What is a LEMP STACK?
Linux an open source operating, is most popular OS among web hosting providers. For successfully hosting a website on a Linux server we need four important software components i.e an operating system, a web server, a database server and a platform to run our website codes to display web pages. These four components support each other and makes up a LEMP STACK.
LEMP Stack is the most widely used web server configuration for developing and hosting websites and web applications.
The 4 common components that makes up a STACK are:
- Linux: Operating system
- Nginx (pronounced as “engine X”): Web server
- MariaDB: Database server
- PHP: Scripting language to run codes/scripts to display web pages.
So, what is the use of this information?
Well, if you are going to host a website you will be needing a SERVER and a server without LEMP Stack installed is not going to server the purpose.
In this article I will be demonstrating how to prepare your Linux Server for successfully hosting a website.
Prerequisites
Before you begin with the installation of LEMP stack following things are required:
- VPS or Dedicated server with Centos 7 installed.
- Root login details or a user login with sudo privileges.
Let’s begin with the Installation!
NGINX
Follow the steps given below for installing NGINX on Centos 7
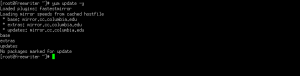
- Update your server just to make sure all the packages are up-to date
yum update -y |
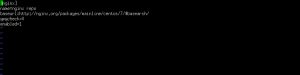
- Using any text editior create a file “nginx.repo’ at location “/etc/yum.repos.d/”
vi /etc/yum.repos.d/nginx.repo |

And add the following content in the file:
[nginx] name=nginx repo baseurl=http://nginx.org/packages/mainline/centos/7/$basearch/ gpgcheck=0 enabled=1 |
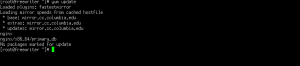
- Update your server again and install NGINX
yum update yum install nginx |
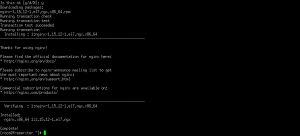
- Start NGINX and enable it on server reboot.
systemctl start nginx systemctl enable nginx |
![]()

- Check the Status of NGINX
systemctl status nginx |
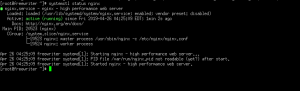
NGINX is now successfully installed!
You can now verify whether NGINX is working fine or not by directly accessing your server’s IP on the browser as shown below:
http://server_domain_name_or_IP/ |
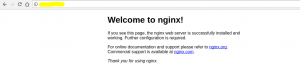
You will see the default NGINX webpage as shown in the image below:
NOTE: If the default NGINX page is not loading in the browser then you need to allow port 80 in the server’s default FIREWALL.
Run the following commands to allow port 80 in FIREWALL:
firewall-cmd –permanent –add-port=80/tcp firewall-cmd –reload |

MariaDB
It is the database server used for creating and managing databases used by your websites and web applications.
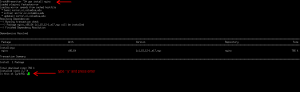
- Install Mariadb and MySQL/MariaDB-PHP support
yum install mariadb-server php-mysql -y |


- Start MariaDB and enable it on server reboot.
systemctl start mariadb systemctl enable mariadb |

- Secure your MariaDB server.
mysql_secure_installation |
It will ask for the root password, just press “enter” as there is no password initially.
After this prompt will ask to set a new password. Press Y and set the new password.
Answer Y at the following prompts:
- Remove anonymous users?
- Disallow root login remotely?
- Remove test database and access to it?
- Reload privilege tables now?
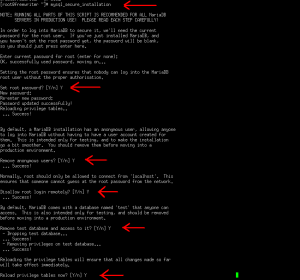
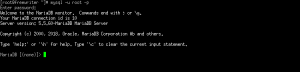
- MariaDB is now secured and you can access SQL shell using the following command:
mysql -u root -p |
When prompted, enter the MariaDB password you have set in step 3.
PHP
- Install PHP and PHP-FPM (FastCGI Processing Manager)
yum install php php-fpm -y |

![]()
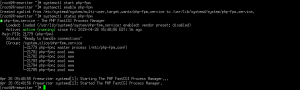
- Start and enable PHP-FMP on reboot
systemctl start php-fpm systemctl enable php-fpm systemctl status php-fpm |
Secure the PHP setup
- Using any text editor open the file “/etc/php.ini” (main php configuration file
vi /etc/php.ini |

- Search for the parameter “cgi.fix_pathinfo=1”.
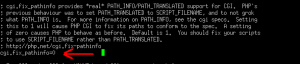
Uncomment it by removing the semicolon and replace it with “cgi.fix_pathinfo=0”.
The final result should like as shown in the screenshot below:
- Save and close the file.
We did this because “cgi.fix_pathinfo=1” is an insecure setting as it tells PHP to try to execute the closest file it can find if the actual PHP file does not match exactly. By setting “cgi.fix_pathinfo=0” we are actually mitigating the possibility of the execution of an arbitrary php code if the requested .php file is not present in the server.
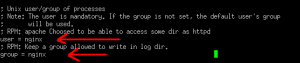
- By default, PHP runs under Apache user i.e. “nobody”. Since you have installed NGINX as the web server you need to change the User and Group to match with the NGINX’s User and Group.
NGINX uses “nginx” as the User and Group.
So, open the file “/etc/php-fpm.d/www.conf” using any text editor.
vi /etc/php-fpm.d/www.conf |

And replace user = apache and group = apache TO user = nginx and group = nginx as shown in the screenshots below:
Before the making changes.

After making the changes.
- Save and close the file.
- Restart PHP-FPM
systemctl restart php-fpm |
Configure NGINX to Process PHP Pages
- Disable the default NGINX configuration file.
mv /etc/nginx/conf.d/default.conf /etc/nginx/conf.d/default.conf.back |

- Create a new configuration file at location “/etc/nginx/conf.d/”. Here i am creating a file with the name “newnginx.conf”
vi /etc/nginx/conf.d/newnginx.conf |

And paste the following content in the newly created nginx configuration file and save it:
server {

listen         80 default_server;

listen         [::]:80 default_server;

server_name    your_domain_or_IP;

root           /var/www/html;

index          index.html;


location / {

try_files $uri $uri/ =404;

}


location ~* \.php$ {

fastcgi_pass 127.0.0.1:9000;

include         fastcgi_params;

fastcgi_param   SCRIPT_FILENAME    $document_root$fastcgi_script_name;

fastcgi_param   SCRIPT_NAME        $fastcgi_script_name;

}

} |
NOTE: replace “your_domain_or_IP” with your actual domain name or server’s IP address.
- Restart NGINX
systemctl restart nginx |
Testing PHP Processing In Your Server
- In order to test whether PHP is configured and working fine or not we will test it by creating a php script. For this create a file using any text editor with the name “info.php” at location “/var/www/html”
vi /var/www/html/info.php |

And paste the following code in “info.php” file and save it:
<?php phpinfo(); ?> |
So, the file will look as shown in the screenshot attached below:
- You can now verify whether PHP is working fine or not by directly accessing your server’s IP on the browser as shown below:
http://server_domain_name_or_IP/info.php |
You will the see the page as shown in the screenshot below:
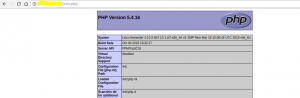
This page basically gives you information about your server from the perspective of PHP.
- Remove the info.php file once you have confirmed that PHP is working fine.
rm /var/www/html/info.php |
Congratulations! LEMP stack is now successfully installed.
Related Posts:
NameCrane Offloaded SQL: Get Hosted MySQL in the Cloud for Very Cheap!
MariaDB Swallowed by Private Equity
Setup a Highly Available WordPress Site From Scratch, 2024 Edition! Part 7: Round-Robin DNS, Let’s ...
Setup a Highly Available WordPress Site From Scratch, 2024 Edition! Part 6: MariaDB Multi-Master
Setup a Highly Available WordPress Site From Scratch, 2024 Edition! Part 5: WordPress Install
Setup a Highly Available WordPress Site From Scratch, 2024 Edition! Part 4: Gluster
At LowEndBox, our News and Editorial Team is dedicated to delivering timely, accurate, and actionable content tailored to the needs of developers, hosting enthusiasts, and infrastructure professionals. We curate, report, and analyze the latest developments in the world of hosting, cloud infrastructure, data centers, open-source platforms, and internet services, always with a focus on value, performance, and accessibility.
Our team monitors the global hosting landscape to bring you breaking news, vendor updates, platform changes, market trends, and expert insights. Whether it’s a price hike from a major control panel, a breakthrough in virtualization technology, or a new indie provider shaking up the market, we strive to deliver content that empowers the LowEnd community to stay informed and ahead of the curve.
We also collaborate closely with the vibrant LowEndTalk community to surface meaningful discussions, highlight real-world deployments, and share voices from within the ecosystem.
Our mission is simple: to help you make smarter infrastructure decisions by delivering the stories that matter, clearly, consistently, and without hype.
Stay tuned for fresh editorial content, in-depth analyses, and community-powered features from the team that keeps LowEndBox running.


What of ssl.. how do we make the page https