 Recently I wanted to take advantage of Oracle’s Free Tier to serve my Low End website for free. By moving to Oracle Free Tier, I now save the $5 per month which was paying for the VPS on which my site had been running.
A few days ago, Low End Box published the story of how I set up Caddy server on Oracle Free Tier.
After installing Caddy in an Oracle Free Tier instance, the next step was moving my site’s files from the old server to the new server.
To move the files, I used scp(1), secure copy. Secure copy, scp(1), is a command which originally implemented the Secure Copy Protocol.
This article discusses how easy it is to use scp(1) to copy files from one server to another. As an example, we show my site’s move from its previous home to Oracle Free Tier. Along the way, some helpful suggestions are made so that the file transfer can be safer if trouble happens.
Backup The Old Site
First, let’s backup the old site. Backups are good!
On the old box I was working as root, inviting trouble if I mistyped some random command. Thus, I wanted to begin the site’s move by making a backup of the files in the /root directory as well as the actual site files in /var/www/html.
bash:~$ ssh root@metalvps.com

Linux metalvps 5.10.0-8-amd64 #1 SMP Debian 5.10.46-5 (2021-09-23) x86_64
The programs included with the Debian GNU/Linux system are free software;
the exact distribution terms for each program are described in the
individual files in /usr/share/doc/*/copyright.
Debian GNU/Linux comes with ABSOLUTELY NO WARRANTY, to the extent
permitted by applicable law.
Last login: Sun Sep 18 20:19:42 2022 from 200.68.171.136
root@metalvps:~# cd /
root@metalvps:/# date
Sun Sep 18 20:52:41 UTC 2022
root@metalvps:/# tar cvzf metalvps.com-202209182052.tgz var/www/html root
var/www/html/
[ . . . files . . . ]
root/
[ . . . files . . . ]
root@metalvps:/#
We now have an extra tar archive on the old server. The archive contains an additional copy of all the files which we are going to transfer. Just in case something unexpected happens.
Different Administrative Setup On The New Box
The administrative setup inside the new box is a little different than on the old server. Following the Oracle default, I’m not working on the new server as root. Instead, I’m working as an ordinary user called opc. However, opc can run root commands (execute “privileged” operations) because opc has sudo. For convenience, we will do some things in /home/opc on the new box that we would have done in /root on the old box.
Generate SSH Keys On The New Box
To use scp(1) we first need to generate ssh keys on the new box. We will need the newly generated keys to allow access directly from the new box to the old box. So, we connect to the new box, change to the .ssh directory, and generate the keys.
bash:~$ ssh opc@129.146.184.250

Activate the web console with: systemctl enable --now cockpit.socket
Last login: Sun Sep 18 20:28:36 2022 from 187.189.238.1
[opc@instance-20220717-1620 ~]$ cd .ssh
[opc@instance-20220717-1620 .ssh]$ ssh-keygen -t ed25519
Generating public/private ed25519 key pair.
Enter file in which to save the key (/home/opc/.ssh/id_ed25519):
Enter passphrase (empty for no passphrase):
Enter same passphrase again:
Your identification has been saved in /home/opc/.ssh/id_ed25519.
Your public key has been saved in /home/opc/.ssh/id_ed25519.pub.
[ . . . ]
[opc@instance-20220717-1620 .ssh]$ ls
authorized_keys id_ed25519 id_ed25519.pub
[opc@instance-20220717-1620 .ssh]$
Back Up The New Box
So, on the new server, I wanted to put the old server’s root directory content into opc’s home directory. And, therefore, I wanted to back up the pre-transfer contents of the /home/opc directory just in case something went wrong in the transfer and I needed to revert.
[opc@instance-20220717-1620 home]$ sudo tar cvzf opc-202209182117.tgz opc

opc/

[ . . . files . . . ]

[opc@instance-20220717-1620 ~]$
At this point there was not yet a /var/www directory on the new box. So, no need to back it up.
[opc@instance-20220717-1620 ~]$ cd /var; ls

account  crash  ftp     kerberos  lock  nis   preserve  tmp

adm      db     games   lib       log   oled  run       yp

cache    empty  gopher  local     mail  opt   spool

[opc@instance-20220717-1620 var]$
Enable Direct SSH Access From The Old Box To The New Box
First, Inside The New Box
We use cat to show the newly generated public key. Copy the key into your clipboard: Make sure there is no line break in the key. Highlight the key with your mouse and press Ctrl-c.
[opc@instance-20220717-1620 .ssh]$ cat id_ed25519.pub

ssh-ed25519 AAAAC3NzaC1lZDI1NTE5AAAAIHsyzJ1ev5mmmbVh13GpvV+qVQHg1QQ/T+5kXR9p/+5J opc@instance-20220717-1620

[opc@instance-20220717-1620 .ssh]$
Second, Inside The Old Box
Use echo(1) to add the new key to the authorized_keys file inside the .ssh directory. Type echo. Paste the key from your clipboard, type two “greater than” symbols, type authorized_keys, and press the return key.
root@metalvps:/# cd .ssh

echo ssh-ed25519 AAAAC3NzaC1lZDI1NTE5AAAAIHsyzJ1ev5mmmbVh13GpvV+qVQHg1QQ/T+5kXR9p/+5J opc@instance-20220717-1620 >> authorized_keys

root@metalvps:/#
Copy Root Directory Files With scp(1)
Let’s transfer the root directory’s files. While not part of the website, I had files in the root directory that I wanted to move to the new box. Of course, this step would be similar for any other additional directory that we also wanted to move.
[opc@instance-20220717-1620 ~]$ scp -pr root@metalvps.com:/root root-old

Enter passphrase for key '/home/opc/.ssh/id_ed25519':

[ . . . files . . . ]

[opc@instance-20220717-1620 ~]$
Let’s make sure all the files are there.
[opc@instance-20220717-1620 ~]$ ls -aR root-old/

[ . . . files . . . ]]

[opc@instance-20220717-1620 ~]$
Make The /var/www Directory
[opc@instance-20220717-1620 ~]$ cd /var

[opc@instance-20220717-1620 var]$ ls

[opc@instance-20220717-1620 var]$ sudo mkdir www
Are the Directory Permissions Okay?
[opc@instance-20220717-1620 var]$ ls -l | grep www

drwxr-xr-x.  2 root root    6 Sep 18 22:24 www

[opc@instance-20220717-1620 var]$
Copy The Site Files With scp(1)
Let’s copy the site files from the old server to the new server.
[opc@instance-20220717-1620 var]$ cd www

[opc@instance-20220717-1620 www]$ sudo scp -i /home/opc/.ssh/id_ed25519 -pr root@metalvps.com:/var/www/html .
Are all the expected files there?
[opc@instance-20220717-1620 html]$ ls
[ Lots of files! ]
Are the file permissions okay?
[opc@instance-20220717-1620 www]$ ls -l

total 4

drwxr-xr-x. 7 root root 4096 Sep 17 03:22 html

[opc@instance-20220717-1620 www]$ cd html

[opc@instance-20220717-1620 html]$ ls -l
[ Lots of files! ]
Caddy Server Previously Was Installed
In a previous post we covered installing Caddy server on the new box.
Changes To The Caddyfile
The next step was two simple changes to the Caddyfile at /etc/caddy/Caddyfile. As explained in the Caddy default web page and in the install instructions, I changed :80 to metalvps.com and also changed the site root to /var/www/html.
Is SELinux Happy?
When I first tried this on Oracle Cloud with Oracle Linux 8.6, SELinux didn’t allow Caddy to access the newly transferred files. My browser got only blank pages when trying to access the site. Bummer!
Luckily, I quickly found helpful error messages that appeared in /var/log/messages. The error messages may also have been in the output of sudo journalctl -xe.
I googled for the error, “SELinux is preventing caddy from getattr access on the file /var/www/html/index.html.” Based on the Google results and the helpful error messages, the solution seemed to be running sudo restorecon -v '/var/www/html/index.html'. I read the restorecon manpage and tried it. It worked.
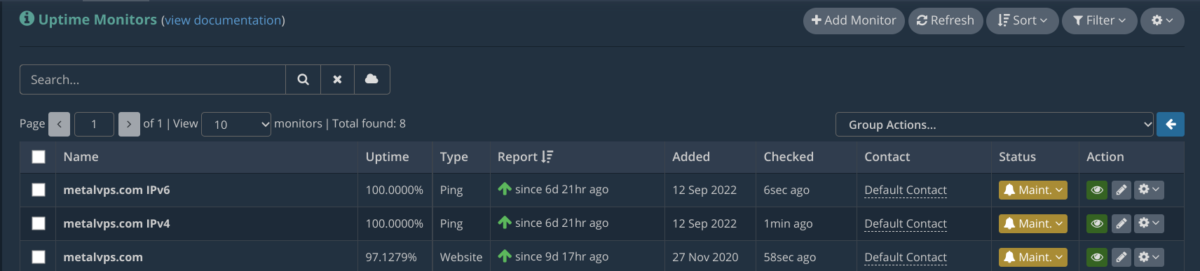
Set Monitoring To Maintenance
Before updating DNS, I set my Hetrix Tools monitoring to maintenance mode.
Update DNS
I headed over to Porkbun and changed the A and AAAA DNS records for the site. Then I waited a few minutes for the changes to propagate.
See The Site Served From The New Box
After the DNS changes propagated I could see the site served from the new box.
Final Steps
Once everything seemed to be working okay, I went back to Hetrix, changed the numerical addresses set for the IP monitors, and terminated maintenance mode. Then I backed up the site as it was when newly installed on the new box. Of course, I kept all the backups of the site as it had been on the old box. I deleted the old box. Now I have to figure out how to spend the billions I am saving by using Oracle Cloud Free Tier!
Logging
Interestingly, I didn’t initially see any mention of logging in the Caddy install instructions that I read. After the server was running on the new box, I was surprised to go to /var/log and find no Caddy logs! Getting Caddy logs working required an additional change to the Caddyfile plus also resolving another SELinux hiccup. These adventures will be discussed in another upcoming post.
Conclusion
In this and the previous post we have seen how to install Caddy server on Oracle Cloud Free Tier and one way to transfer a website from another provider to Oracle Cloud.
Appendix: Recent Changes In scp(1)
Nowadays what’s happening on simple uses of scp seems the same as it’s always been, even though what’s happening under the hood has changed:
From release notes, version 8.0:
The scp protocol is outdated, inflexible and not readily fixed. We

recommend the use of more modern protocols like sftp and rsync for

file transfer instead.

-- https://www.openssh.com/txt/release-8.0
From release notes, version 9.0:
This release switches scp(1) from using the legacy scp/rcp protocol

to using the SFTP protocol by default.

-- https://www.openssh.com/txt/release-9.0
Related Posts:
HostSailor Greenhouse (NL) Fujitsu Primergy Dedicated Server Review
How Much Faster Is Making A Tar Archive Without Gzip?
How To Install Caddy Web Server On Oracle Cloud Free Tier
What You Need to Know About Buying A Hetzner Auction Server
What Happens When Your Site's DNS Goes Down?
Porkbun Virtual Office Tour -- Alex, Eddie, and Andy
It feels like just yesterday—but it was actually fifty years ago—that I stood in a doorway, watching yard after yard of ASCII art scroll out of a Teletype Model 33, surrounded by a group of laughing, wide-eyed tech enthusiasts. That was my first taste of computing, and I’ve been hooked ever since.
My Low End Adventure began right here on LowEndBox, when I stumbled across the perfect deal on a dedicated server from OVH a few years ago. That moment opened the door to a whole new world of tinkering, learning, and community.
Today, I’m the proud owner of Darkstar—a lovingly maintained antique server currently colocated in Dallas, Texas at LevelOneServers.com. She may be older than most, but she runs like a champ and has taught me more than a few lessons about hardware and humility.
In addition to writing for LowEndBox and helping out as a moderator on LowEndTalk, I spend my time exploring the worlds of programming, networking, and Linux system administration. There’s always something new to learn—and luckily, the LowEnd community is filled with brilliant, generous people who are more than willing to teach.
All these years later, I’m still learning, still experimenting, and still having a blast.
It’s very, very fun here on the Low End… isn’t it? 😊


Leave a Reply