In the days before Virtualization emerged, servers could only be built using physical hardware. A server admin would build a server, plug in a keyboard and monitor, and install Linux via CD or over the network. Once the server was online they could go back to their workstation and fire up a terminal emulator that let them work on the server from their desk.
Fast forward to the present time; None of the aforementioned hardware, work, or expense is necessary to have the Linux Server Experience. You came to LowEndBox.com, you purchased your awesome new VPS, and thanks to modern virtualization methods you server comes pre-built and ready to go. The result is an inexpensive Linux server at your fingertips!
One thing hasn’t changed though: You’ll still need to use a terminal emulator to log into your new VPS. The industry standard is to use Secure Shell (SSH). That’s what we’re going to cover in this tutorial. The tutorial is split into three sections:
- Identifying the login details
- Logging into your VPS for the first time via SSH
- Setting up SSH keys for easy and secure SSH access
The Details
To start, your VPS provider is going to provide you with the IP address of your new server and its root password. Here are two examples of the information sent from two different LowEndBox providers:
New VPS Information - 1024MB RAM Linux VPS
=============
Main IP Address: 1.2.3.4
Additional IP Address(es):
Root Password: 2FW5Mjg3En3l
SolusVM Control Panel URL: http://vps.[sampleprovider].com
SolusVM Username: vmuser19999
SolusVM Password: 2FW5Mjg3En3l
SolusVM Login Details (reboot your VPS, reinstall your VPS's operating system instantly, and more)
=============================
URL: https://manage.[samplevpsprovider].com/
Username: vps19999
Password: yw4wgTbB76Ky

SSH Access Information
=============================
Main IP Address: 1.2.3.4
Username: root
Root Password: yw4wgTbB76Ky
You’ll notice that while the formats and URLs are different, they have everything else in common: The IP address of the new VPS, the username (root) and the root password. They also provide a log in for the SolusVM backend control panel, which allows server recovery and administration in case normal administration methods become unavailable.
You’re going to want to take note of the IP address and the root password and have them handy for the next steps.
Logging into SSH for the first time
Just as you need a web browser to connect to a web server, you need an SSH client to connect to an SSH server (your new VPS). For this tutorial, we’re going to use a free program for Windows called MobaXterm. It is a fully featured SSH client that allows you to have tabbed sessions and a bunch of other fancy features that we’re not going to cover here. MobaXterm is quite good and highly recommended. You can download MobaXterm here:
https://mobaxterm.mobatek.net/download.html
Once MobaXterm is installed, open it up for the first time. We’re going to get connected to your new server using the previously noted IP and root password.
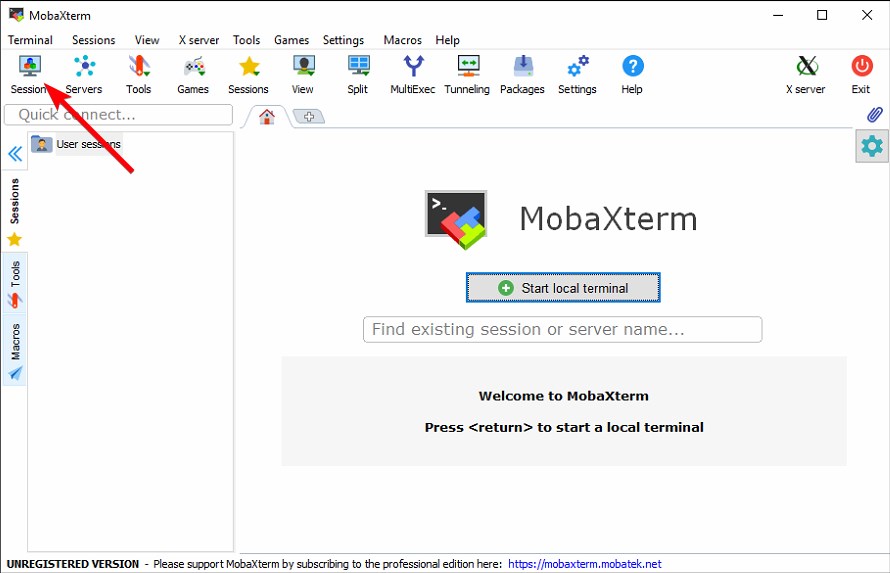
To start, click on the Session icon in the top left corner:
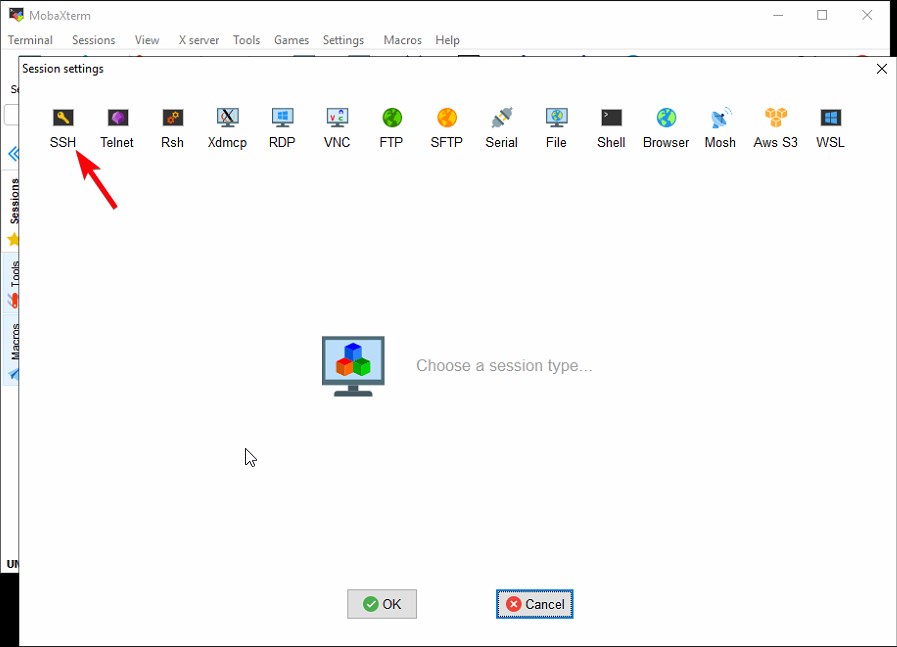
Now click on the SSH icon in the top left corner:
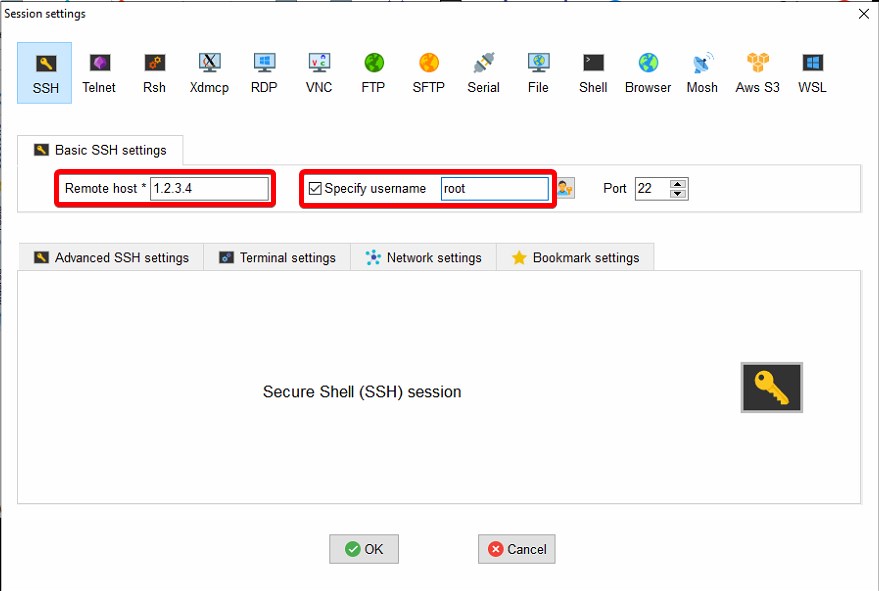
Here we will enter the Basic SSH settings. “Remote Host” is the IP address of your server, so go ahead and type that in. Check the “Specify username” checkbox, and type in the username “root” (without quotes).
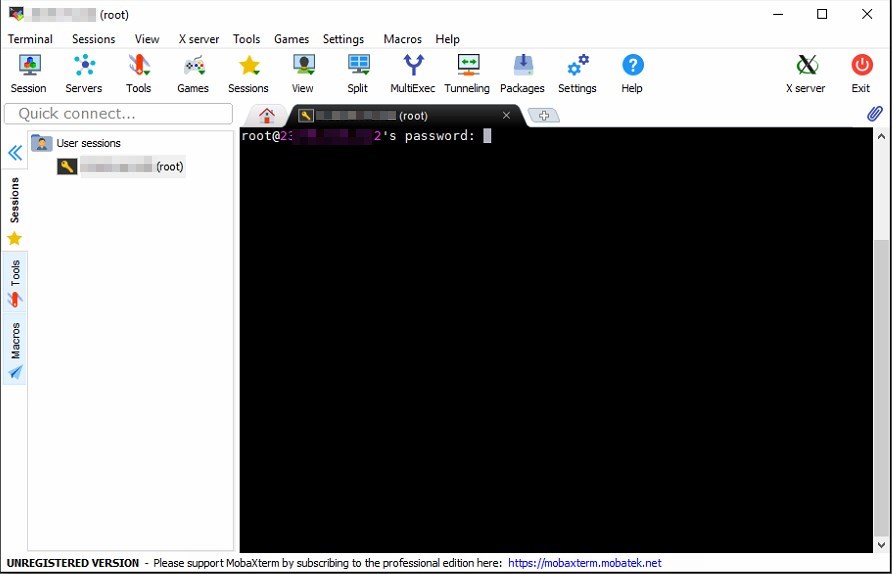
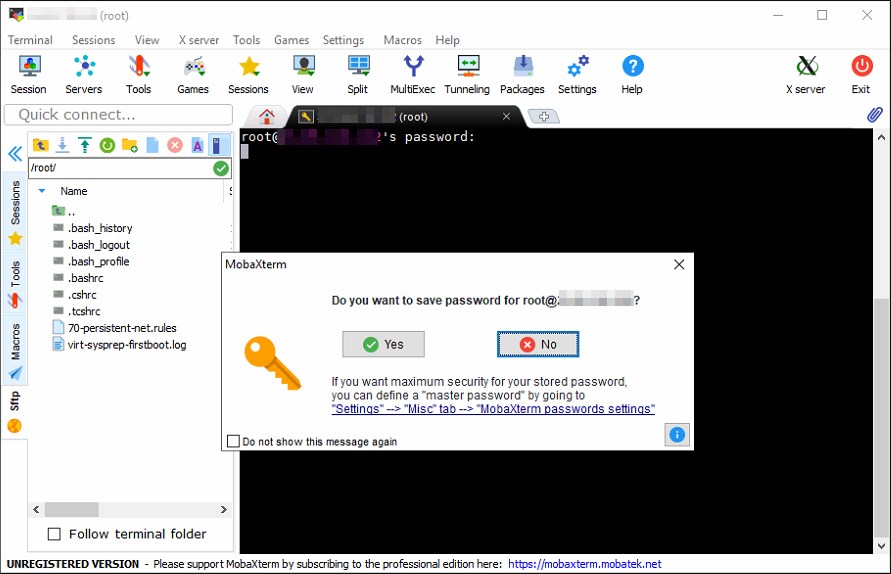
Next, click on OK. If everything goes correctly, you’ll be presented with a prompt asking you to input the root password as shown below. If not, then you may need to double check your settings. Copy and paste the root password directly into the screen below, and press enter.
It is time to choose whether you want MobaXterm to save the password or not. We’re going to select “No” because we’re going to be setting up key based authentication shortly.
You should see a successful login, and it’ll look something like the following. Don’t worry if the details don’t match exactly. The details are unimportant.
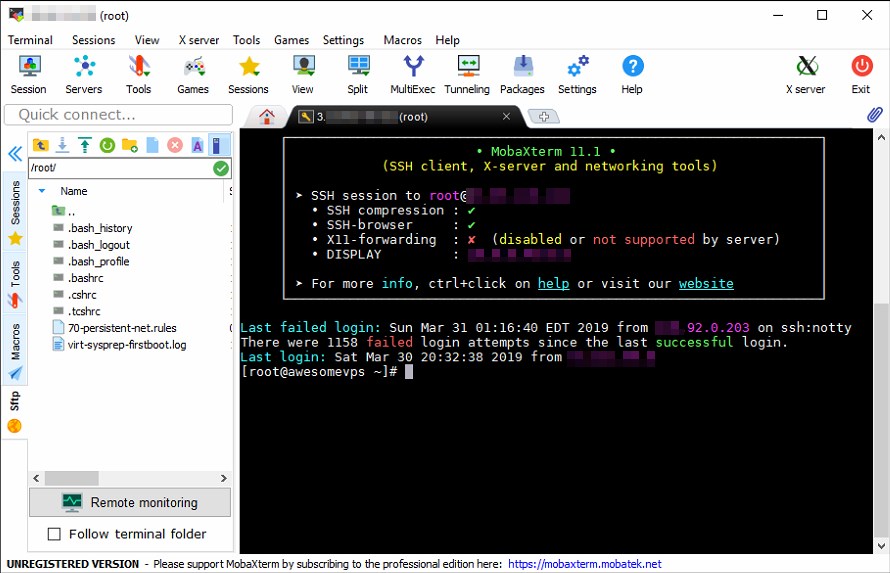
Congratulations! You’ve logged into your new VPS for the first time. Now, we’re going to the next phase: Setting up SSH Keys.
Creating and using SSH Keys
What are SSH Keys, and why are we using those instead of a password? Passwords have their place, but as a security measure, they’re actually quite terrible. In the above screen shot, you may have noticed that there were 1158 failed login attempts. That’s because there are other computers on the internet whose sole purpose is to try random passwords until they find one that works.
A great solution is to use SSH Keys instead. SSH Keys are exponentially more unique than a password and they also allow for an automatic login. You will still need the root password for other things however, so make sure you keep it in a safe place such as a password manager.
What SSH Keys are
SSH keys replace the password with a cryptographic key pair that only match each other. The Public key is just that- anyone can see it and that’s okay. It’s like the padlock on a locker. Anybody can see the lock, but only one person has the key to that lock. If a Public key is like a padlock, then it is opened by the Private Key. The Private Key is a closely guarded encryption key that grants access to any server that has the Public Key on it, so don’t let it fall into the wrong hands.
Generating the SSH Key pair
In MobaXterm, click Tools > MobaKeyGen (SSH key generator). The default key is RSA, but we don’t want that- it’s deprecated. Select ED25519 instead, and click on Generate as shown below:

Now you’ll be prompted to just wiggle your mouse around to generate some randomness for the key generator to use to generator your new keys. When it’s complete, you’ll see a screen that looks similar to what you see here:
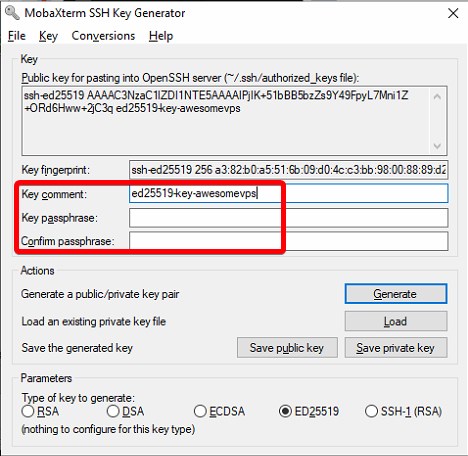
I edited the Key comment to have my vps name in it, and you can do the same. The comment is arbitrary and you can make it say whatever you want.
At the top is the Public Key. Now’s a good time to copy/paste that into Notepad++ or your favorite editor. We’re going to need it in a moment. You also have the option of adding a password to your key as an added protection. For the purpose of this tutorial, leave this blank.
Click on “Save public key” and “Save private key”. When you save the private key you will be asked “Are you sure you want to save this key without a passphrase to protect it?” You can click Yes and continue saving the key. Save both keys in a location on your PC where you can easily find them later. I made a folder in my Documents library called “SSH Keys” and saved them as “awesome-vps-public-key” and “awesome-vps-private-key.ppk”.
Close the SSH Key Generator window with the X in the top right corner. It is now time to install our new Public Key on our VPS. You should have a root prompt that looks something like the following:
[root@awesomevps ~]#
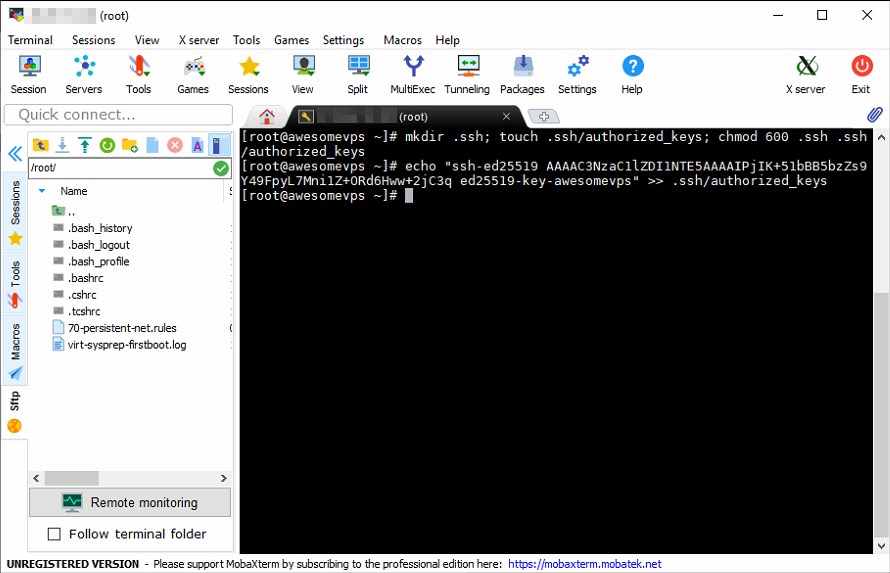
Copy and paste in the following command into the SSH window to create the .ssh directory and the .ssh/authorized_keys file, and set the permissions correctly. These are required to use SSH Keys. Click “OK” on the warning that pops up in MobaXterm. You may have to press Enter after this command and the next:
mkdir .ssh; touch .ssh/authorized_keys; chmod 600 .ssh .ssh/authorized_keys
You’ll know the command was successful when you get another prompt:
[root@awesomevps ~]# mkdir .ssh; touch .ssh/authorized_keys; chmod 600 .ssh .ssh/authorized_keys
[root@awesomevps ~]#
Now we need to add your SSH key to the .ssh/authorized_keys file. You can use vi or nano if you prefer, but for simplicity we’ll use the shell to insert our Public Key into the file. In the following command, replace “your-public-key” with the public key that you copy/pasted into your text editor. Be sure to preserve the quotes. Here is the command:
echo "your-public-key" >> .ssh/authorized_keys
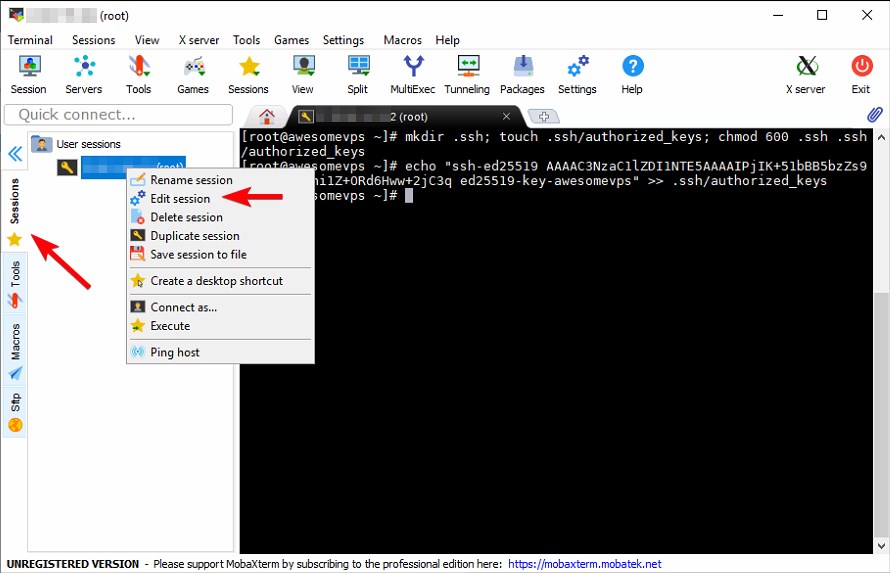
Here’s how these two commands looked on our VPS:
We’re almost there! Now we need to configure MobaXterm to use our Private Key to log into our VPS. To do this, click the vertical Sessions tab on the left side, right click on your session and click edit:
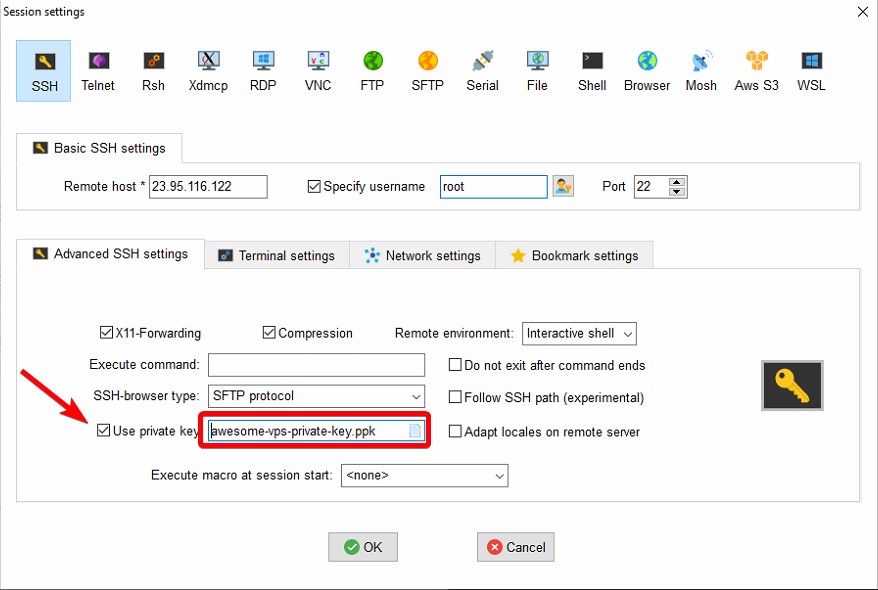
Click the Advanced SSH settings tab. Check the box in the bottom left that says “Use private key”. In the right side of the text box, you’ll see a small icon. Click it, and navigate to the “awesome-vps-private-key.ppk” file that you saved earlier. Select it and click open. You should see something similar to the following:
Now click OK. Without closing your session that you already have open, we’re going to open a second one by double clicking your session in the sessions tab on the left side. If everything went as planned, you’ll see the following message for a brief moment:
Authenticating with public key "ed25519-key-awesomevps"
And then as if by magic, you’ve been logged in to your shiny new VPS and have thus successfully completed this tutorial. Please leave any comments and questions below!


Directory .ssh needs 700 permission otherwise server won’t let read ssh key while login.
I tried.
you should also go next-step and configure “AllowGroups sshusers” to allow only members of the sshusers group to log-in over ssh, this enables you to have system users for purposes of email, web, and other stuff, without giving them shell access over ssh.