Introduction
In this article, we will show you how to install LAMP stack on Ubuntu 16.04. It is a common web stack used for hosting contents on the web.
The term LAMP is an acronym for the group of open source software which represents Linux, Apache, MySQL and PHP.
In this case, we are using Ubuntu 16.04 as Linux. In the following paragraphs, we will be explaining the steps involved in the installation of Apache as a web server, MySQL as database management system and PHP to process dynamic content.
Prerequisites to install LAMP on Ubuntu 16.04
Before you begin installing the LAMP stack on your machine, Please make sure that you have the following things.
– A machine with Ubuntu 16.04 installed
– A user account with sudo privileges
– Putty to connect to server
Installing LAMP on Ubuntu 16.04
The installation of LAMP on ubuntu 16.04 involves the following three steps
- Installing Apache
- Installing MySQL
- Installing PHP
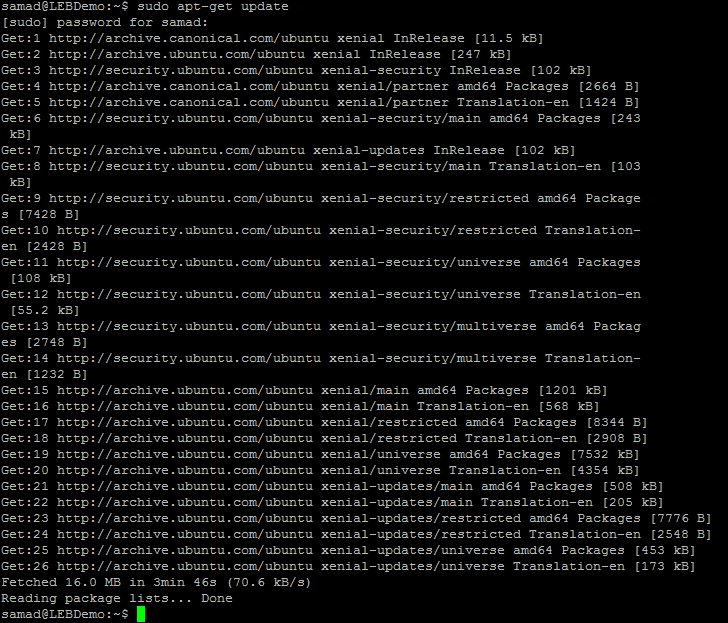
Before you start with installation, you should run the following command on the server to make sure that the system is up to date.
sudo apt-get update
Since we are using sudo command, it will ask us to enter the password for the user upon hitting enter. Just type the user password and hit enter to continue.
It may take a while to complete depends on the size of update available. Wait until it completes. Once it is done, move on to next step!
Installing Apache on Ubuntu 16.04
Installing Apache on Ubuntu is very easy and first step in the LAMP installation process. Ubuntu has included Apache in the package by default and is available in the default repository. Just issue the following command to start the installation of Apache.
sudo apt-get install apache2
Don’t forget to type “Y” and hit enter when it asks for confirmation
 Now you have successfully installed apache on Ubuntu 16.04 server. Check whether Apache is running by issuing the following command.
sudo service apache2 status
If the apache service is not running after successful installation. Just enter the following commands to stop and start Apache.
sudo service apache2 stop
sudo service apache2 start
 You can verify whether Apache is working by opening server IP on a web browser.
ie, http://youripaddress
If you don’t know the server IP address, either check the information mail from web server provider or run any of the following commands in putty
ip addr show
ifconfig -a
A default apache web page will be loaded in your web browser with basic information about apache web server when you visit your server IP address on web browser

Installing MySQL on Ubuntu 16.04
Now the Apache web server is up and running. It’s the time to install MySQL database to store and manage information.
The MySQL package also comes up with default Ubuntu repository. we can easily install MySQL by simply issuing the apt-get command.
Just paste the following command and hit enter to continue with MySQL installation.
sudo apt-get install mysql-server
It will list the package information with a confirmation question to continue. Just type Y and hit enter to continue.

The installation process will ask to enter MySQL root password. Just type a strong password for MySQL root. This password is similar as that of your web server root password. It is better to use a strong and unique password.
Just issue the following command to the terminal to secure your MySQL installation by removing some default settings.
sudo mysql_secure_installation
This will take you through a series of questions. I request you to read all the questions and respond. Type Y for the question they ask except for the password strength. For password strength, you need to type a value.
Wait until you receive the following message on the terminal.

You can check whether MySQL server is running by typing the following command
sudo service mysql status
 You can stop and start the MySQL server by applying the following commands
sudo service mysql stop
sudo service mysql start
Now it’s time to move on with the final part of LAMP stack installation on Ubuntu 16.04.
Install PHP on Ubuntu 16.04
The following command will install the latest version of PHP on your server. Please note that the following command will install the packages libcurl3 librtmp1 php php-cgi php-common php-curl php-json php-mysql php7.0 php7.0-cgi php7.0-cli php7.0-common php7.0-curl php7.0-fpm php7.0-json php7.0-mysql
php7.0-opcache php7.0-readline
sudo apt-get install php-mysql php-curl php-json php-cgi libapache2-mod-php php

You can install additional PHP packages by apending to the existing command. Even you can install it later when required by running a sudo command.
To find all the Php modules and libraries, just run the following command
apt-cache search php- | less
The detailed information regarding a module can be retrieved by using the below command
apt-cache show Packagename
Install any module by using the following command
sudo apt-get install packagename
You can install multiple packages using single command by placing the package names continuously by separating with space
ie, sudo apt-get install package1 package2 package3
You can check the current version of PHP after installation by using the below command
php -v

Test PHP installation on Ubuntu 16.04
In this step, we will check whether the web server is processing PHP files correctly. To make sure that we will create a simple PHP file which will list the PHP info page.
By default, Ubuntu will not give access to any file that is kept outside /var/www/ directory trough web browser. The default document root is /var/www/html. So we need to place the test php file in the /var/www/html directory to output in the web browser.
Just follow the below steps to create a test php file on the web root.
sudo vi /var/www/html/phptest.php
A blank page with edit option will be opened. Just copy paste the following code to the editor
<?php
phpinfo();
?>
After pasting the code press Esc : wq and hit enter. This will save the file and come back to the command window.
Now you can check whether the php is working fine by accessing the created file from a web browser.
To check, just visit http://ipaddress/phptest.php
This will give a result like below. If you are not getting the php parsed result, we should conclude that there was an error in the package installation. Just try again!

Finally, I request you to remove the php info page after testing. Just release the below command to delete the phptest.php file
sudo rm /var/www/html/phptest.php
Congratulations! Now you have successfully installed LAMP stack on Ubuntu 16.04 and your server is ready for basic use. You can start using this server to host your websites by simply creating a virtual hosts file. This will be discussed in the upcoming articles.
Thanks for following our How to Install Apache, MySQL, PHP (LAMP) Stack on Ubuntu 16.04 tutorial!
Related Posts:
Should You Run FreeBSD in 2026? Maybe, Maybe Not
So How Exactly Do You Learn About Security Issues on Your VPS?
Before You Format: ext4, XFS, and btrfs Differences Explained (And Which One You Should Pick)
The End of Uniprocessor Configs on Linux - It's a Multicore-Only Kernel Now
Have You Missed Any of these LowEndBoxTV Videos?
LowEndBoxTV: Ubuntu 24: Hot Rod Ferrari Speed Freak, Crippled Dump Truck, or Somewhere in Between?
At LowEndBox, our News and Editorial Team is dedicated to delivering timely, accurate, and actionable content tailored to the needs of developers, hosting enthusiasts, and infrastructure professionals. We curate, report, and analyze the latest developments in the world of hosting, cloud infrastructure, data centers, open-source platforms, and internet services, always with a focus on value, performance, and accessibility.
Our team monitors the global hosting landscape to bring you breaking news, vendor updates, platform changes, market trends, and expert insights. Whether it’s a price hike from a major control panel, a breakthrough in virtualization technology, or a new indie provider shaking up the market, we strive to deliver content that empowers the LowEnd community to stay informed and ahead of the curve.
We also collaborate closely with the vibrant LowEndTalk community to surface meaningful discussions, highlight real-world deployments, and share voices from within the ecosystem.
Our mission is simple: to help you make smarter infrastructure decisions by delivering the stories that matter, clearly, consistently, and without hype.
Stay tuned for fresh editorial content, in-depth analyses, and community-powered features from the team that keeps LowEndBox running.


Somebody must forgot to put “Read More” tag somewhere…
Pretty much copypasta tuto without trying out by the author himself.
You can’t do “service blah status” on a systemd system without aliasing everything (or let a package doing that) but that’s dumb because it’s not future-proof. How about to rewrite this tuto by using systemctl?
This is one of the worst LEB articles…
Good. Very good.
Why post something original right? Why post something that hasn’t been posted million times in the internet right?
I really wonder what the admins are thinking…
No words…
Next article will be about how to put a power plug to a home pc. Evolving…
I found it very helpful. (@jvnadr == twat)
We really should have posted a disclaimer, the next few tutorials are going to be posted as “beginner posts” that we have wanted to reference in other tutorials so that we didn’t need to include entire tutorials for something as basic as this. Kind of prerequisite material, even if it is remedial.
If anyone of you would like to step up to the plate and submit some tutorials of your own, we’re always on the lookout for content writers 🙂
Interested parites can Email me at mzelasko at colocrossing . com and we can talk topics and compensation.