 In this tutorial series, we are setting up a highly available WordPress web site from scratch.
Part 1 – Introduction, Considerations, and Architecture
Part 2 – Setting Up the VPSes
Part 3 – Setting Up MariaDB Multi-Master Replication
Part 4 – File Replication and Setting Up DRBD
Part 5 – Setting Up OCFS2
Part 6 – Round-Robin DNS, Let’s Encrypt, & Conclusion
Setting Up OCFS2
OCFS2 (Oracle Cluster Filesystem 2) is simple to setup. Despite its proprietary-sounding name, it’s licensed under the Gnu GPL and can be installed via your normal package manager.
Place the following in /etc/ocfs/cluster.conf on both nodes:
node:
    ip_port = 7777
    ip_address = 1.1.1.1
    number = 0
    name = web1.lowend.party
    cluster = ocfs2
node:
    ip_port = 7777
    ip_address = 2.2.2.2
    number = 1
    name = web2.lowend.party
    cluster = ocfs2
cluster:
    node_count = 2
    name = ocfs2
You can name your cluster (the “name =” directive) anything you want.
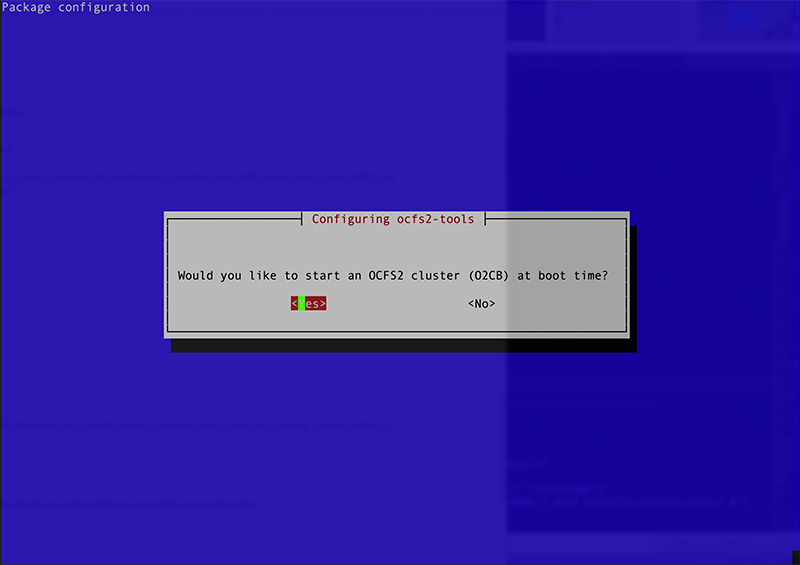
We want the cluster to start at boot-time, which is controlled by /etc/default/o2cb. We could probably just change O2CB_ENABLED to “true” in that file, but it has this comment:
# This is a configuration file for automatic startup of the O2CB
# driver.  It is generated by running 'dpkg-reconfigure ocfs2-tools'.
# Please use that method to modify this file.
So run dpkg-reconfigure ocfs2-tools on both nodes. Answer YES to the first question, and then accept defaults for all the rest.
Now we can make the filesystem. We don’t want to make it on /dev/sdc1 but rather on the DRBD device:
root@web1:/etc/drbd.d# mkfs.ocfs2 -N 2 -L ocfs2drbd /dev/drbd0
mkfs.ocfs2 1.8.5
Cluster stack: classic o2cb
Label: ocfs2drbd
Features: sparse extended-slotmap backup-super unwritten inline-data strict-journal-super xattr indexed-dirs refcount discontig-bg append-dio
Block size: 4096 (12 bits)
Cluster size: 4096 (12 bits)
Volume size: 10736005120 (2621095 clusters) (2621095 blocks)
Cluster groups: 82 (tail covers 8359 clusters, rest cover 32256 clusters)
Extent allocator size: 8388608 (2 groups)
Journal size: 67108864
Node slots: 2
Creating bitmaps: done
Initializing superblock: done
Writing system files: done
Writing superblock: done
Writing backup superblock: 2 block(s)
Formatting Journals: done
Growing extent allocator: done
Formatting slot map: done
Formatting quota files: done
Writing lost+found: done
mkfs.ocfs2 successful
Those flags mean “2 nodes, and label the volume ‘ocfs2drbd'”.
Now start/enable the cluster registration service on both nodes:
# systemctl enable ocfs2 && systemctl enable o2cb
Synchronizing state of ocfs2.service with SysV service script with /lib/systemd/systemd-sysv-install.
Executing: /lib/systemd/systemd-sysv-install enable ocfs2
Synchronizing state of o2cb.service with SysV service script with /lib/systemd/systemd-sysv-install.
Executing: /lib/systemd/systemd-sysv-install enable o2cb
# systemctl start ocfs2 && systemctl start o2cb
Mounting the Shared DRBD Volume
We’re going to mount /dev/drbd0 (the shared cluster volume) on /web. First, create the following entry in /etc/fstab on both nodes:
/dev/drbd0 /web ocfs2 noauto,noatime 0 0Now rename the existing /web to /web.prev and mkdir /web on both nodes: # systemctl stop nginx # mv /web /web.prev # mkdir /web
Finally mount it on both nodes:
# mount /webIf you get this error when trying to mount:
mount.ocfs2: Unable to access cluster service while trying initialize clusterTry this:
/etc/init.d/o2cb restartNow if you go into /web on one node and touch a file or copy a file to that directory, you’ll find it’s nearly-instantly available on the other node. We’re enabled for multi-master so you can have nodes writing on both sides and changes will replicate bi-directionally.
Now on *one* node (it’s a shared volume, remember?) do this:
mv /web.prev/www.lowend.party /webAnd then cleanup on both nodes:
rm -rf /web.prev
systemctl start nginx
Next Part: Part 6 – Round-Robin DNS, Let’s Encrypt, & Conclusion
Related Posts:
Want to Guess How Many Spam Comments We've Blocked Since 2016?
Nyr's Legendary Road Warrior Script: Still the Rock Solid Go-To for Easy VPN!
⚡️Turbocharge Your WordPress Site with Bunny.net CDN⚡️
Roll Your Own: How to Setup and Maintain a Minecraft Server on Your VPS
How to Add Two-Factor Authentication (2FA) to WordPress in About 2 Minutes
LowEndBoxTV: FASTER CORES vs MORE CORES? Is Ryzen 3x the Speed of Epyc for WordPress?
raindog308 is a longtime community LETizen, technical writer, and self-described techno polymath. With deep roots in the *nix world, he has a passion for systems both modern and vintage, ranging from Unix, Perl, Python, and Golang to shell scripting and mainframe-era operating systems like MVS. He’s equally comfortable with relational database systems, having spent years working with Oracle, PostgreSQL, and MySQL.
As an avid user of LowEndBox providers, raindog308 runs an empire of LEBs, from tiny boxes for VPNs, to mid-sized instances for application hosting, and heavyweight servers for data storage and complex databases. He brings both technical rigor and real-world experience to every piece he writes.
Beyond the command line, raindog308 has a life-long love of German Shepherd Dogs, high-quality knives, target shooting, theology, tabletop RPGs, playing guitar, and hiking in deep, quiet forests.
His goal with every article is to help users, from beginners to seasoned sysadmins, get more value, performance, and enjoyment out of their infrastructure.
You can find him daily in the forums at LowEndTalk under the handle @raindog308.


Leave a Reply