This article will be showing how to install Openconnect server on Ubuntu 16.04 and connect to it using the Cisco Anyconnect client. OpenConnect server(ocserv) is a VPN server that connects through SSL. It is a secure, lightweight and fast connect server that can be installed on Linux environment. We will be guiding you through the simple installation of the OpenConnect server on Ubuntu in this article.
The demo installation is going to perform on a fresh Ubuntu 16.04 installed server having IP address 104.236.38.188. You’ll need to have a machine with Ubuntu installed with a user account having sudo access to it.
Before we start with installation, please update the Ubuntu repository by using the following command
sudo apt-get update
As the Ocserver is included in the Ubuntu package, no need of getting the package from the external source. You can simply use the apt-get command to install ocserv on Ubuntu 16.04.
Installing OCServ on Ubuntu 16.04
Once the package fetching completes, install ocserv using the following command
sudo apt-get install ocserv
This will even install the additional packages required for running the ocserver automatically. Just put “y” while asking for the confirmation of installation and wait till the installation completes to perform the further steps.

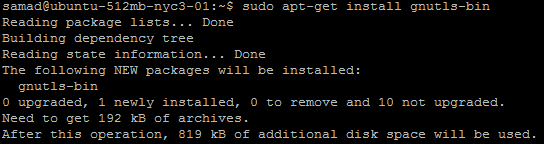
As we require to create keys and certificates, we need to install an additional package GnuTLS from Ubuntu repository. Just release the following command to install GnuTLS
sudo apt-get install gnutls-bin
Creating Certificates
Now we will navigate to the ocserv directory and will create the keys and certificates
Use the following command to change the directory
cd /etc/ocserv
In this directory create a new file named ca.tmpl using the following command
sudo vi ca.tmpl
Now you will be in the vi editor where you can insert content after pressing the “insert” key. Just paste the following content to the ca.tmpl file. Save and quit the vi editor using the keys Esc:wq
cn = “VPN CA”
organization = “Low End Box”
serial = 1
expiration_days = 3650
ca
signing_key
cert_signing_key
crl_signing_key
Please note that you can change the cn and organization values with any value that you wish.
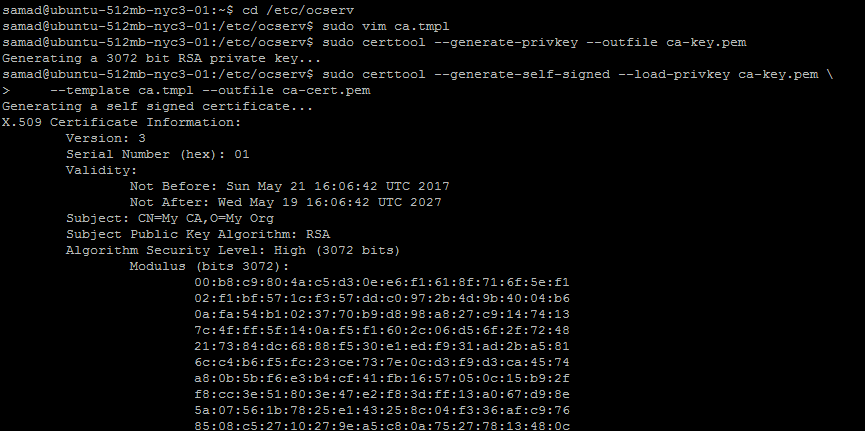
Once done, run the following command to generate a private key
sudo certtool –generate-privkey –outfile ca-key.pem
Now, generate a self-signed certificate using the following command
sudo certtool –generate-self-signed –load-privkey ca-key.pem \
–template ca.tmpl –outfile ca-cert.pem
Now you need to create a new file named server.tmpl on the current directory using the following command
sudo vi server.tmpl
Insert the following data into the server.tmpl file after changing the cn value with your domain name or IP address. I have used my server IP address 104.236.38.188 in the example
cn = “104.236.38.188”
organization = “Low End Box”
expiration_days = 3650
signing_key
encryption_key
tls_www_server
Once you paste the values to the file, save and quite from the vi editor
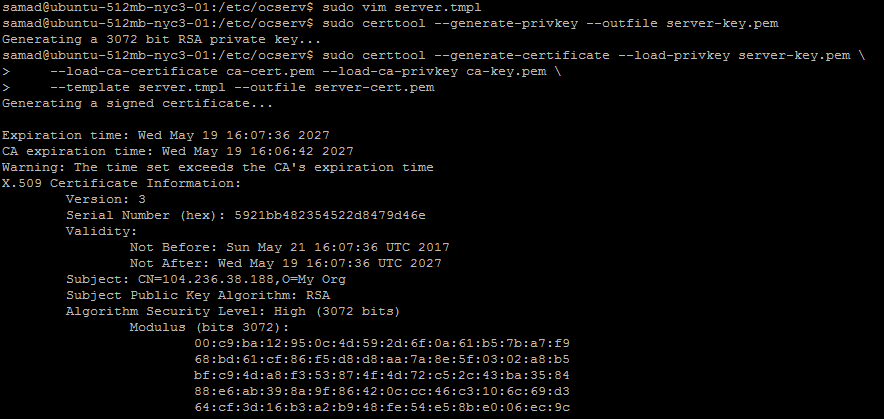
Now create a private key for generating server certificate by using the following command
sudo certtool –generate-privkey –outfile server-key.pem
Create a server certificate by utilising the private key generated in the next step. Just use the below command in the putty box
sudo certtool –generate-certificate –load-privkey server-key.pem \
–load-ca-certificate ca-cert.pem –load-ca-privkey ca-key.pem \
–template server.tmpl –outfile server-cert.pem
Modify OCServ Configuration File
In the next step, you need to make some changes into the ocserv default configuration file. Open the configuration file using the below command and make below-listed changes to the file
sudo vim ocserv.conf
In the opened file make the following changes, for easy searching, you can use /search keyword in vi editor
Find the line auth = “pam[gid-min=1000]” and replace it with the following
auth = “plain[/etc/ocserv/ocpasswd]”Replace these two lines
server-cert = /etc/ssl/certs/ssl-cert-snakeoil.pem
server-key = /etc/ssl/private/ssl-cert-snakeoil.key
with the following lines
server-cert = /etc/ocserv/server-cert.pem
server-key = /etc/ocserv/server-key.pemChange the value of
try-mtu-discovery from false to true
try-mtu-discovery = trueChange the DNS value from 192.168.1.2 to 8.8.8.8
dns = 8.8.8.8Remove the lines or place a # in front of following lines
route = 10.10.10.0/255.255.255.0
route = 192.168.0.0/255.255.0.0
no-route = 192.168.5.0/255.255.255.0
After making these changes, save and quit the VI editor using the keys Esc:wq
Create Password Open Connect Server
Next, you need to create a password file with details. Use the following command
sudo ocpasswd -c /etc/ocserv/ocpasswd samad
replace the value “samad” with your desired username
It will ask for the password and confirmation of password
You need to make changes in the system control configuration file to allow forwarding. To do so, open the file in vi editor by using the following command
sudo vim /etc/sysctl.conf
Uncomment the line by deleting the # from #net.ipv4.ip_forward=1.
It should look like below
net.ipv4.ip_forward=1
Save and exit the editor and activate the change by simply throwing the following command to putty box
sudo sysctl -p
IPTable Configuration
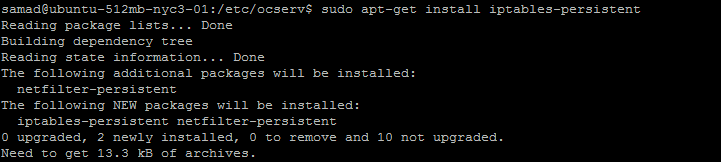
If the machine is new, you need to install the IP tables. Use the below command
sudo apt-get install iptables-persistent
Now we will add SSL ports to the firewall’s accepted list. Just use the following commands for TCP and UDP connections respectively
sudo iptables -A INPUT -p tcp –dport 443 -j ACCEPT
sudo iptables -A INPUT -p udp –dport 443 -j ACCEPT
Enable NAT by using the following command
sudo iptables -t nat -A POSTROUTING -j MASQUERADE
Reconfigure the IP tables to make your changes persist across server reboots
sudo dpkg-reconfigure iptables-persistent

I have found that the server is listening on port 443 before enabling the ocserver. The following command will list the list of sockets and can find the respective unit that is listening to the port
systemctl -all list-sockets
From the screenshot, you can see that the ocserv.socket is listening to the port 443, so I stopped it using the following command before continuing further.
sudo systemctl stop ocserv.socket
After killing you can enable ocserv by running the following command
sudo ocserv -c /etc/ocserv/ocserv.conf
You can verify that it is listening to 443 using the below command
sudo netstat -tulpn | grep 443

Download and Install Certificates
I have tried to connect to the open connect VPN server by using the Cisco’s any connect client. But it was unsuccessful as the certificate was not trusted. So, you need to install this certificate on your device to connect to the Open connect server
You can simply copy the key from the certificate file and save in a text file to install the certificate on your device. Alternatively, you can follow the below steps to get it via browser
Opening port 80 on firewall
sudo iptables -A INPUT -p tcp –dport 80 -j ACCEPT
Install apache to render files via browser
sudo apt-get install apache2
Copy the ca-cert.pem file to default html directory
sudo cp /etc/ocserv/ca-cert.pem /var/www/html
Now the file will be available over, youripaddress/ca-cert.pem or you can delete the index.html file from the /var/www/html directory and can access the IP address on the browser to list the file and download it.
Install Certificate on Windows 7
You need to install it on your device, the below steps will show you how to install certificate on Windows
- open command prompt
- type mmc and hit enter
- File -> add remove snap-in
- Select certificates and add
- Select computer account -> next -> finish
- Select certificates(local computer) -> OK
- Expand certificates from left menu
- Right click on trusted Root certificate Authorities -> all tasks-> import -> next
- Browse the file you have downloaded
- Choose “All file” in the browser window and choose the downloaded file
- Click Next -> Finish
- Now you have installed certificate on your Windows machine
Install AnyConnect and connect to Openconnect Server
Now you need to download Cisco AnyConnect Secure mobility client for your machine and install it.
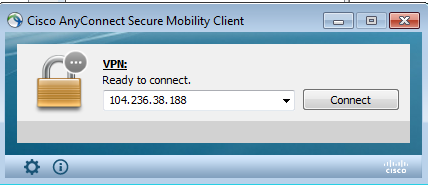
After installation, open it and provide the IP address or domain name you have configured in the certificate and click on the connect button
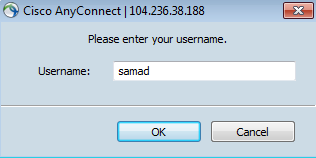
It will ask for the username. Use the username that is configured earlier
In the next step, you need authenticate using password.
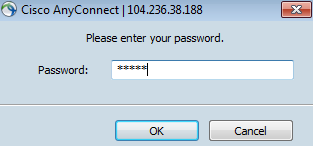
Now you will be connected to the Openconnect server using Cisco AnyConnect client

You can check your current IP address by just googling What is my IP

Hope you were able to follow the steps and installed OpenConnect server on Ubuntu 16.04.
At LowEndBox, our News and Editorial Team is dedicated to delivering timely, accurate, and actionable content tailored to the needs of developers, hosting enthusiasts, and infrastructure professionals. We curate, report, and analyze the latest developments in the world of hosting, cloud infrastructure, data centers, open-source platforms, and internet services, always with a focus on value, performance, and accessibility.
Our team monitors the global hosting landscape to bring you breaking news, vendor updates, platform changes, market trends, and expert insights. Whether it’s a price hike from a major control panel, a breakthrough in virtualization technology, or a new indie provider shaking up the market, we strive to deliver content that empowers the LowEnd community to stay informed and ahead of the curve.
We also collaborate closely with the vibrant LowEndTalk community to surface meaningful discussions, highlight real-world deployments, and share voices from within the ecosystem.
Our mission is simple: to help you make smarter infrastructure decisions by delivering the stories that matter, clearly, consistently, and without hype.
Stay tuned for fresh editorial content, in-depth analyses, and community-powered features from the team that keeps LowEndBox running.


how is Openconnect Compared to openvpn?
in terms of sercurity & performance/lightweightness
I installed ocserv last week. I just requested a Let’s Encrypt certificate, to save all the trouble of downloading and installing self-signed CA certificate on clients.
is it possible if i don’t have a domain and simply public ip in order to do with lets encrypt certficate
No, you must have a domain pointing to the server for Let’s Encrypt.
Would be nice to see this tutorial with letsencrypt and also how to set up a cron job for autorenewal.
Installing self-signed certificate onto client is insecure: if your VPS is compromised, attacker can use the private to generate new certificates imposing as your bank, etc. The client machine would trust such certificates.
I’ve written the steps of installing ocserv with Let’s Encrypt certificate.
https://yoursunny.com/t/2017/ocserv-letsencrypt/
Hi yoursunny,
Thanks for the write up! I have a question, I couldn’t figure out how to tunnel all traffic through the Openconnect VPN. From your post, i see that you are able to tunnel all traffic. Can you please show me where you add that setting.
It’s the default setting.
I regularly visit your site and find a lot of interesting information.
Not only good posts but also great comments.
Thank you and look forward to your page growing stronger.
Your writing very well and provide a lot of useful information. But if you tap water more than half as compared to another article, I would definitely be great
Tried on debian but it did not go well. Had to change the repositories to include stretch but the problem came with iptables and nat does not exist. Tried a reboot but no luck.
I did like your tutorial – very clear, accurate and I got a long way through it.
The knowledge you share really changes me in life, I sincerely thank you for the things you have done, sure your blog will help more people. Sincerely thanks
I’ve struggled with this for a long time 🙁 thanks for sharing, it’s really helpful <3
I’ve been looking for that for a long time. Thanks
Very helpful advice in this particular post! It’s the little changes that make the largest changes. Thanks for sharing!
Your writing very well and provide a lot of useful information.
I was excited to find this site. I wanted to thank you for your time for this wonderful read!! I definitely savored every little bit of it and I have you book marked to check out new things in your web site.
It’s great because of the knowledge you share with us, I will always follow your blog and will share your blog with my friends
I regularly visit your site and find a lot of interesting information. thanks for sharing, it’s really helpful <3
pam_auth_pass: Authentication failure
need help
wonder if there is a similar tutorial about installing openconnect server on centos 7?
how is Openconnect Compared to openvpn?
in terms of sercurity & performance/lightweightness
HI people! I have same problems with opening socket.
ocserv[4812]: error opening socket: Operation not permitted
ocserv[4812]: GnuTLS error (at worker-vpn.c:466): GnuTLS internal error.
ocserv[4807]: main: 2XX.XX.XX.XX:51505 user disconnected (rx: 0, tx: 0)
ocserv[4813]: error opening socket: Operation not permitted
ocserv[4813]: GnuTLS error (at worker-vpn.c:466): GnuTLS internal error.
Can you help me?
Hello Samad jan
thank you for your instruction
I am using Ubuntu 18.04 x64 and I get this error
root@vultr:/etc/ocserv# ocserv -c /etc/ocserv/ocserv.conf
error: unknown or unsupported auth method: “plain[/etc/ocserv/ocpasswd]”
root@vultr:/etc/ocserv#
could you please help
I also get this error when I try to install a radlients on th older versions of openconnect which are already running.
Thank you
Thanks for sharing about Install OpenConnect Server on Ubuntu 16.04 and also create a new password details.
How Can I remove user i made ?!
here you can find them,
nano /etc/ocserv/ocpasswd
Thanks for sharing. but I don have internet access after connecting to the VPN. What am I doin wrong? ubuntu 18.04
best VPS of openconnect where you can change IP in case of blockage by your country without to rebuild VPS, https://www.hostwinds.com/6850.html
if some one looking for a openconnect vpn panel and custom applicaton where you can make bulk accounts auto expiry and many more thing just contact me
my portfolio: https://www.fiverr.com/share/8zYZ34
my email: tanzil@DigitalDtech.com
After checking out a number of the articles on your site, I seriously appreciate your way of writing a
blog. I book marked it to my bookmark site list and will be checking back in the near
future. Take a look at my website as well and tell me how you feel.
hello
in this command i have a problem
————–
root@ubuntu:/etc/ocserv# sudo certtool –generate-privkey –outfile ca-key.pem
certtool: Command line arguments are not allowed.
certtool [options]
certtool –help for usage instructions.
————–
whats the problem ?
its ok, i found my problem
but now i cant connect to radius
how can i do that ?
I have the same problem. would you please tell more about the problem and how to solve it? thanks.
type like this
sudo certtool –generate-privkey –outfile ca-key.pem
this is correct
sudo certtool –generate-privkey –outfile ca-key.pem
i want to use radcli
and use this codes, its ok i think, but in this line show me error
sudo ocserv -c /etc/ocserv/ocserv.conf
—
how can i fix this problem ?
Please post Install OpenConnect Server on Ubuntu 22.04 badly need.