Editorial note: this is Jonathan’s first tutorial on LowEndBox. I hope you enjoy it and more are to follow in the future! If all goes well, he will be writing tutorials occasionally alongside me. MPK
Have you been into a situation where you wanted to stream live events such as school graduation or teaching seminar? There are already many companies offering ready made solution for such purpose. But for budget conscious people, doing it the LEB way is surely cheaper!
This tutorial will guide you step by step on how to setup and use the different components that needs to work together.
Real Time Messaging Protocol (RTMP)
I chose the RTMP protocol for simplicity. It was developed by Macromedia/Adobe and can be played on any machine with Adobe Flash player.
Server Setup
The server requirements is minimal:
- Any virtualization. OpenVZ, Xen, KVM are all fine.
- 64MB RAM
- Ubuntu OS – steps are tested on 12.04
Nginx has a nice module to support the RTMP protocol. But using it means we need to compile Nginx from source! Log into your box as root and follow the steps below:
Install required packages to compile Nginx
apt-get install build-essential libpcre3 libpcre3-dev libssl-dev
Create a temporary folder
mkdir -p ~/temp/nginx-install
cd ~/temp/nginx-install
Download and extract the source of NGINX and the RTMP module.
wget http://nginx.org/download/nginx-1.6.1.tar.gz
tar -xvf nginx-1.6.1.tar.gz
wget https://github.com/arut/nginx-rtmp-module/archive/master.zip
unzip master.zip
This is my directory structure after:
root@default:~/temp/nginx-install# ls -l
total 1332
-rw-r--r-- 1 root root 545036 Sep  7 20:27 master.zip
drwxr-xr-x 8 1001 1001   4096 Aug  5 19:18 nginx-1.6.1
-rw-r--r-- 1 root root 803301 Aug  5 21:55 nginx-1.6.1.tar.gz
drwxr-xr-x 6 root root   4096 Sep  2 02:44 nginx-rtmp-module-master
Go to the NGINX extracted source
cd nginx-1.6.1/
Configure with the RTMP module
./configure --with-http_ssl_module --add-module=../nginx-rtmp-module-master
If you wish to add the other supported modules, you can freely add them. For example:
./configure --with-http_ssl_module --with-http_realip_module --with-http_addition_module --with-http_sub_module --with-http_dav_module --with-http_flv_module --with-http_mp4_module --with-http_gunzip_module --with-http_gzip_static_module --with-http_random_index_module --with-http_secure_link_module --with-http_stub_status_module --with-mail --with-mail_ssl_module --with-file-aio --with-ipv6 --add-module=../nginx-rtmp-module-master
Then continue to compile and install. By default, Nginx will be installed at: /usr/local/nginx
make
sudo make install
It will be more convenient to create init scripts for the service.
wget https://raw.github.com/JasonGiedymin/nginx-init-ubuntu/master/nginx -O /etc/init.d/nginx
chmod +x /etc/init.d/nginx
sudo update-rc.d -f nginx defaults
After that, we can start and stop NGINX using the commands:
service nginx start
service nginx stop
Open the file: /usr/local/nginx/conf/nginx.conf and add the following contents at the bottom:
rtmp {
        server {
                listen 1935;
                chunk_size 4096;

                application live {
                        live on;
                        record off;
                }
        }
}
Restart the server after this.
Flash Media Live Encoder (FMLE)
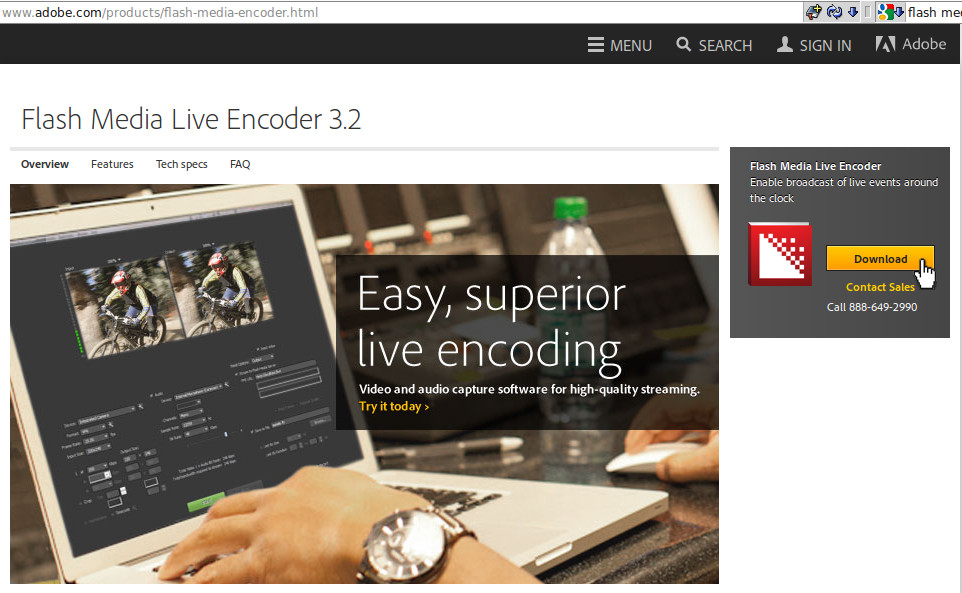
FMLE is a free live encoding software made by Adobe. You can use this capture video and audio input from different devices and stream it to your server configured above. You can get it from http://www.adobe.com/products/flash-media-encoder.html.
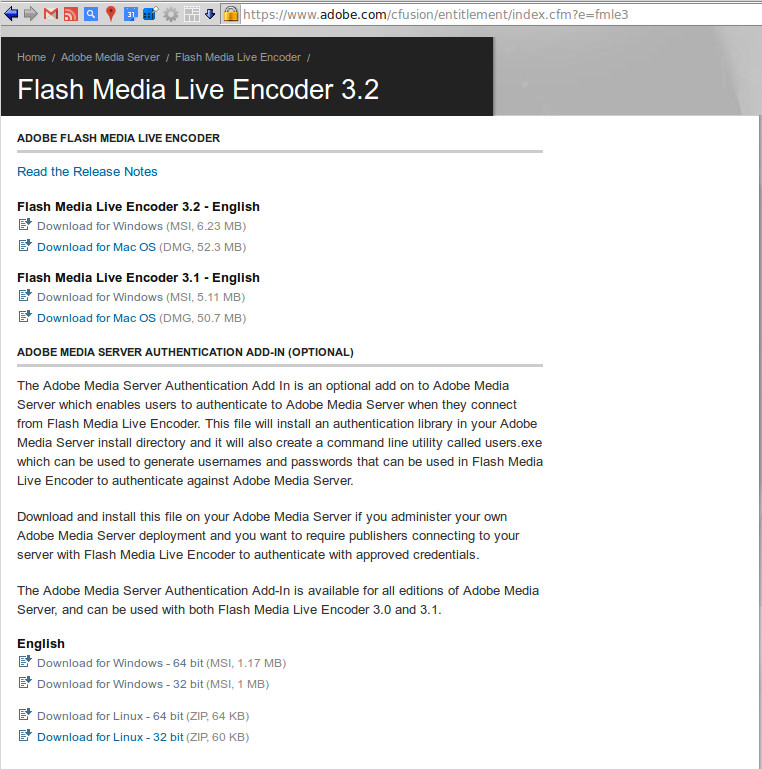
Here is a walkthrough on downloading the product:

Install the software and open it. It should look like this:
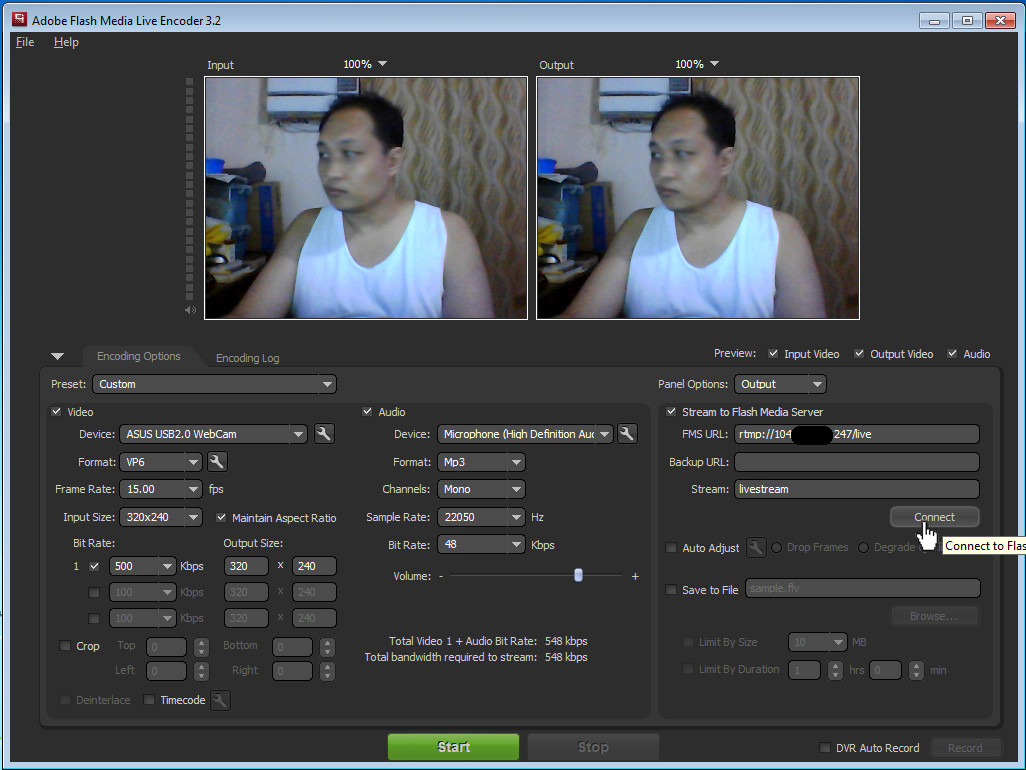
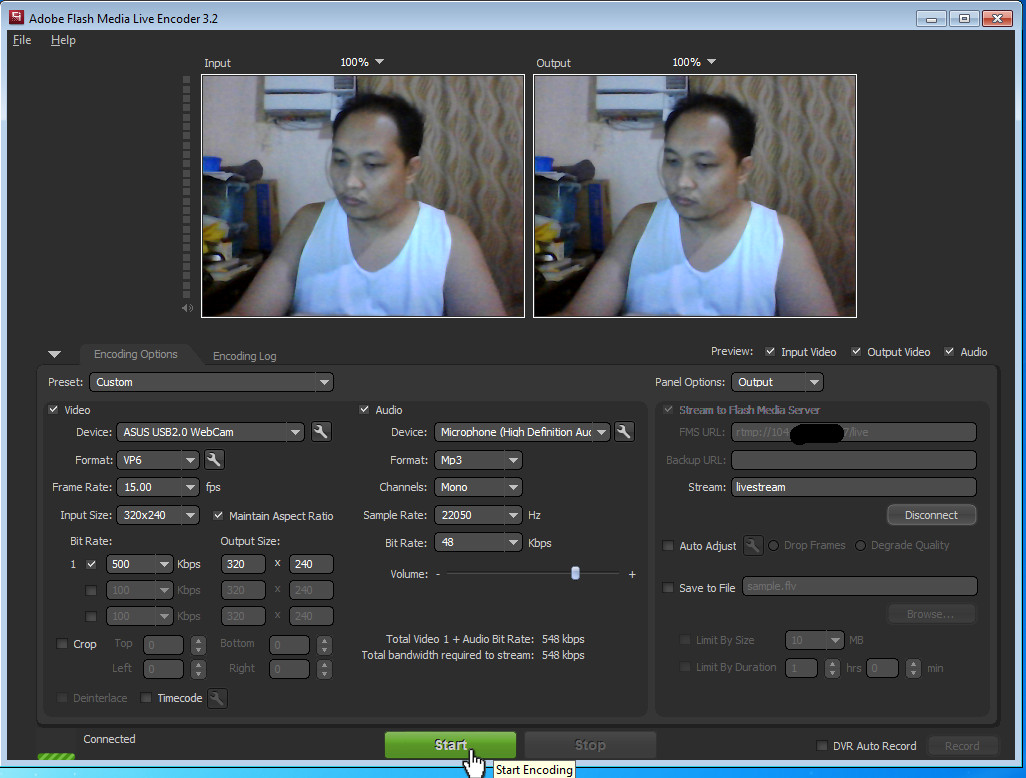
You can choose and configure your video and audio device on the left. Feel free to play around. The right side contains the details of your server.
I blotted out my IP address from the screen capture. But do note of the values rtmp://xx.xx.xx.xx/live and livestream in the text boxes. You will need these in your HTML.
Click connect to connect FMLE to the server and click start to begin the streaming session
FlowPlayer
I have found good success using FlowPlayer for rendering my video streams on a browser.
Here is the relevant HTML/Javascript code that shows the stream from the broadcast made by FMLE above:
$f("wowza", "http://releases.flowplayer.org/swf/flowplayer-3.2.15.swf", {
    clip: {
	url: 'livestream',
	scaling: 'fit',
	live: true,
	autoPlay: true,
	provider: 'hddn'
    },
    plugins: {
	hddn: {
	    url: "flowplayer.rtmp-3.2.11.swf",
		netConnectionUrl: 'rtmp://xx.xx.xx.xxx/live'
	}
    },
    canvas: {
	backgroundGradient: 'none'
    }
});
$f("wowza").play();
And this is output when the HTML page was opened on a browser:
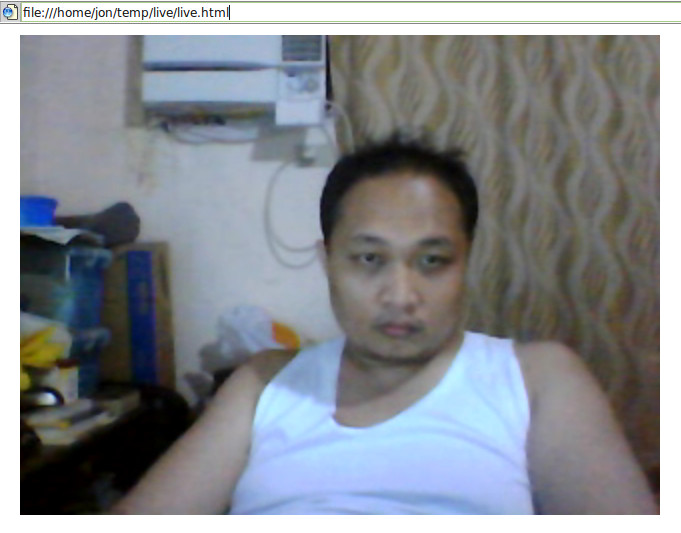
To save you the trouble of finding the right combination of swf files and HTML code, here is the complete zipped html client package.
Final notes
I want to thank @ihatetonyy of LET who helped me a lot with my research on video streaming.


@ihatetonyy, you should drag a shirt or something before starting the stream xD
@ihatetonyy is a different person. But he gave me about 99% of what I know about streaming. I did not put the usage, but in my box the RAM usage is about 11mb with OpenVZ. So this is much LEB friendly.
So long on main page
Nice tutorial Jon 🙂
Previously I just use Red5 for streaming a camera trough my local vps in Indonesia, and I make it my personal cctv. But with this tutorial, it gives me an idea to use a raspberry pi for 24×7 live streaming if we needed it 🙂
Thanks Erawan
What’s the minimum requirement for the server if I need to accommodate 100 people watching at the same time? Is this streaming service CPU intense or RAM hog?
I believe this is just network intensive. CPU and RAM should be very little. Maybe 32mb ram and 5% CPU (just my estimate). Because no encoding is done on the server. It just routes the packets to your viewers.
How to embed to wordpress?
http://lowendbox.com/blog/setup-for-streaming-live-events-to-browser-clients-using-nginx-fmle-and-flowplayer/live.zip is 404. The Page you requested was not found
fixed. Thanks. For WP, it is not that hard to create a plugin using the sample HTML
Or you just skip half of this nonsense and once you have the rtmp nginx server setup, you simply push any crap that you want using OBS. lol.
Also having picks like that in the post is simply sad to watch, if you work, do w/e stuff at home at least dress up when you stream, put content of yourself on the Internet.
OBS ?
NVM got it.
I apologize for offending you.
You didn’t offend me in any way.
OBS can capture all of the inputs, monitor, window, webcam.
If you use Linux for your desktop, OBS Studio is still in works as a full project rewrite.
You simply specify your rtmp server local or remote and you can push it to any player that supports streaming or some VLC.
General idea can be found in this post:
https://obsproject.com/forum/threads/private-rtmp-server-preconfigured-virtualbox-image.5873/
It is the same as FMLE then. It is also free
I did a quick look at OBS. It seems like a C/C++ project. How to watch using a browser?
wow
Ran on 64 bit, Ubuntu 12.04:
# apt-get install build-essential libpcre3 libpcre3-dev libssl-dev
Reading package lists… Done
Building dependency tree… Done
Package libpcre3-dev is not available, but is referred to by another package.
This may mean that the package is missing, has been obsoleted, or
is only available from another source
E: Unable to locate package build-essential
E: Package ‘libpcre3-dev’ has no installation candidate
E: Unable to locate package libssl-dev
Have you tried to apt-get update and apt-get upgrade first?
That worked, thank you.
apache is the most popular program hanging on the port 80 🙂
New error.. lol god I suck at this
service nginx start
* Starting Nginx Server… nginx: [emerg] bind() to 0.0.0.0:80 failed (98: Address already in use)
nginx: [emerg] bind() to 0.0.0.0:80 failed (98: Address already in use)
nginx: [emerg] bind() to 0.0.0.0:80 failed (98: Address already in use)
nginx: [emerg] bind() to 0.0.0.0:80 failed (98: Address already in use)
nginx: [emerg] bind() to 0.0.0.0:80 failed (98: Address already in use)
nginx: [emerg] still could not bind()
[fail]
you seem to have apache. uninstall it.
asdjhdajk xD nub question -> how did you know?
You can kill it using:
sudo fuser -k 80/tcp
And then try restarting nginx again:
service nginx start
Thank you for this great tutorial, we needed it 🙂
cheers, I followed the instructions and it’s working perfectly on 64 MB VPS
So I got it all set up and launched app, hit connect and no errors. Now from my server, how do I give people access to view the stream?
check the last part about the HTML
Ah I think I misread it the first time, thanks.
So just create an index.html page and throw in that javascript? Nothing in the body to call it or? A little confused about this, been out of web design for about 6 years now.
download the zip file. it has other codes in it.
In the zip file point the browser to live.html
Make sure to edit that file as well pointing the IP to your server
Any person can transmit on your live stream server know the ip of the server. there any password protection like wowza ?
Good tutorial 🙂
For crtmp server, it is easy to put password. For Nginx rtmp, it is a bit tricky but it is possible. Maybe I will post it in future tutorial
No, it is not tricky at all. Try this:
—
CREATE A PHP FILE WITH NAME authorize.php (OR OTHER) AND UPLOAD IT TO A SERVER ACCESIBLE THRU HTTP:
Of course, change “uniquepasswordhere” with your password
Then, Add this inside the application live { } block:
on_publish http://xxx.xxxxxxx.xxx/authorize.php;
where xxx.xxxxxxx.xxx/ is the address you can find the file you created
Then, in FMLE, in path/play stream use xxxxx?passphrase=uniquepasswordhere
where xxxx is your path stream and uniquepasswordhere is your password.
Yes. this is the right approach. Ihatetonny also mentioned this to me. thank you for pointing it out
Thanks for the shoutout — and great to-the-point tutorial! Looking forward to more.
I could never get things to behave on Debian/Ubuntu.
Well, I run in a whole cluster of main streamer and repeaters (restreamers)with ubuntu 12.04 and works like a charm, and a second cluster with Debian 7, also working very well
ILL TRY TO POST THIS AGAIN, BECAUSE IT BROKE IN MY PREVIOUS POST:
No, it is not tricky at all. Try this:
—
CREATE A PHP FILE WITH NAME authorize.php (OR OTHER) AND UPLOAD IT TO A SERVER ACCESIBLE THRU HTTP:
Of course, change “uniquepasswordhere” with your password
Then, Add this inside the application live { } block:
on_publish http://xxx.xxxxxxx.xxx/authorize.php;
where xxx.xxxxxxx.xxx/ is the address you can find the file you created
Then, in FMLE, in path/play stream use xxxxx?passphrase=uniquepasswordhere
where xxxx is your path stream and uniquepasswordhere is your password.
I AM POSTING THIS ONCE AGAIN, WITH AN EXTERNAL TXT FILE BECAUSE LEB WILL NOT LET ME TO POST PHP CODE IN HERE!
+++++++++++++++++++++++++++++++++++++++++++++++
CREATE A PHP FILE WITH NAME authorize.php (OR OTHER) AND UPLOAD IT TO A SERVER ACCESSIBLE THRU HTTP:
This is the code:
http://freetexthost.com/wa6ibkwn5s
Of course, change “uniquepasswordhere” with your password
Then, Add this inside the application live { } block:
on_publish http://xxx.xxxxxxx.xxx/authorize.php;
where xxx.xxxxxxx.xxx/ is the address you can find the file you created
Then, in FMLE, in path/play stream use xxxxx?passphrase=uniquepasswordhere
where xxxx is your path stream and uniquepasswordhere is your password
Please How can I do multiple stream with different port numbers from multiple countries or location etc on one VPS?.
I am currently broadcasting only one TV Stream and I have more bandwidth to use for other stream.
Finally, the CODE LINK YOU NO MORE WORKING: http://freetexthost.com/wa6ibkwn5s
Nice, thanks! Will try it ASAP.
Great post. Looking forward to more like this…..
hello,
I followed the steps above my open broadcast connect to the nginx rtmp but i can see anything on the FlowPlayer. Please help.
How did you install FMLE in Ubuntu server? it is my understanding that it is not compatible and my web page resides on an ubuntu server. thanks!!
Thanks. Your example is better than the official documentation
I am using youtube livestreaming.
Hi,
when I executed command sudo service nginx start
There is an error: nginx: unrecognized service
So how can I fix it? Thank you!
thanks friend