 Today we’re going to take a look at a really cool project: bashvm.com.
This project allows you to create, modify, and manage virtual machines using – you guessed it – bash. The entire environment is coded as a bash shell script. That’s really neat!
At home, I have a modest VM environment which runs on a dedicated Protectli system with a i5-8250U CPU (as I said, my needs are modest). I didn’t have a spare physical box to setup bashvm for testing, so I decided to create a nested virtualization VM. In otherwords, a VM that itself acts as a host for its own VMs.
This is pretty straightforward, but there’s a key ‘qm’ command I had to google for. If you’re interested in doing this, here is the guide I used.
I figured up a Deb 12 system called bashvm with 4 vCPU, 16GB of RAM, a 20GB root, and a second disk at 60GB that I mounted as /data.
Then I headed over to bashvm.com and followed the step-by-step there to install bashvm. Very easy to do – just clone the repo and run the installer, which then installs 277 packages (!) on my 12.5 system.
And then you just
bash bashvm.sh
You’re presented with a delightfully minamalist menu:
At that point, you’re ready to play.
Naturally, I just jumped into Virtual Machines and tried to create one. That didn’t work, and I figured out that the right thing to do is create a storage pool first.
I backed up and created a storage pool (“stor1”) and put it in /data:
 Name    State     Autostart   Persistent   Capacity    Allocation   Available
--------------------------------------------------------------------------------
 stor1   running   yes         yes          58.76 GiB   633.79 MiB   58.14 GiB
With that out of the way, I was able to create a VM:
Enter your choice: 8
Enter the name for the new / existing virtual machine: vm1
Enter the amount of memory in MB (e.g., 1024): 1024
Enter the number of virtual CPUs (e.g., 2): 1
Would you like to download or use a debian 12 iso? (y/n): y
Enter the storage pool name [default]: stor1
File debian-12.5.0-amd64-netinst.iso already there. Canceling re-download.
Would you like to create a new volume? (y/n): y
Enter the name of the new storage volume (e.g., new-vm): vol2
Enter the size of the volume (e.g., 10GB): 10GB
Enter the storage pool name [default]: stor1
Vol vol2.qcow2 created

Enter the network name to connect the virtual machine to [default]:
Enter the mac address for this vm (nothing for auto generate):
Domain 'vm1' defined from /etc/libvirt/qemu/vm1.xml

Please note that there will be a vnc port automatically assigned to this vm.
This is optional if needed and the ports will start at 5900 and onward.
BTW, you’ll note that the Debian 12 CD is already there. That was from an earlier attempt. To my delight, bashvm will go out and download the ISO for you and put it in your storage pool. That’s a trick enterprise grade platforms could learn!
After the above, I started the VM.
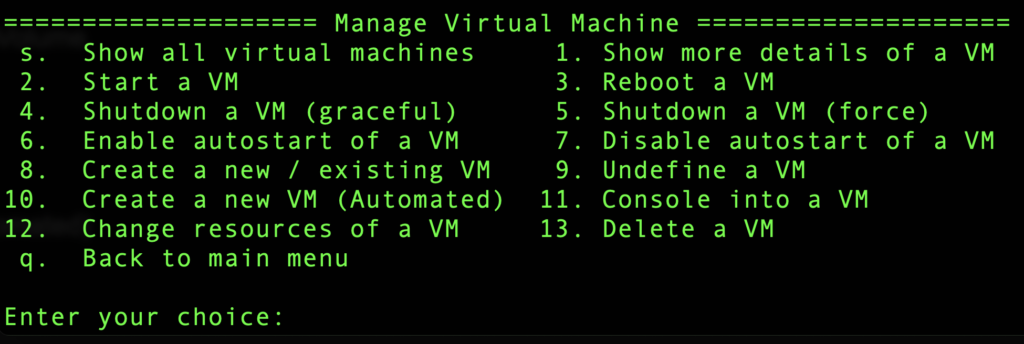
Enter your choice: 2
Enter the name of the virtual machine to start: vm1
Domain 'vm1' started


==================== Manage Virtual Machine ====================
 s.  Show all virtual machines     1. Show more details of a VM
 2.  Start a VM                    3. Reboot a VM
 4.  Shutdown a VM (graceful)      5. Shutdown a VM (force)
 6.  Enable autostart of a VM      7. Disable autostart of a VM
 8.  Create a new / existing VM    9. Undefine a VM
10.  Create a new VM (Automated)  11. Console into a VM
12.  Change resources of a VM     13. Delete a VM
 q.  Back to main menu

Enter your choice: s
 Id   Name   State
----------------------
 1    vm1    running
And I could see it in ps:
libvirt+ 12406 1 10 15:40 ? 00:01:55 /usr/bin/qemu-system-x86_64 -name guest=vm1,debug-threads=on...
Next I tried to connect to the console, but unfortunately couldn’t get any further. Not sure why…
==================== Manage Virtual Machine ====================
 s.  Show all virtual machines     1. Show more details of a VM
 2.  Start a VM                    3. Reboot a VM
 4.  Shutdown a VM (graceful)      5. Shutdown a VM (force)
 6.  Enable autostart of a VM      7. Disable autostart of a VM
 8.  Create a new / existing VM    9. Undefine a VM
10.  Create a new VM (Automated)  11. Console into a VM
12.  Change resources of a VM     13. Delete a VM
 q.  Back to main menu

Enter your choice: 11
Enter the VM name to console into: vm1
Connected to domain 'vm1'
Escape character is ^] (Ctrl + ])
At that point, I hit return a few times but never got a response. bashvm is just calling “virsh console” under the hood, and I have a feeling I’m just not doing something right. Connecting to the host’s 5900 for vnc asked for a password, but I didn’t know it because I was never asked for it.
Well, I’m out of my depth. That’s why I buy VMs instead of trying to run my own LOL.
Still, looks like a really cool project. You should definitely check it out. I mean, what can be more LowEnd than using bash to create, configure, and manage VMs? I’m in love. 😍
raindog308 is a longtime community LETizen, technical writer, and self-described techno polymath. With deep roots in the *nix world, he has a passion for systems both modern and vintage, ranging from Unix, Perl, Python, and Golang to shell scripting and mainframe-era operating systems like MVS. He’s equally comfortable with relational database systems, having spent years working with Oracle, PostgreSQL, and MySQL.
As an avid user of LowEndBox providers, raindog308 runs an empire of LEBs, from tiny boxes for VPNs, to mid-sized instances for application hosting, and heavyweight servers for data storage and complex databases. He brings both technical rigor and real-world experience to every piece he writes.
Beyond the command line, raindog308 has a life-long love of German Shepherd Dogs, high-quality knives, target shooting, theology, tabletop RPGs, playing guitar, and hiking in deep, quiet forests.
His goal with every article is to help users, from beginners to seasoned sysadmins, get more value, performance, and enjoyment out of their infrastructure.
You can find him daily in the forums at LowEndTalk under the handle @raindog308.


Leave a Reply