 I’ve been a fan of Synology NAS systems for a while. For a long time, I ran my home storage by stuffing hard drives into previous PCs and turning them in Linux file servers (if I was going to go down that route again, I’d be tempted to try TrueNAS today).
The problem with that approach is the energy cost. A rig big enough to hold four or eight drives is a usually a full-sized mobo with a decent CPU on it and a pretty big power supply. You end up with a pretty hefty power bill.
So some years ago I transitioned to Synology NAS devices for home use. They’re Linux-based but really are their own specialized OS. All kinds of packages and options, aimed at home and small business use. My own use is pretty basic: file storage, backups, media player, and that’s about it. I’d rather run databases, web apps, etc. on my own Linux VMs.
Anti-Ransomware Checklist
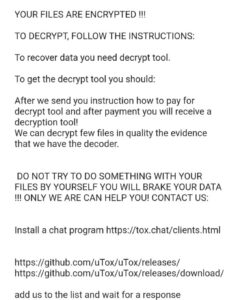
If you read Synology forums for a while, you inevitably run across people whose Synologys were ransomware’d. That’s heartbreaking – your files and your backups taken hostage by criminal scum.
There are some things you can do to prevent such misfortunes. Here’s a basic run down of securing your Synology. The box is pretty secure out of the box, but given the importance of what you’re probably using it for, it’s important to take all possible precautions.
First, do not connect your Synology to the Internet unless it’s absolutely can’t be avoided! Security is good, but why take the risk? I’d give the same advice for any system, so I’m not singling out Synology specifically.
 Follow the Security Audit: Login to your Synology (port 5000 by default) and from the main menu (upper left), select Security Advisor.
There’s a couple things you should look at. Look at the Overview to start. If anything isn’t a green checkmark, you should take action.
Then click Advanced and click View the checklist, which is a much more in-depth list of things you can do to improve security. There’s 49 categories and the status of each is indicated.
Clean Up Your Users: This is really easy to do and only takes a few minutes. Got to the Control Panel and click User & Group. You should deactivate/disable both “admin” and “guest”.
Enable 2-Factor Authentication: In the Control Panel, click on Security. Under Account, you can enforce 2FA for all users. It’s quite simple to do – just follow the prompts and use the authenticator of your chocie.
While you’re there, you can also explore the Firewall. Whatever you can do to limit access is advisable.
In the Control Panel, go to Login and consider changing the DSM port. That way if someone is on your network and is scanning for Synologies, they’re less likely to find yours.
Speaking of people on your network, keep in mind that other than direct Internet access, your most likely vector of attack is a compromised PC inside your network. Someone reads an email, clicks something they shouldn’t click, and how an external entity has control of a PC. If that PC has access to your Synology, expect them to encrypt and ransom the files.
The solution to this is twofold. First, train your users (or yourself!) to avoid phishing and malware. Second, limit access to files, directories, and shares only to those who truly need them.
You should look at immutable snapshots (requires DSM 7.2+ on supported hardware), which are the best protection if something goes bad. Search for (or add) the package “Snapshot Replication”. Open it, click Snapshots, select your share, and then click Settings to enable. Remember that these snapshots take space, though how much depends on how much data change there is in that share.
And finally, keep backups. You may need a second Synology and probably need an off-site backup.
Related Posts:
Looking Back at 2025: What a Wild Year! Our Recap of the Year's Biggest Moments
Synology Reverses Policy on "Synology-Branded Hard Drives Only" With DSM 7.3
They Used to Be Good, But Now They've Turned to Evil: The Synology End Game
B2 or C2? That is the Question. That is the Quest.
Are You Recyling Old Hardware for Your DIY? The Environment Isn't Thanking You
HostSolutions.ro Hacked
raindog308 is a longtime community LETizen, technical writer, and self-described techno polymath. With deep roots in the *nix world, he has a passion for systems both modern and vintage, ranging from Unix, Perl, Python, and Golang to shell scripting and mainframe-era operating systems like MVS. He’s equally comfortable with relational database systems, having spent years working with Oracle, PostgreSQL, and MySQL.
As an avid user of LowEndBox providers, raindog308 runs an empire of LEBs, from tiny boxes for VPNs, to mid-sized instances for application hosting, and heavyweight servers for data storage and complex databases. He brings both technical rigor and real-world experience to every piece he writes.
Beyond the command line, raindog308 has a life-long love of German Shepherd Dogs, high-quality knives, target shooting, theology, tabletop RPGs, playing guitar, and hiking in deep, quiet forests.
His goal with every article is to help users, from beginners to seasoned sysadmins, get more value, performance, and enjoyment out of their infrastructure.
You can find him daily in the forums at LowEndTalk under the handle @raindog308.


Leave a Reply