 Last night, in a moment of sudden Low End Inspiration, I grabbed a Hetzner Auction Server! It’s been awhile since I had a server at Hetzner. I wanted something for a few new projects.
I haven’t decided what operating system will be used on the new server. Perhaps OpenBSD. So, for extra Low End fun while I was deciding, I installed Proxmox Virtual Environment (“PVE”).
PVE is used a lot on the Low End because PVE is designed as a free and open source “virtual environment” to control a group or several groups of LXC Containers, KVM virtual machines, and a storage system. Proxmox will work across multiple nodes, so it has many cloud features.
One interesting aspect of installing Proxmox on a Hetzner dedicated server is that a Google search on how to do this install reveals several tutorials, including an official tutorial from Hetzner itself. All these tutorials seem to suggest installing Debian using Hetzner’s Installimage script and then installing PVE on top of Debian.
But there is an easier way!
Starting Hetzner’s Installimage script following any of the other tutorials brings one to a screen where the operating system is selected. The default preselected first choice in the list is Debian.
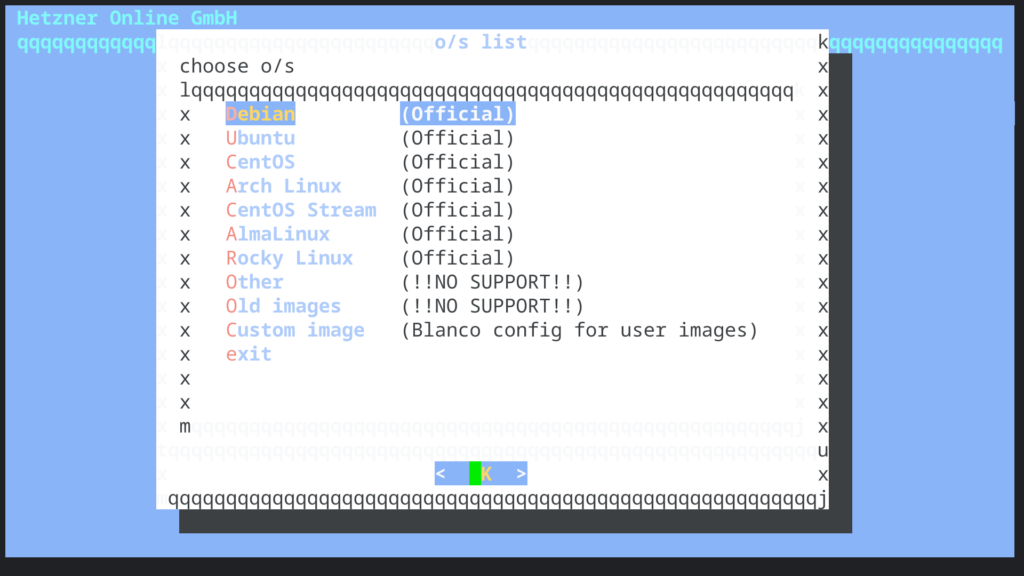
But, what happens is we sneak down the menu, note the ominous “!!NO SUPPORT!!” warning, and select “Other?”
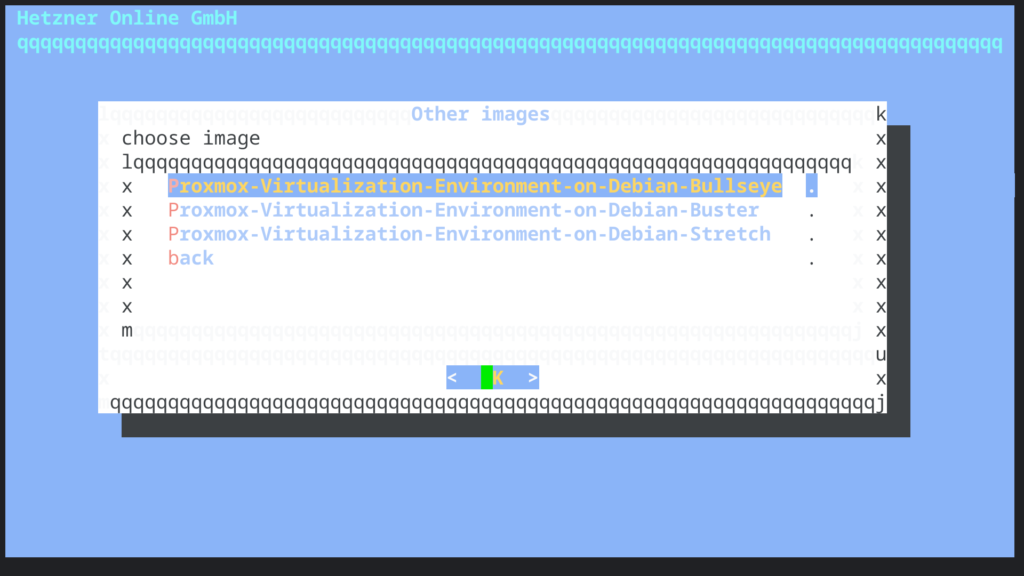
Wow! We can go straight into Proxmox without having first to install Debian and then install Proxmox on top of Debian!
The actual install is straightforward. We select a Debian version, perhaps Bullseye, the current Debian stable release.
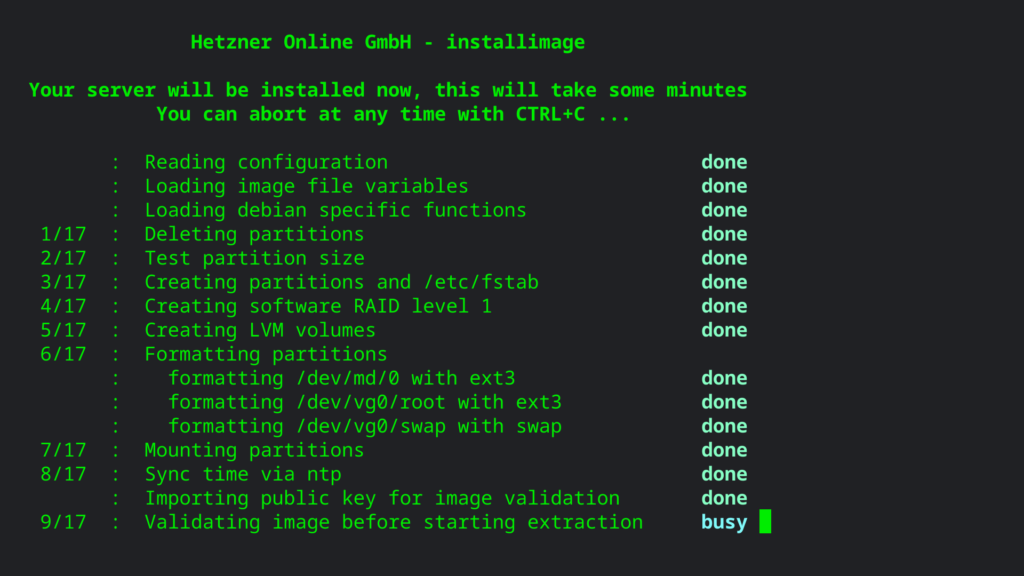
Next, we are dropped into an editor where we can configure a few parameters. Stuff like hostname, etc. We also get to select the filesystem type and to arrange the disk partitions. Once everything is configured, press F10 (Esc then 0 also works).
The install takes a few minutes during which we get progress reports.
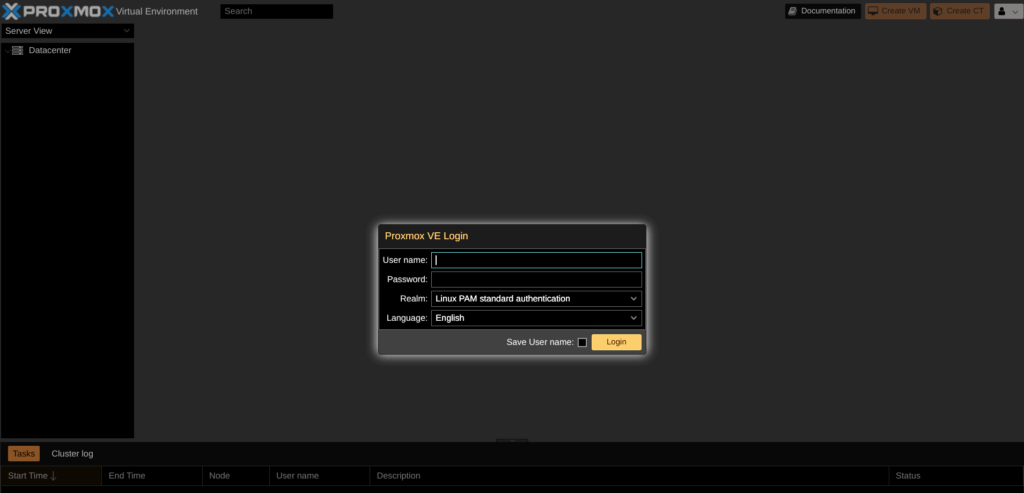
Once the install completes, we can reboot our server out of the Rescue System install environment, and Proxmox comes up! Here’s https://$Server_IP:8006
Issues To Consider
Password
If we set an ssh key to log in to our server, we might need to login via ssh and create a password for the root user before he can login to the the Proxmox GUI.
Accessing The Web GUI
The Proxmox web GUI initially requires https plus a security override. We have to obtain validated certificates to replace the original self-signed certificates. This can be done in the web GUI.
When trying to log in to the web GUI, don’t forget the “s” in “https” and don’t forget port 8006!
Security
Let’s not forget security such as fail2ban, firewall rules, and 2FA. Be careful with the firewall rules! The default is drop, so if you turn on the firewall before setting allow rules you can lock yourself out.
Additional References
Proxmox has a helpful Support Forum.
Hetzner Instalimage has a Github repository.
Proxmox has a self-hosted git repository which has a Github mirror.
Related Posts:
Are You Running Automated Updates? Fail Back Easily With Proxmox Snapshots! But There's a Catch...
BLACK FRIDAY: Cheap Dedicated Servers in Taiwan and Hong Kong from HostingInside!
BLACK FRIDAY: ColoCrossing has VPS Offers at Just $11.99/YEAR! Dedicated Servers for $12.33/Month o...
server.net - Now in Amsterdam! Special 3-Month 30% Discount on Dedicated Server Stock, AMD Ryzen, ...
Providers: Grow Your Business in 2025 - Partner with LowEndBox for FREE Advertising!
Interested in LowEnd Apple Silicon Mac Hosting? Check Out Alexhost's Offer!
It feels like just yesterday—but it was actually fifty years ago—that I stood in a doorway, watching yard after yard of ASCII art scroll out of a Teletype Model 33, surrounded by a group of laughing, wide-eyed tech enthusiasts. That was my first taste of computing, and I’ve been hooked ever since.
My Low End Adventure began right here on LowEndBox, when I stumbled across the perfect deal on a dedicated server from OVH a few years ago. That moment opened the door to a whole new world of tinkering, learning, and community.
Today, I’m the proud owner of Darkstar—a lovingly maintained antique server currently colocated in Dallas, Texas at LevelOneServers.com. She may be older than most, but she runs like a champ and has taught me more than a few lessons about hardware and humility.
In addition to writing for LowEndBox and helping out as a moderator on LowEndTalk, I spend my time exploring the worlds of programming, networking, and Linux system administration. There’s always something new to learn—and luckily, the LowEnd community is filled with brilliant, generous people who are more than willing to teach.
All these years later, I’m still learning, still experimenting, and still having a blast.
It’s very, very fun here on the Low End… isn’t it? 😊


Hello,
Thank you for this useful tip. I successfully install proxmox VE in few seconds.
Thales