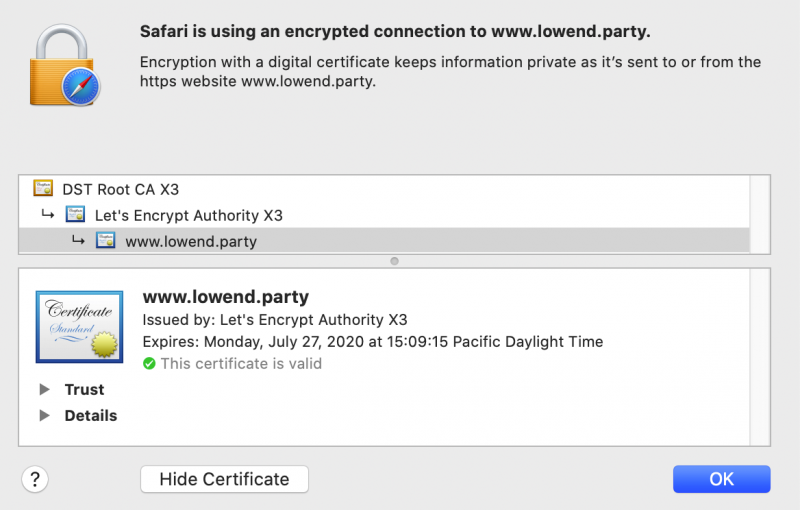
Let’s Encrypt is a free https certificate you can install on your cheap VPS for free, browser-validated https. In this tutorial, we’ll walk through setting up Let’s Encrypt https on an nginx host running on Debian 10.
We’ll be installing nginx from scratch but not will not be getting into php-fpm and other extensions in this tutorial. I’ll be starting from a spanking new VPS on Vultr.
This tutorial assumes that you’ve already got your DNS records setup. In other words, if you’re setting up for www.example.com, then www.example.com already has an A record or CNAME that points to your VPS. Note that the certbot installer we’ll be using will query DNS, so this must be working properly.
Installing and Setting Up nginx
Installing nginx in straightforward:
apt-get update && apt-get upgrade
apt-get install nginx
I’ll be setting up www.lowend.party and putting its web root in /web/www.lowend.party.
Let’s configure the web root and log directory:
mkdir -p /web/www.lowend.party
mkdir -p /var/log/nginx/www.lowend.party
chown www-data:adm /var/log/nginx/www.lowend.party
Configure Logs and Rotation
We want separate logs for each domain we host, and we want to rotate those logs. We can Debian’s log rotation system to accomplish this. We do this by placing the appropriate rules file in /etc/logrotate.d. Start with nginx’s basic log rotation rule:
cp /etc/logrotated.d/nginx /etc/logrotate.d/nginx_domain_logs
Now edit /etc/logrotate.d/nginx_domain_logs and modify as follows:
# change this: /var/log/nginx/*.log {
# to this:
/var/log/nginx/*/*.log {
Setting Up nginx http
Before setting up https, we’ll setup http. I’ll place a place-holder index.html in /web/www.lowend.party:
<html>
<head>
<title>www.lowend.party test page</title>
</head>
<body>
<h1>www.lowend.party works!</h1>
</body>
</html>
Now take a look at /etc/nginx. /etc/nginx/sites-available should have a file for every single site we might host. Then we symlink into /etc/nginx/sites-enabled to turn on or off specific sites.
Let’s create a basic nginx config by creating /etc/nginx/sites-available/www.lowend.party:
server {
  server_name www.lowend.party;

  access_log /var/log/nginx/www.lowend.party/access.log;
  error_log /var/log/nginx/www.lowend.party/error.log;

  location / {
    root /web/www.lowend.party;
    index index.html;
  }
}
Now make it live by:
ln -s /etc/nginx/sites-available/www.lowend.party /etc/nginx/sites-enabled/www.lowend.party
Let’s syntax check that file:
# nginx -t
nginx: the configuration file /etc/nginx/nginx.conf syntax is ok
nginx: configuration file /etc/nginx/nginx.conf test is successful
Now restart nginx:
systemctl restart nginx
Then I visited http://www.lowend.party and successfully saw the HTML I created early.
Activating Let’s Encrypt
Let’s start by installing certbot, the package that will setup https for us and keep our certificate fresh:
apt-get install certbot python-certbot-nginx
Now for the magic! Run this command:
certbot --authenticator webroot --installer nginx
And then follow along with the interactive install. My input is bolded:
# certbot --authenticator webroot --installer nginx
Saving debug log to /var/log/letsencrypt/letsencrypt.log
Plugins selected: Authenticator webroot, Installer nginx
Enter email address (used for urgent renewal and security notices) (Enter 'c' to
cancel): raindog308@raindog308.com

- - - - - - - - - - - - - - - - - - - - - - - - - - - - - - - - - - - - - - - -
Please read the Terms of Service at
https://letsencrypt.org/documents/LE-SA-v1.2-November-15-2017.pdf. You must
agree in order to register with the ACME server at
https://acme-v02.api.letsencrypt.org/directory
- - - - - - - - - - - - - - - - - - - - - - - - - - - - - - - - - - - - - - - -
(A)gree/(C)ancel: A

- - - - - - - - - - - - - - - - - - - - - - - - - - - - - - - - - - - - - - - -
Would you be willing to share your email address with the Electronic Frontier
Foundation, a founding partner of the Let's Encrypt project and the non-profit
organization that develops Certbot? We'd like to send you email about our work
encrypting the web, EFF news, campaigns, and ways to support digital freedom.
- - - - - - - - - - - - - - - - - - - - - - - - - - - - - - - - - - - - - - - -
(Y)es/(N)o: N

Which names would you like to activate HTTPS for?
- - - - - - - - - - - - - - - - - - - - - - - - - - - - - - - - - - - - - - - -
1: www.lowend.party
- - - - - - - - - - - - - - - - - - - - - - - - - - - - - - - - - - - - - - - -
Select the appropriate numbers separated by commas and/or spaces, or leave input
blank to select all options shown (Enter 'c' to cancel): 1
Obtaining a new certificate
Performing the following challenges:
http-01 challenge for www.lowend.party
Input the webroot for www.lowend.party: (Enter 'c' to cancel): /web/www.lowend.party
Waiting for verification...
Cleaning up challenges
Deploying Certificate to VirtualHost /etc/nginx/sites-enabled/www.lowend.party

Please choose whether or not to redirect HTTP traffic to HTTPS, removing HTTP access.
- - - - - - - - - - - - - - - - - - - - - - - - - - - - - - - - - - - - - - - -
1: No redirect - Make no further changes to the webserver configuration.
2: Redirect - Make all requests redirect to secure HTTPS access. Choose this for
new sites, or if you're confident your site works on HTTPS. You can undo this
change by editing your web server's configuration.
- - - - - - - - - - - - - - - - - - - - - - - - - - - - - - - - - - - - - - - -
Select the appropriate number [1-2] then [enter] (press 'c' to cancel): 2
Redirecting all traffic on port 80 to ssl in /etc/nginx/sites-enabled/www.lowend.party

- - - - - - - - - - - - - - - - - - - - - - - - - - - - - - - - - - - - - - - -
Congratulations! You have successfully enabled https://www.lowend.party

(rest snipped)
Now take a look at /etc/nginx/sites-available/www.lowend.party:
server {
  server_name www.lowend.party;

  access_log /var/log/nginx/www.lowend.party/access.log;
  error_log /var/log/nginx/www.lowend.party/error.log;

  location / {
    root /web/www.lowend.party;
    index index.html;
  }

  listen 443 ssl; # managed by Certbot
  ssl_certificate /etc/letsencrypt/live/www.lowend.party/fullchain.pem; # managed by Certbot
  ssl_certificate_key /etc/letsencrypt/live/www.lowend.party/privkey.pem; # managed by Certbot
  include /etc/letsencrypt/options-ssl-nginx.conf; # managed by Certbot
  ssl_dhparam /etc/letsencrypt/ssl-dhparams.pem; # managed by Certbot
}
server {
  if ($host = www.lowend.party) {
    return 301 https://$host$request_uri;
  } # managed by Certbot

  server_name www.lowend.party;
  listen 80;
  return 404; # managed by Certbot
}
certbot has done the following:
- provisioned an SSL certification for www.lowend.party
- loaded the SSL configuration in /etc/letsencrypt
- updated /etc/nginx/sites-available/www.lowend.party and put the proper nginx rules in place to serve HTTPS
- also added an entry so that if you connect on http, it redirects to https
And going to http://www.lowend.party in my browser confirms everything is working correctly.

Keeping Your Certificate Up to Date
Here’s a cool part of the certbot system: this chore is already taken care of for you.
Take a peek in /etc/systemd/system/certbot.timer and you’ll see a job is setup to run twice a day to check renewal and renew if needed.


May I suggest a few modifications to this tutorial?
1. First, it is worth to think twice before enabling access-logfile as it might cause zillions of small writes to disk, basically one line in logfile for every piece of website being served to every client. I personally recommend to turn access.log off, but in case someone really needs it, at least activate buffered writing:
access_log /var/log/nginx/www.lowend.party/access.log combined buffer=32k flush=10s;
This way access-logs are written to disk only every 10 seconds of when 32kB buffer is full (whatever comes first).
2. With all do respect to letsencrypt-folks and their good work, certbot is utterly stupid client, and that http->https redirect section just prooves it. Why in heavens name would someone use “if” in it? Avoid “if” whenever possible! The server already listens on “www.lowend.party”, so why should someone need to check $host? Instead of:
server {
if ($host = http://www.lowend.party) {
return 301 https://$host$request_uri;
} # managed by Certbot
server_name http://www.lowend.party;
listen 80;
return 404; # managed by Certbot
}
use:
server {
server_name http://www.lowend.party;
listen 80;
return 301 https://$host$request_uri;
}
You see how much simpler is it? The same goal achieved without calling “if” from rewrite-module. I know we are talking about small example-site here where logs or “ifs” do not matter. But if someone learns to do it this way, he will use it later with bigger sites too. And there it might matter…
Thanks for the feedback Jarry, I will point this out to the author.
@Jarry makes some good points about Certbot being kinda stupid for newbies. Their automatic modification of Nginx server blocks is risky and really depends on how you are setting up your servers.
I prefer the manual request for Certbot SSL generation:
https://stackoverflow.com/questions/49172841/install-certbot-letsencrypt-without-interaction/57019299#57019299
This way Certbot will never mess with your Nginx config files. Of course, it requires having good config of your Nginx files to begin with, but after you settle that so no need for Certbot messing with it…
Just in case someone wants to use suggested modification, there should be no “http://” or “https://” inside of server{} declaration. Smart comment editor added it on its own :-)
Because that “if” section is returning http requests to https, not port 80 to https. Their rule includes all the cases where http is not used on port 80.
By the way for those who don’t need public certificates by a third-party, Debian has the “ssl-cert” package. It’s like certbot for self-signed. https://wiki.debian.org/Self-Signed_Certificate#Easier_Alternative_for_STEP_2
You are completely wrong. Although web-server could listen on any port, no “server” declaration of nginx configuration means it is listening on “all” ports! You can omit “listen”, then it is per default port 80.
But in the above mentioned example it is exactly specified port 80. It is not important that “listen” directive is under “if”. “server” declaration is evaluated as whole, during server start-up (not just when some request comes). Order of those lines is not important (btw, this is typical for nginx configuration).
So that “if” condition redirects http request coming for server http://www.lowend.party listening on port 80 to https request. Only this and no other. And that’s why this “if” is useless. You can test it on your vps if you want ;-)
“https://domain.tld:80” works on certbot’s configuration, wrongly redirects on yours. Certbot is an accessible solution which also aims to upgrade already existing environments, not just new ones.
I’m not going to argue with you as it apparently makes no sense. As the last try, here is what nginx-folks say about it. I think they are best qualified to address this (btw, I did my training @ nginx, and this was one of many topics addressed by trainer). It is up to every nginx-user to decide who is right: you, or me & nginx team:
https://www.nginx.com/blog/creating-nginx-rewrite-rules/#https
For certbot a fail-safe automatic configuration which doesn’t break things and doesn’t require manual intervention has a priority over efficiency. That’s the reason behind choosing “if”.
Thanks for your contribution @Raindog308
Great article. Thank you.