Moodle is an open source Learning Management System or LMS. It hails as the worlds most popular learning platform with over 153M users worldwide. Moodle is consumable in 3 basic hosted varieties: DIY (self-hosted,) Hosted by Moodle for pretty reasonable price points, and Hosted by Moodle Partners. The Moodle product portfolio includes Core, App, Workplace, Cloud, a social platform called MoodleNet, and a certification program called Moodle Education.
Always thought whomever named the project was crazy but it turns out Moodle is an acronym
![]()
M Modular
O Object-
O Oriented
D Dynamic
L Learning
E Environment
Targeted Audience
This tutorial is targeted at enthusiasts, educators and entrepreneurs that want to use Moodle to convey their own courses and information to learners, be they traditional students, workers, or anyone else.
Difficulty: Moderate
Found that following the installation guide on the Moodle site left out a number of important steps that needed to be figured out along the way such as required php-modules, and MariaDB file formats. All of that information were easily resolved with a google search but I’ve tried to make this tutorial more inclusive of those steps.
Why
There are so many corporate requirements for compliance training on Cyber Security, Corporate Policy, new hire on-boarding, and any other sort of customized education that needs to be reported and tracked that it is likely a very common request to corporate IT for recommendations on a Learning Management System or Platform. Moodle is a solid contender in that space.
Prerequisites
- Moodle requires a web server like
- Apache
- a SQL relational database management system like
- MySQL
- MariaDB
- PostgresSQL
- PHP https://www.php.net/ a server side scripting language for building sites
- To send notification emails: sendmail or access to an SMTP server
- Git command line
- This tutorial is for a server running Ubuntu Linux release 18.04.
- You need SUDO access and the ability to modify configuration files like mariadb.cnf, and php.ini
Getting Started
Let’s start off with updating Ubuntu to the latest and greatest
$ sudo apt-get update [sudo] password for user: Ign:1 http://dl.google.com/linux/chrome/deb stable InRelease Hit:2 http://dl.google.com/linux/chrome/deb stable Release Get:4 http://security.ubuntu.com/ubuntu bionic-security InRelease [88.7 kB] Hit:5 http://us.archive.ubuntu.com/ubuntu bionic InRelease Get:6 http://us.archive.ubuntu.com/ubuntu bionic-updates InRelease [88.7 kB] Get:7 http://us.archive.ubuntu.com/ubuntu bionic-backports InRelease [74.6 kB] Fetched 252 kB in 1s (213 kB/s) Reading package lists... Done user@dev:~$ sudo apt-get upgradeuser@dev:~$ sudo apt-get upgrade Reading package lists... Done Building dependency tree Reading state information... Done Calculating upgrade... Done The following packages were automatically installed and are no longer required: linux-headers-4.18.0-15 linux-headers-4.18.0-15-generic linux-image-4.18.0-15-generic linux-modules-4.18.0-15-generic linux-modules-extra-4.18.0-15-generic Use 'sudo apt autoremove' to remove them. The following packages have been kept back: libreoffice-avmedia-backend-gstreamer libreoffice-base-core libreoffice-calc libreoffice-core libreoffice-draw libreoffice-gnome libreoffice-gtk3 libreoffice-impress libreoffice-math ### BUNCH OF PACKAGES THAT WON’T show up on a server install… 230 upgraded, 0 newly installed, 0 to remove and 15 not upgraded. Need to get 45.7 MB/107 MB of archives. After this operation, 2,821 kB disk space will be freed. Do you want to continue? [Y/n] ###HIT YES#### Get:1 http://us.archive.ubuntu.com/ubuntu bionic-updates/main amd64 ubuntu-release-upgrader-gtk all 1:18.04.34 [9,376 B] Get:2 http://us.archive.ubuntu.com/ubuntu bionic-updates/main amd64 ubuntu-release-upgrader-core all 1:18.04.34 [25.2 kB] … ###TAKE A SHORT BREAK AND COME BACK |
Hopefully your update/upgrade went well and you didn’t run into anything really annoying like your drive filled up and your server caught fire.
Install Apache2
Apache is one of the oldest and most reliable web servers available and it runs approximately 44.77% of the internet’s sites. It is free and open source.
| $ sudo apt-get install apache2 Reading package lists… Done Building dependency tree Reading state information… Done The following packages were automatically installed and are no longer required: linux-headers-4.18.0-15 linux-headers-4.18.0-15-generic linux-image-4.18.0-15-generic linux-modules-4.18.0-15-generic linux-modules-extra-4.18.0-15-generic Use ‘sudo apt autoremove’ to remove them. The following additional packages will be installed: apache2-bin apache2-data apache2-utils libapr1 libaprutil1 libaprutil1-dbd-sqlite3 libaprutil1-ldap liblua5.2-0 Suggested packages: apache2-doc apache2-suexec-pristine | apache2-suexec-custom The following NEW packages will be installed: apache2 apache2-bin apache2-data apache2-utils libapr1 libaprutil1 libaprutil1-dbd-sqlite3 libaprutil1-ldap liblua5.2-0 0 upgraded, 9 newly installed, 0 to remove and 15 not upgraded. Need to get 1,713 kB of archives. After this operation, 6,920 kB of additional disk space will be used. Do you want to continue? [Y/n] Get:1 http://us.archive.ubuntu.com/ubuntu bionic/main amd64 libapr1 amd64 1.6.3-2 [90.9 kB]… ### Lots of downloading and stuff goes on here |
Let’s assume you didn’t get some sort of show stopping error message and that Apache installed correctly.
If you don’t know your server’s IP address by memory I’m a big fan of ifconfig
$ ifconfig enp0s3: flags=4163<UP,BROADCAST,RUNNING,MULTICAST> mtu 1500 inet 10.0.10.15 netmask 255.255.255.0 broadcast 10.0.2.255 inet6 fe80::234e:e48c:93f3:2a0c prefixlen 64 scopeid 0x20<link> ether 08:00:27:40:b2:0c txqueuelen 1000 (Ethernet) RX packets 541278 bytes 641517592 (641.5 MB) RX errors 0 dropped 0 overruns 0 frame 0 TX packets 128871 bytes 8581698 (8.5 MB) TX errors 0 dropped 0 overruns 0 carrier 0 collisions 0 enp0s8: flags=4163<UP,BROADCAST,RUNNING,MULTICAST> mtu 1500 inet 192.168.1.140 netmask 255.255.255.0 broadcast 192.168.1.255 inet6 fe80::6039:8d60:8da:cfa3 prefixlen 64 scopeid 0x20<link> inet6 2600:1700:1181:5520:f5a7:98:a603:3cb8 prefixlen 64 scopeid 0x0<global> inet6 2600:1700:1181:5520:84db:b2d8:8c4:3c5d prefixlen 64 scopeid 0x0<global> … |
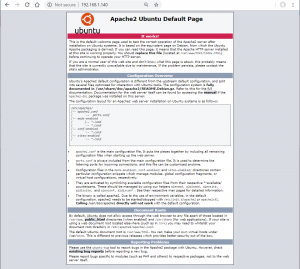
Visit your server’s IP address in your web browser and you should see the friendly Apache2 Ubuntu Default Page.
Installing MariaDB
MariaDB is a fork of MySQL, started by the folks that originally wrote MySQL and sold it to Oracle and I’m pretty sure MariaDB is actually the upstream for a lot of the features and improvements that go into MySQL. The default version on Ubuntu 18.04 at the time of writing is MariaDB version 10.1. Since MySQL and MariaDB are so closely intertwined it is common to see commands that use mysql in the name. They are generally interchangeable.
user@dev:~$ sudo apt install mariadb-server [sudo] password for user: Reading package lists... Done Building dependency tree Reading state information... Done The following additional packages will be installed: galera-3 gawk libaio1 libconfig-inifiles-perl libdbd-mysql-perl libdbi-perl libhtml-template-perl libjemalloc1 libmysqlclient20 libsigsegv2 libterm-readkey-perl mariadb-client-10.1 mariadb-client-core-10.1 mariadb-common mariadb-server-10.1 mariadb-server-core-10.1 mysql-common socat Suggested packages: gawk-doc libmldbm-perl libnet-daemon-perl libsql-statement-perl libipc-sharedcache-perl mailx mariadb-test tinyca The following NEW packages will be installed: galera-3 gawk libaio1 libconfig-inifiles-perl libdbd-mysql-perl libdbi-perl libhtml-template-perl libjemalloc1 libmysqlclient20 libsigsegv2 libterm-readkey-perl mariadb-client-10.1 mariadb-client-core-10.1 mariadb-common mariadb-server mariadb-server-10.1 mariadb-server-core-10.1 mysql-common socat 0 upgraded, 19 newly installed, 0 to remove and 15 not upgraded. Need to get 24.0 MB of archives. After this operation, 184 MB of additional disk space will be used. Do you want to continue? [Y/n] ### HIT ENTER ### Get:1 http://us.archive.ubuntu.com/ubuntu bionic/main amd64 libsigsegv2 amd64 2.12-1 [14.7 kB]… Setting up mariadb-server-10.1 (1:10.1.40-0ubuntu0.18.04.1) ... Created symlink /etc/systemd/system/mysql.service → /lib/systemd/system/mariadb.service. Created symlink /etc/systemd/system/mysqld.service → /lib/systemd/system/mariadb.service. Created symlink /etc/systemd/system/multi-user.target.wants/mariadb.service → /lib/systemd/system/mariadb.service. Setting up mariadb-server (1:10.1.40-0ubuntu0.18.04.1) ... Processing triggers for libc-bin (2.27-3ubuntu1) ... Processing triggers for ureadahead (0.100.0-21) ... Processing triggers for systemd (237-3ubuntu10.23) ... |
Check that it starts automatically and that it is running with system control
user@dev:~$ sudo systemctl status mariadb ● mariadb.service - MariaDB 10.1.40 database server Loaded: loaded (/lib/systemd/system/mariadb.service; enabled; vendor preset: enabled) Active: active (running) since Mon 2019-07-01 06:06:08 CDT; 1min 29s ago Docs: man:mysqld(8) https://mariadb.com/kb/en/library/systemd/ Main PID: 25995 (mysqld) Status: "Taking your SQL requests now..." Tasks: 27 (limit: 4915) CGroup: /system.slice/mariadb.service └─25995 /usr/sbin/mysqld |
Change defaults with mysql_secure_installation. Make sure you do this on any production system and if you don’t: Do not come crying to me.
user@dev:~$ sudo mysql_secure_installation NOTE: RUNNING ALL PARTS OF THIS SCRIPT IS RECOMMENDED FOR ALL MariaDB SERVERS IN PRODUCTION USE! PLEASE READ EACH STEP CAREFULLY! In order to log into MariaDB to secure it, we'll need the current password for the root user. If you've just installed MariaDB, and you haven't set the root password yet, the password will be blank, so you should just press enter here. Enter current password for root (enter for none): OK, successfully used password, moving on... Setting the root password ensures that nobody can log into the MariaDB root user without the proper authorisation. Set root password? [Y/n] New password: Re-enter new password: Password updated successfully! Reloading privilege tables.. ... Success! By default, a MariaDB installation has an anonymous user, allowing anyone to log into MariaDB without having to have a user account created for them. This is intended only for testing, and to make the installation go a bit smoother. You should remove them before moving into a production environment. Remove anonymous users? [Y/n] ... Success! Normally, root should only be allowed to connect from 'localhost'. This ensures that someone cannot guess at the root password from the network. Disallow root login remotely? [Y/n] ... Success! By default, MariaDB comes with a database named 'test' that anyone can access. This is also intended only for testing, and should be removed before moving into a production environment. Remove test database and access to it? [Y/n] - Dropping test database... ... Success! - Removing privileges on test database... ... Success! Reloading the privilege tables will ensure that all changes made so far will take effect immediately. Reload privilege tables now? [Y/n] ... Success! Cleaning up... All done! If you've completed all of the above steps, your MariaDB installation should now be secure. Thanks for using MariaDB! user@dev:~$ |
Set InnoDB’s default file format
Next we need to modify the mariadb.cnf file to support the barracuda file format because newer versions of Moodle require it for full UTF-8 support, the default is 3 bytes and Moodle requires full support for 4 bytes. If you really want to know more https://docs.moodle.org/37/en/MySQL_full_unicode_support
Note if you mis-type barracude nothing is going to work. Save yourself some time and don’t mistype. If you do make a boo-boo and MariaDB won’t start on you anymore the error log is in /var/log/mysql/error.log by default.
user@dev:/var/www/html/moodle$ sudo vi /etc/mysql/mariadb.cnf # The MariaDB configuration file # # The MariaDB/MySQL tools read configuration files in the following order: # 1. "/etc/mysql/mariadb.cnf" (this file) to set global defaults, # 2. "/etc/mysql/conf.d/*.cnf" to set global options. # 3. "/etc/mysql/mariadb.conf.d/*.cnf" to set MariaDB-only options. # 4. "~/.my.cnf" to set user-specific options. # # If the same option is defined multiple times, the last one will apply. # # One can use all long options that the program supports. # Run program with --help to get a list of available options and with # --print-defaults to see which it would actually understand and use. # # This group is read both both by the client and the server # use it for options that affect everything # [client-server] # Import all .cnf files from configuration directory !includedir /etc/mysql/conf.d/ !includedir /etc/mysql/mariadb.conf.d/ [client] default-character-set = utf8mb4 [mysqld] innodb_file_format = Barracuda innodb_file_per_table = 1 innodb_large_prefix character-set-server = utf8mb4 collation-server = utf8mb4_unicode_ci skip-character-set-client-handshake [mysql] default-character-set = utf8mb4 |
After modifying the configuration file please make sure to restart MariaDB
user@dev:/var/www/html/moodle$ sudo systemctl restart mariadb.service user@dev:/var/www/html/moodle$ sudo systemctl status mariadb.service ● mariadb.service - MariaDB 10.1.40 database server Loaded: loaded (/lib/systemd/system/mariadb.service; enabled; vendor preset: enabled) Active: active (running) since Wed 2019-07-03 05:20:48 CDT; 9s ago Docs: man:mysqld(8) https://mariadb.com/kb/en/library/systemd/ Process: 5005 ExecStartPost=/bin/sh -c systemctl unset-environment _WSREP_START_POSITION (code=exit Process: 5003 ExecStartPost=/etc/mysql/debian-start (code=exited, status=0/SUCCESS) Process: 4883 ExecStartPre=/bin/sh -c [ ! -e /usr/bin/galera_recovery ] && VAR= || VAR=`/usr/bin/ Process: 4881 ExecStartPre=/bin/sh -c systemctl unset-environment _WSREP_START_POSITION (code=exite Process: 4880 ExecStartPre=/usr/bin/install -m 755 -o mysql -g root -d /var/run/mysqld (code=exited Main PID: 4976 (mysqld) Status: "Taking your SQL requests now..." Tasks: 27 (limit: 4915) CGroup: /system.slice/mariadb.service └─4976 /usr/sbin/mysqld Jul 03 05:20:47 dev systemd[1]: Starting MariaDB 10.1.40 database server... Jul 03 05:20:47 dev mysqld[4976]: 2019-07-03 5:20:47 140277788638336 [Note] /usr/sbin/mysqld (mysqld Jul 03 05:20:48 dev /etc/mysql/debian-start[5007]: Upgrading MySQL tables if necessary. Jul 03 05:20:48 dev systemd[1]: Started MariaDB 10.1.40 database server. Jul 03 05:20:48 dev /etc/mysql/debian-start[5010]: /usr/bin/mysql_upgrade: the '--basedir' option is Jul 03 05:20:48 dev /etc/mysql/debian-start[5010]: Looking for 'mysql' as: /usr/bin/mysql Jul 03 05:20:48 dev /etc/mysql/debian-start[5010]: Looking for 'mysqlcheck' as: /usr/bin/mysqlcheck Jul 03 05:20:48 dev /etc/mysql/debian-start[5010]: This installation of MySQL is already upgraded to Jul 03 05:20:48 dev /etc/mysql/debian-start[5018]: Checking for insecure root accounts. Jul 03 05:20:48 dev /etc/mysql/debian-start[5022]: Triggering myisam-recover for all MyISAM tables an lines 1-26/26 (END) |
Install PHP
PHP or the PHP Hypertext Preprocessor is a server-side scripting language that is used to render data and code into html for your web browser to display.
Install PHP 7.2, the default on Ubuntu 18.04. You need several modules to support Moodle including:
- php
- libapache2-mod-php
- php-mysql
- php-xml
- php-curl
- php-zip
- php-gd
- php-intl
- php-mbstring
- php-xmlrpc
- php-soap
user@dev:~$ sudo apt install php libapache2-mod-php php-mysql php-xml php-curl php-zip php-gd php-intl php-mbstring php-xmlrpc php-soap Reading package lists... Done Building dependency tree Reading state information... Done The following additional packages will be installed: libapache2-mod-php7.2 php-common php7.2 php7.2-cli php7.2-common php7.2-json php7.2-opcache php7.2-readline Suggested packages: php-pear The following NEW packages will be installed: libapache2-mod-php libapache2-mod-php7.2 php php-common php7.2 php7.2-cli php7.2-common php7.2-json php7.2-opcache php7.2-readline 0 upgraded, 10 newly installed, 0 to remove and 15 not upgraded. Need to get 3,866 kB of archives. After this operation, 17.2 MB of additional disk space will be used. Do you want to continue? [Y/n] ###HIT ENTER ### Get:1 http://us.archive.ubuntu.com/ubuntu bionic/main amd64 php-common all 1:60ubuntu1 [12.1 kB] … Creating config file /etc/php/7.2/cli/php.ini with new version Setting up libapache2-mod-php7.2 (7.2.19-0ubuntu0.18.04.1) ... Creating config file /etc/php/7.2/apache2/php.ini with new version Module mpm_event disabled. Enabling module mpm_prefork. apache2_switch_mpm Switch to prefork apache2_invoke: Enable module php7.2 Setting up libapache2-mod-php (1:7.2+60ubuntu1) ... Setting up php7.2 (7.2.19-0ubuntu0.18.04.1) ... Setting up php (1:7.2+60ubuntu1) ... |
Create an info.php file and throw it into /var/www/html so that you can validate that php is functioning.
user@dev:~$ sudo vi /var/www/html/info.php user@dev:~$ cat /var/www/html/info.php <?php phpinfo(); ?> |
Restart apache or none of this is going to work
user@dev:~$ sudo systemctl restart apache2 |

Visit the info.php page in your web browser! Get some proof of life from Apache that Php is working.
The output goes on for days…
Let’s download Moodle!
We have two methods here, download it from the website http://moodle.org/downloads or clone it from git. Downloading it from the website seems safe and easy so let’s try and clone it from git instead.
user@dev:~$ cd /var/www/html user@dev:/var/www/html$ git clone -b MOODLE_36_STABLE git://git.moodle.org/moodle.git Command 'git' not found, but can be installed with: ###HAHA sudo apt install git user@dev:/var/www/html$ sudo apt install git Reading package lists... Done Building dependency tree Reading state information... Done The following additional packages will be installed: git-man liberror-perl Suggested packages: git-daemon-run | git-daemon-sysvinit git-doc git-el git-email git-gui gitk gitweb git-cvs git-mediawiki git-svn The following NEW packages will be installed: git git-man liberror-perl 0 upgraded, 3 newly installed, 0 to remove and 15 not upgraded. Need to get 4,733 kB of archives. After this operation, 33.9 MB of additional disk space will be used. Do you want to continue? [Y/n] Get:1 http://us.archive.ubuntu.com/ubuntu bionic/main amd64 liberror-perl all 0.17025-1 [22.8 kB] Get:2 http://us.archive.ubuntu.com/ubuntu bionic-updates/main amd64 git-man all 1:2.17.1-1ubuntu0.4 [803 kB] Get:3 http://us.archive.ubuntu.com/ubuntu bionic-updates/main amd64 git amd64 1:2.17.1-1ubuntu0.4 [3,907 kB] Fetched 4,733 kB in 4s (1,208 kB/s) Selecting previously unselected package liberror-perl. (Reading database ... 162347 files and directories currently installed.) Preparing to unpack .../liberror-perl_0.17025-1_all.deb ... Unpacking liberror-perl (0.17025-1) ... Selecting previously unselected package git-man. Preparing to unpack .../git-man_1%3a2.17.1-1ubuntu0.4_all.deb ... Unpacking git-man (1:2.17.1-1ubuntu0.4) ... Selecting previously unselected package git. Preparing to unpack .../git_1%3a2.17.1-1ubuntu0.4_amd64.deb ... Unpacking git (1:2.17.1-1ubuntu0.4) ... Setting up git-man (1:2.17.1-1ubuntu0.4) ... Setting up liberror-perl (0.17025-1) ... Processing triggers for man-db (2.8.3-2ubuntu0.1) ... Setting up git (1:2.17.1-1ubuntu0.4) ... user@dev:/var/www/html$ git clone -b MOODLE_36_STABLE git://git.moodle.org/moodle.git fatal: could not create work tree dir 'moodle': Permission denied user@dev:/var/www/html$ sudo git clone -b MOODLE_36_STABLE git://git.moodle.org/moodle.git Cloning into 'moodle'... remote: Counting objects: 1103808, done. remote: Compressing objects: 100% (249653/249653), done. remote: Total 1103808 (delta 822202), reused 1102742 (delta 821136) Receiving objects: 100% (1103808/1103808), 365.09 MiB | 7.64 MiB/s, done. Resolving deltas: 100% (822202/822202), done. Checking out files: 100% (19061/19061), done. user@dev:/var/www/html$ ls ### expecting to see the moodle folder index.html info.php moodle user@dev:/var/www/html$ |
Now we need to create the database and user that Moodle will interact with to store data!
sudo mysql -u root -p [sudo] password for user: ### THIS IS YOUR SUDO PASSWORD Enter password: ### THIS IS THE PASSWORD FOR MySQL Welcome to the MariaDB monitor. Commands end with ; or \g. Your MariaDB connection id is 52 Server version: 10.1.40-MariaDB-0ubuntu0.18.04.1 Ubuntu 18.04 Copyright (c) 2000, 2018, Oracle, MariaDB Corporation Ab and others. Type 'help;' or '\h' for help. Type '\c' to clear the current input statement. MariaDB [(none)]> CREATE DATABASE moodle DEFAULT CHARACTER SET utf8mb4 COLLATE utf8mb4_unicode_ci; Query OK, 1 row affected (0.00 sec) MariaDB [(none)]> GRANT SELECT,INSERT,UPDATE,DELETE,CREATE,CREATE TEMPORARY TABLES,DROP,INDEX,ALTER ON moodle.* TO 'moodleuser'@'localhost' IDENTIFIED BY 'password12345thatsthecombinationonmyluggage'; Query OK, 0 rows affected (0.00 sec) MariaDB [(none)]> quitBye |
Create your Moodle Data Directory. I put mine in /var/moodledata. The Moodle documentation is absent of a specific recommendation for this.
user@dev:/var$ sudo mkdir /var/moodledata user@dev:/var$ chmod 0777 /var/moodledata ### everyone makes mistakes... chmod: changing permissions of '/var/moodledata': Operation not permitted user@dev:/var$ sudo chmod 0777 /var/moodledatauser@dev:/var$ sudo chown www-data /var/moodledata/ |
Copy config-disti.php to config.php and modify variables like the database, database username, and data password to the settings used when the database was created.
Modify config.php to fit our values from throughout the process. //========================================================================= // 1. DATABASE SETUP //========================================================================= // First, you need to configure the database where all Moodle data // // will be stored. This database must already have been created // // and a username/password created to access it. // $CFG->dbtype = 'mariadb'; // 'pgsql', 'mariadb', 'mysqli', 'sqlsrv' or 'oci' $CFG->dblibrary = 'native'; // 'native' only at the moment $CFG->dbhost = 'localhost'; // eg 'localhost' or 'db.isp.com' or IP $CFG->dbname = 'moodle'; // database name, eg moodle $CFG->dbuser = 'moodleuser'; // your database username $CFG->dbpass = 'password12345thatsthecombinationonmyluggage'; // your database password $CFG->prefix = 'mdl_'; // prefix to use for all table names |
Further down the file we need to set the URL for our moodle installation. Please keep in mind the IP address in this example is from my lab environment and you should substitute your own domain name or IP as appropriate.
//========================================================================= // 2. WEB SITE LOCATION //========================================================================= // Now you need to tell Moodle where it is located. Specify the full // web address to where moodle has been installed. If your web site // is accessible via multiple URLs then choose the most natural one // that your students would use. Do not include a trailing slash // // If you need both intranet and Internet access please read // http://docs.moodle.org/en/masquerading $CFG->wwwroot = 'http://192.168.1.140/moodle'; |
Data files location… This is starting to feel like work.
//========================================================================= // 3. DATA FILES LOCATION //========================================================================= // Now you need a place where Moodle can save uploaded files. This // directory should be readable AND WRITEABLE by the web server user // (usually 'nobody' or 'apache'), but it should not be accessible // directly via the web. // // - On hosting systems you might need to make sure that your "group" has // no permissions at all, but that "others" have full permissions. // // - On Windows systems you might specify something like 'c:\moodledata' $CFG->dataroot = '/var/moodledata'; |
Run the Moodle installer!
Visit your website at the URL you configured. Mine looks like this.

Hit Confirm and if you have all of the correct modules installed you will get to the web based installer.

Hit continue! NOW DO NOT DO ANYTHING!!! JUST WAIT A LITTLE BIT The installer is running and the first thing it loads is a blank page. If you have a complete lack of patience you might high refresh which will screw up everything see “The Mulligan” You need to wait and the page will populate with results as Moodle installs like 4,000,000,000 modules.
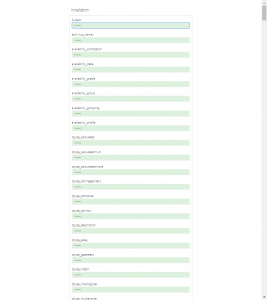
Modules for days…
When it finally gets to the bottom hit continue… and configure your administrator account. Kudos to the Moodle team for having a complex password requirement be the default.

Now configure your front page settings

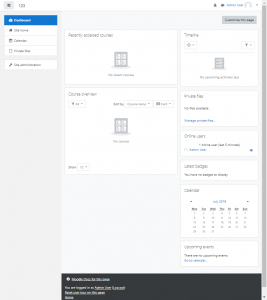
Once that’s complete it should take you to the Dashboard and you’re off to the races. Create courses, add users, etc. Have fun!
THE MULLIGAN
mul·li·gan /ˈməliɡən/ Learn to pronounce nounINFORMAL•NORTH AMERICAN - a stew made from odds and ends of food. - (in informal golf) an extra stroke allowed after a poor shot, not counted on the scorecard. |
If you botched up your FRESH UNUSED MOODLE INSTALL WITH NO DATA I found that dropping the database and re-running the installation script was a remedy. If you have data and you do this it will blow it all away in an unrecoverable fashion.
user@dev:/var/www/html/moodle/admin$ sudo mysql -u root -p Enter password: Welcome to the MariaDB monitor. Commands end with ; or \g. Your MariaDB connection id is 205 Server version: 10.1.40-MariaDB-0ubuntu0.18.04.1 Ubuntu 18.04 Copyright (c) 2000, 2018, Oracle, MariaDB Corporation Ab and others. Type 'help;' or '\h' for help. Type '\c' to clear the current input statement. MariaDB [(none)]> show tables; ERROR 1046 (3D000): No database selected MariaDB [(none)]> show databases; +--------------------+ | Database | +--------------------+ | information_schema | | moodle | | mysql | | performance_schema | +--------------------+ 4 rows in set (0.00 sec)MariaDB [moodle]> DROP DATABASE moodle;Query OK, 407 rows affected (5.45 sec) MariaDB [(none)]> CREATE DATABASE moodle; Query OK, 1 row affected (0.00 sec) MariaDB [(none)]> quit Bye |
Then go back to the web interface to run the installer.
Security Considerations
Configure Moodle and Apache to run over https in production.
Configure 2 factor authentication for administrators and users where possible.
References / Appendix
Author’s bio
Sean Richards, CISSP, is a 20 year linux enthusiast and security practitioner. He loves animals, BBQ, and bicycles.
https://www.linkedin.com/in/seangrichards/
https://github.com/seangrichards/
https://twitter.com/seangrichards
Related Posts:
Programming Languages I Have Known and Loved (and Hated)
MySQL and MariaDB: Dead Code Walking
Oracle Database 26ai is Coming Out in January. You Don't Need It. But There's a Free Version.
NameCrane Offloaded SQL: Get Hosted MySQL in the Cloud for Very Cheap!
MariaDB Swallowed by Private Equity
Setup a Highly Available WordPress Site From Scratch, 2024 Edition! Part 7: Round-Robin DNS, Let’s ...
Kaylee is the Media Specialist at LowEndBox and a long-time follower of the LowEndTalk community. After years of reading and engaging with the platform from the sidelines, she officially joined the team to help expand LowEndBox’s reach, storytelling, and presence across digital channels.
Kaylee brings a strong passion for accessible technology and digital media. Her technical interests span the Apple ecosystem, Android devices, and emerging maker trends like 3D printing. She’s also deeply immersed in the world of social media—she manages the official LowEndBox social feeds and is always on the lookout for creative ways to spotlight community activity, tutorials, and hosting trends.
Whether she’s writing industry news, covering community milestones, interviewing providers, or crafting technical explainers, Kaylee approaches her work with a genuine enthusiasm for tech and a talent for clear, engaging communication.
Outside of the screen, she enjoys creative writing, photography, and discovering new tech tools to experiment with.
You can find her content right here on LowEndBox, as well as on the official LowEndBox Twitter and YouTube accounts—where she helps bring the LowEnd community to life.


Leave a Reply