Many people like the concept of self-hosting email and then try it only to realize it isn’t the slightest bit fun worrying about email deliverability.
Quite a few hosts out there have unfavorable IP reputations at the biggest email service providers.
It’s particularly hard to inbox on Microsoft-owned services.
And, well… inboxing is no joke when you’re using it for business. Sometimes it’s crucial those emails are delivered.
So, you don’t really want to be using the IPs of these cheap VPS hosts; instead, you want to use a cheap (but high-quality) relay to send your emails on your behalf.
When you rely on other relays; those IPs are managed for you and are already warmed up at the biggest ESPs.
My personal favorite relay is Amazon SES — it costs $0.10 per 1,000 emails. It’s the best balance of price and deliverability, hands down.
This tutorial uses Amazon SES, but you could use any SMTP provider.
There’s a thread on our sister forum, LowEndTalk, with a couple of different options; like MXroute.
Anyways, what using Amazon SES means for you is that if you go over here and grab a $2 per month VPS, and you send less than 10,000 emails per month (which I’m willing to bet you do), we can accomplish self-hosting our own email for less than $3 per month.
The best part is you’ll control 100% of your data and we’ll even do it in three easy steps. Let’s dive in.
Step 1: Spin Up a Debian 12 Server
Debian, thnx.
First things first, after you grab a server to set up everything on, you’ll need to install Debian 12 as the distribution.
I suggest configuring an SSH key as your authentication method, instead of a text-based password, and disabling access to root entirely (create a new user with root privileges).
I would also change the default SSH port; these tasks are simple ways to greatly increase your security.
Technically, you could use Ubuntu with HestiaCP (the panel we’ll use to accomplish this), but I’d recommend Debian.
By the way, HestiaCP is a ridiculously easy control panel that ships with Roundcube and the ability to specify SMTP relay per domain.
It’s how we’ll do this in 15 minutes or less. Any of the $2 per month VPSs here will be powerful enough to run HestiaCP and self-host our email.
Make sure you’re fully updated before continuing and have both a valid hostname pointed towards your HestiaCP server, and an MX record as well.
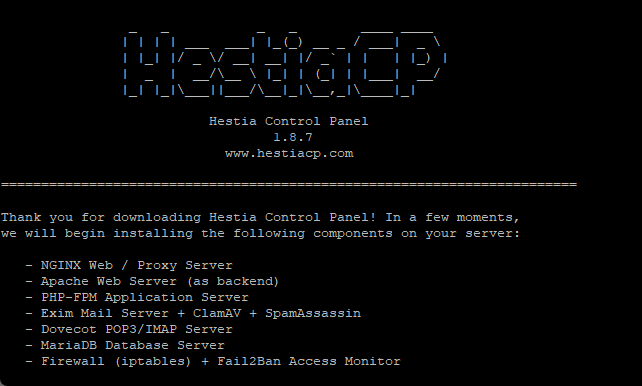
Step 2: Install HestiaCP
Installing HestiaCP is very simple. You only need to run two commands with root privileges:
wget https://raw.githubusercontent.com/hestiacp/hestiacp/release/install/hst-install.shThen:
sudo bash hst-install.sh --port '8083' --lang 'en' --apache yes --phpfpm yes --multiphp no --vsftpd no --proftpd no --named no --mariadb yes --mysql8 no --postgresql no --exim yes --dovecot yes --sieve no --clamav yes --spamassassin yes --iptables yes --fail2ban yes --quota no --api no --interactive yes --force no
Wait a while and allow the installer to continue:
After a bit once the installation successfully finishes, you’ll see the admin user provisioned in the format of:
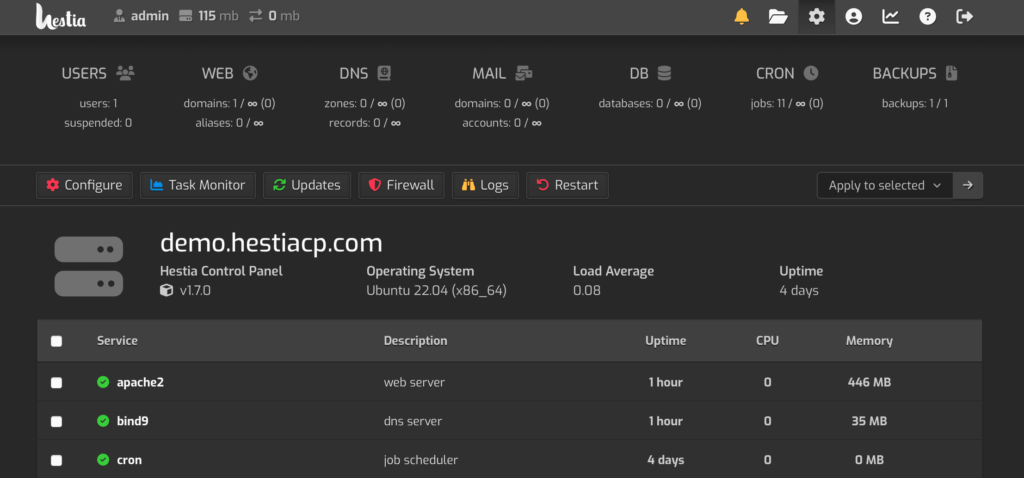
Congratulations!
You have successfully installed Hestia Control Panel on your server.
Ready to get started? Log in using the following credentials:
Admin URL: https://yourdomain.com:8083
Backup URL: https://yourip:8083
Username: admin
Password: randomly generated passwordThank you for choosing Hestia Control Panel to power your full stack web server,
we hope that you enjoy using it as much as we do!
Bingo bongo. We’re in business.

(These are bongo drums, by the way… in case you were curious.)
Step 3: Configure Amazon SES
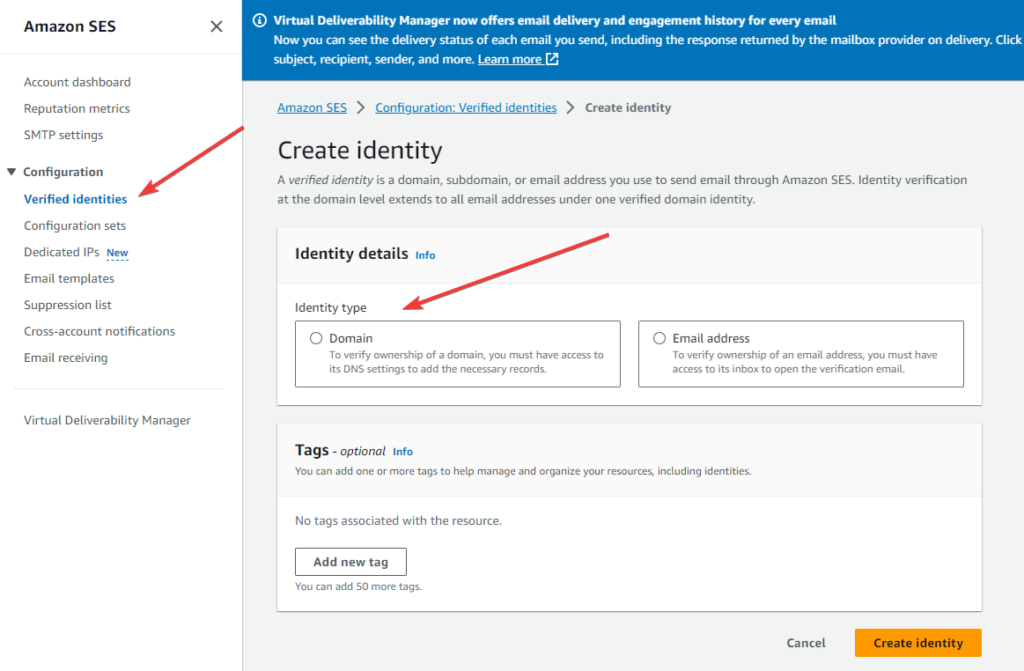
Next up is configuring Amazon SES, to do this you’ll first need to sign up for it here.
Then you’ll need to verify the domain you’re sending from.
You can either do this per email address, or per domain by DNS. I always pick per domain. It’s up to you.
Do NOT use a custom sent-by address. Our reply to/from address will be whatever your domain is, but you want the domain that’s actually sending your emails to be amazonses.com — this allows you to piggyback off their reputation.
For every single new domain you have, if you’re sending emails on behalf of it, it takes months and consistent efforts to warm up the reputation and keep it where it needs to be.
If you do for whatever reason decide to send from your own domain instead of amazonses.com, you’ll need to make sure you add an SPF record to your DNS with “v=spf1 a include:amazonses.com -all”.
By the way, Amazon SES is not for spamming. Like many relays, they require you to keep below a 1% report rate, which isn’t too hard to do when you’re sending legit emails that people want to see.
That being said, next on the domain verification process, you’ll want to select “Easy DKIM”:
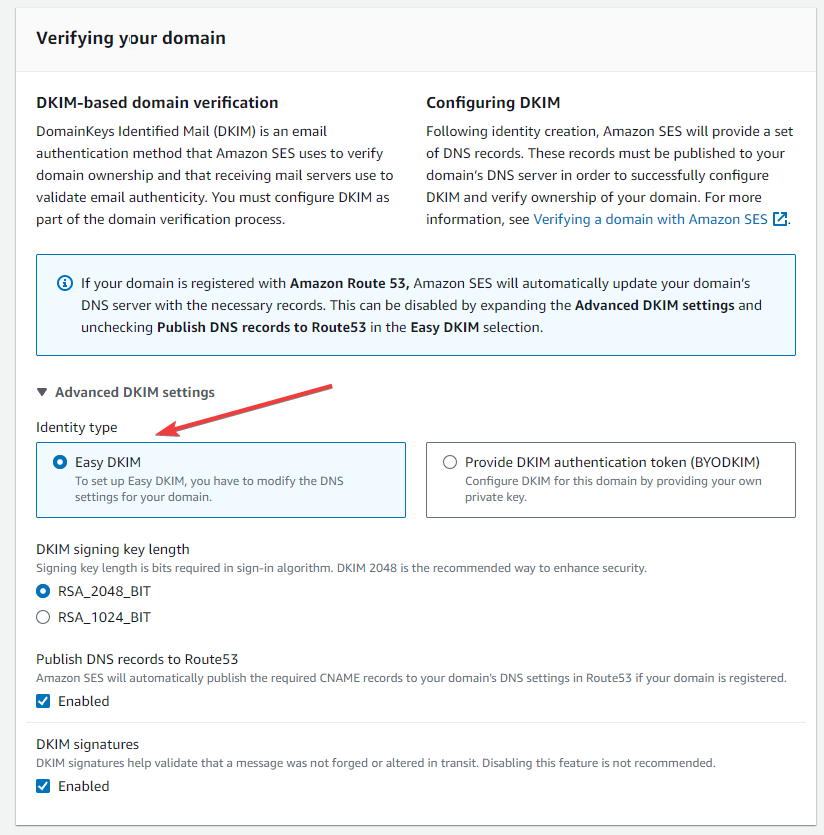
Proceed to follow through with the domain verification process and add the three DNS records to your domain.
After your domain is verified, go over to “SMTP settings” and click “Create SMTP credentials”:

Once you complete that, add a new non-admin user to HestiaCP and login as it, then add your desired domain you want to mail from in HestiaCP, and we can add the SMTP relay to HestiaCP:
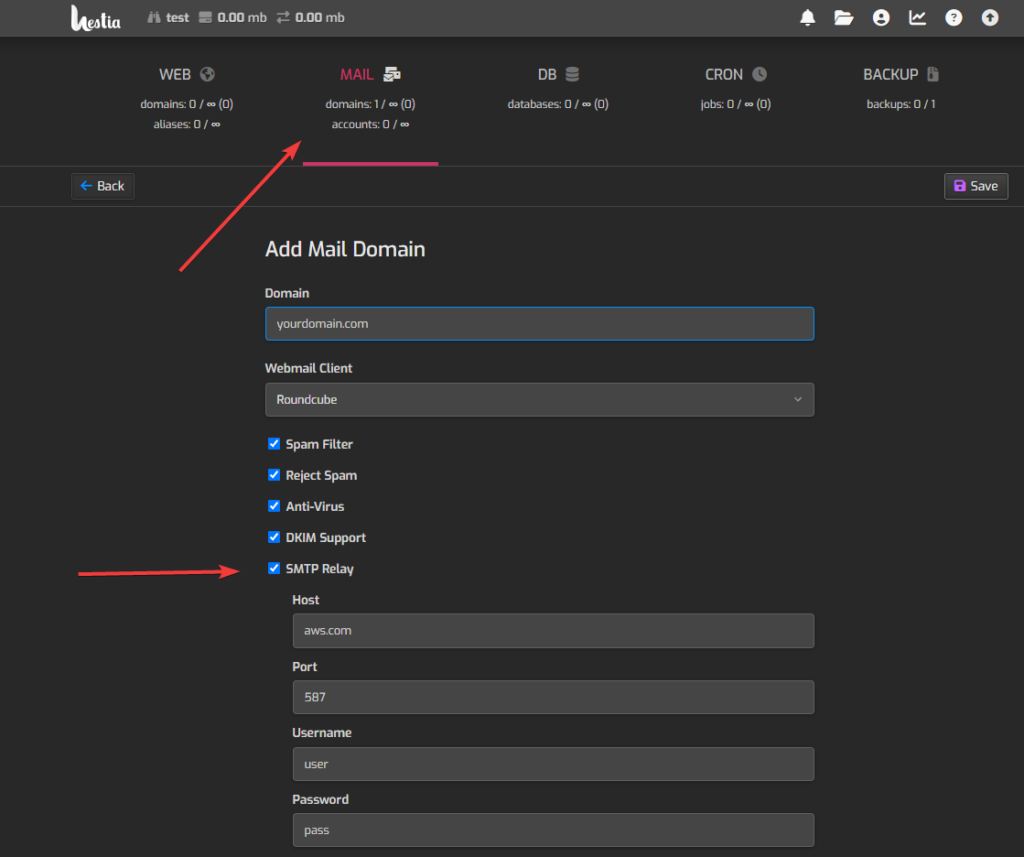
From that point forward it’s easy-peasy; you simply need to add your desired emails within the “Mail” tab of HestiaCP!
HestiaCP has installed everything you need for your mail server, including a user interface to write and receive emails, via Roundcube.
You’ll be able to configure your new mailboxes with your favorite email clients, too.
It comes with all the same standards and features you’re used to and requires little to no actual system administration with HestiaCP, so you can more or less set it up once and forget about it — besides occasional updates (or, you could automatically do that too).
See, self-hosting email doesn’t have to be that painful.
Related Posts:
Mango Mail's Spring Sale Has Begun! Get 35% OFF With This Code: 30GB Plan is Only $3.50/Month!
Mango Mail Summer Flash Sale! Get 35% off Great Email Hosting with Tons of Space and Loads of Featu...
Before You Click ‘Buy’ on That Hosting Deal, Read This Checklist And Avoid the #1 Mistake People Mak...
MangoMail: Spring Sale Is Now Live, Offering 3 Months FREE With Any Signup Between Now and May 31st!
LAST CHANCE on Lifetime Pricing: CraneMail Lifetime Plans Go Up In Price Starting April 1st, 2025
Mango Mail's Winter Sale is Now Extended Through January 10! Up to Six Months FREE Email Hosting!
I write things sometimes. Contact: hey@sirfoxy.com


Leave a Reply