
It’s been a while again, since I’ve posted a tutorial. I’ve been quite busy with a lot of things and have had a nice little vacation as well. But no worries, the tutorials are back on schedule and I’m planning to have one again every other week!
So, this tutorial is one for absolute beginners. I’ve done a tutorial once on setting up an SSH key pair and many people said: why not explain SSH first? Well, this tutorial is just that. If you’ve just purchased a server or are planning to do so, but don’t know what to do after you purchased it: this tutorial is for just that!
I’m going to give a brief overview of SSH and then I’ll show you how to connect with Windows (using PuTTY) and Ubuntu (using it’s default Terminal). This should get you into your server. What do to once actually on the server, is something I’m going to discuss another time.
About SSH
SSH is a network protocol and stands for ‘Secure Shell’. It is what is says it is: a means to securely access a shell account. A shell account is a user account on a remote server. So you may say it’s a way to securely log in to a remote server. SSH is usually used to execute commands on the remove server. There’s more uses for the protocol as well, besides logging in to a remote user account. For example: transferring files using SFTP or SCP, creating a simple tunnel, and other things.
SSH has been around since 1995 and has two versions: SSH-1 and SSH-2. Almost every server around these days uses SSH-2. SSH-1 is open to quite some vulnerabilities because of design flaws, which is the primary reason it’s not being used anymore. SSH is still under development, but no major or ground-breaking new features have been added for a while. The focus is on security and stability, as it should be.
Setting UP SSH Windows
Connecting to a server over SSH on Windows requires PuTTY. PuTTY is a free, small, stand-alone application that lets you connect to servers over SSH on Windows. Windows doesn’t come with SSH itself, so you really need a third party application for that. PuTTY can be downloaded here: http://www.chiark.greenend.org.uk/~sgtatham/putty/download.html. You just need ‘putty.exe’. Download it and put it somewhere to your liking. It doesn’t require anything else, so just launch it after downloading it. This should show PuTTY’s default screen:

In the ‘Host Name’ field, input the hostname or IP address of your server. I’ve chosen to use the IP address here. Now hit the ‘Open’ button. You should get a prompt titled ‘PuTTY Security Alert’. No worries, this is completely normal.
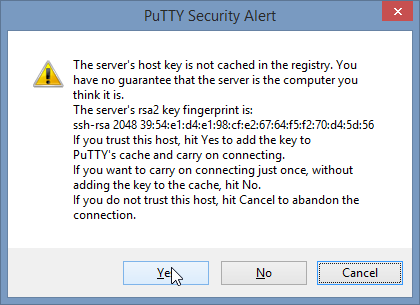
This prompt asks you whether you trust the host. It shows the host’s RSA fingerprint. SSH uses this fingerprint while connecting to see if the server is actually the same as it was before. In order to be able to do this, it needs to have the fingerprint first. So it prompts you whether you trust this host the first time you connect so it. If you say “Yes”, PuTTY will save the fingerprint in the so-called known_hosts file and use that to compare with the host’s RSA fingerprint on future connection attempts. If the host’s RSA fingerprint doesn’t match the known one, the host either got reinstalled or the host is not the one you think it is (possible indicating an attack). So, a quite useful mechanism altogether. Accepting your host’s RSA fingerprint should move you on to the next screen, the actual terminal:
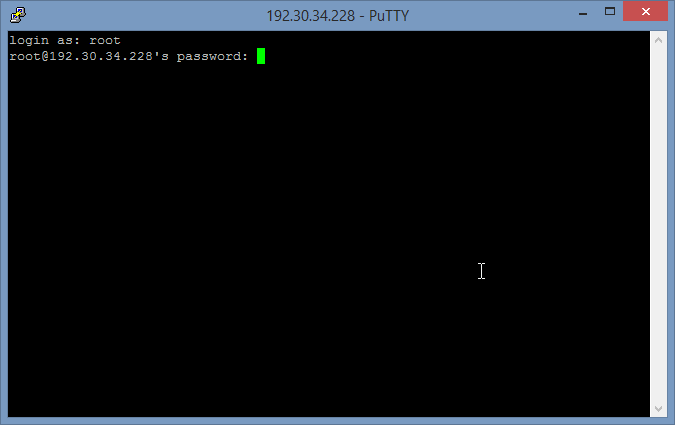
Here it asks you for your username and your password. In this case, I’ve used ‘root’ as the username. Type in your password and hit enter, this should give you a window like this (on Ubuntu hosts):
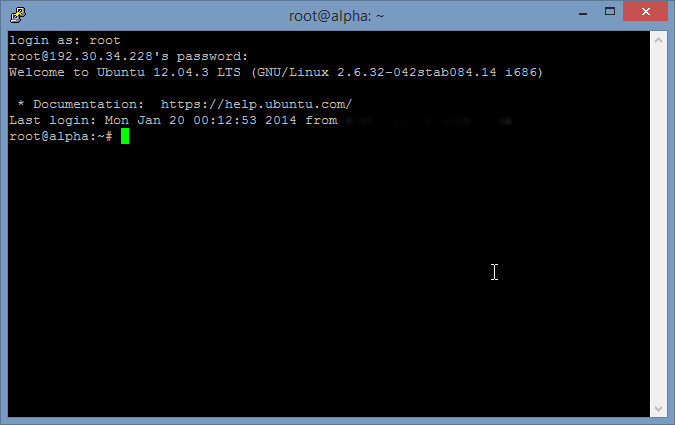
You have succesfully logged in to your server over SSH! Congratulations! That’s how simple it was.
From here on, you’re on your own from now on. You can use commands like ‘cd’ and ‘ls’ to move around a bit and explore your system, but more on that in a future tutorial!
Setting UP SSH Ubuntu
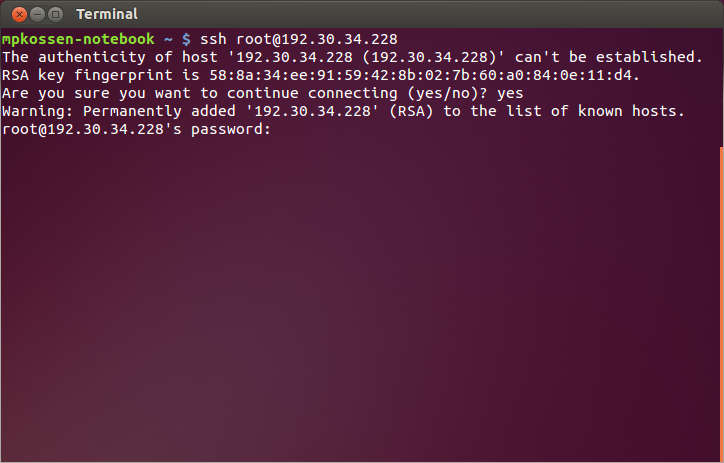
Connecting to a server over SSH on Ubuntu is somewhat easier. It doesn’t require a download. Instead, Ubuntu comes with an application named ‘Terminal’ and Ubuntu ships with an SSH client already installed. Open up the ‘Terminal’ application. You should see a window like this:
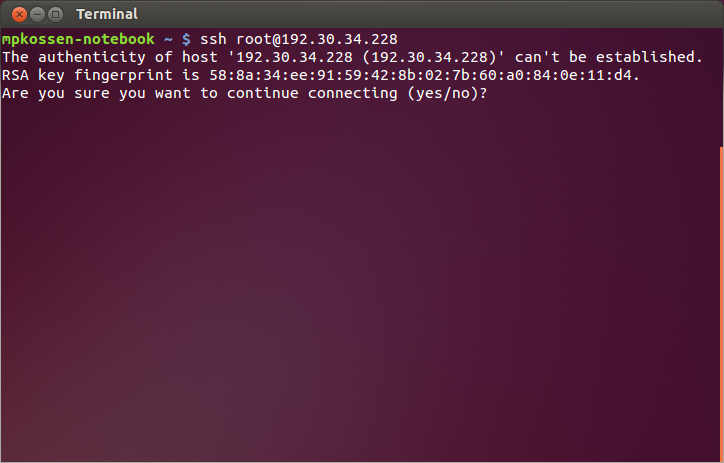
In the above window, I have already attempted to connect to a server. I did this by typing:
ssh root@192.30.34.228
In the terminal windows and hitting ‘Enter’. With this command, you start the SSH client application and tell it to connect to the server at 192.30.34.228 as user ‘root’. You should replace that IP with the IP address of your server.
It then asks you whether you trust the host. It shows the host’s RSA fingerprint. SSH uses this fingerprint while connecting to see if the server is actually the same as it was before. In order to be able to do this, it needs to have the fingerprint first. So it prompts you whether you trust this host the first time you connect so it. If you type “yes”, SSH will save the fingerprint in the so-called known_hosts file and use that to compare with the host’s RSA fingerprint on future connection attempts. If the host’s RSA fingerprint doesn’t match the known one, the host either got reinstalled or the host is not the one you think it is (possible indicating an attack). So, a quite useful mechanism altogether. Accepting your host’s RSA fingerprint should trigger the host to ask for your password:
Type in your password and hit enter, this should give you a window like this (on Ubuntu hosts):
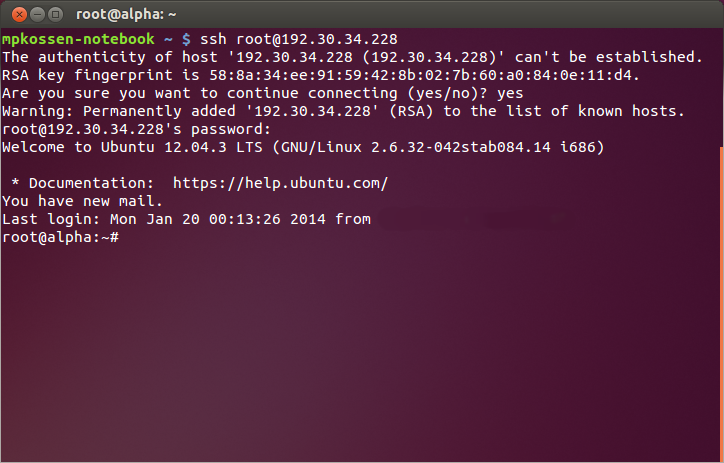
You have succesfully logged in to your server over SSH! Congratulations! That’s how simple it was.
From here on, you’re on your own from now on. You can use commands like ‘cd’ and ‘ls’ to move around a bit and explore your system, but more on that in a future tutorial!
Final note about the basics of SSH for Ubuntu and Windows
While this is only a very basic tutorial, it should show absolute beginners how to (and how easy it is to) connect to a VPS. In a next tutorial, I want to dive into some basic commands. I’m sure I can’t cook them all up myself, so if you know any commands I should really explain, let me know in the comments! This tutorial, combined with the follow-up, should be enough to get absolute beginners started on a VPS.
Up next time: Observing devices with Observium
Related Posts:
Are Tutorials Dead?
Have You Checked Out RackNerd's TikTok Channel? Video Content That Brings Web Hosting Mainstream!
From Oracle Cloud to TOR to Telegram: Check Out LowEndTalk Tutorials!
LowEndBox BUSTED for Dealing in Mind Expanding Substances
Guest Post: Top Five Reasons Why Most Businesses Either Fail or Stay Stagnant by Dustin B. Cisneros,...
How To Compile The 3 Items Needed To Begin MIT’s Free Xv6 Online Operating System Course!
Maarten Kossen served as the administrator of LowEndBox from 2013 to 2015, playing a key role in guiding the platform during a critical phase of its growth. During his tenure, Maarten introduced numerous improvements, helped shape editorial direction, and contributed to the evolution of LowEndBox as both a resource and a community hub for budget-conscious hosting users.
With a deep understanding of web hosting, server management, and open-source infrastructure, Maarten brought fresh ideas and steady leadership to the site, bridging the gap between the original vision of LowEndAdmin and the future of the platform.
Today, Maarten remains an active and valued member of the LowEndTalk community (@mpkossen), continuing to share his experience, engage in discussions, and support the broader LowEnd ecosystem.


Most of us hanging out here already know this. But again there are always some beginners learning new things and this might be quite useful to them.
thanks for the tutorial. 🙂
I’d recommend SSH Secure Shell Client. It has the command line and SFTP. It’s much better than putty in my opinion 🙂
i agree
I don’t think anyone still uses Winows or whatever it’s called.
I prefer XShell…
+1 for XShell.
Free for non-commercial use, saves passwords if you want, tabbed sessions, SFTP client.
+1 for OpenBSD Secure Shell
Don’t know that one. I’m checking it out right now.
Thank for the tutorial!
in windows, i usually using bitvise tunnelier 😀
I am brand new trying to use a vps to set up a vpn to watch my netflix. This was helpful to me, thanks. Are there anymore tutorials laying around?
can you explain me how to config ssh for tunneling as proxy ?
Thanks for your time with this tutorials it shines some light into the world of vps