If you are looking to setup some professional security cameras in your home and put the content in the cloud for remote storage/access, I would recommend looking at the wide range of solutions in the marketplace that are designed to satisfy this need. However, if like me you have a few Raspberry Pis sitting around and want to hack up something on your own, read on.
In this tutorial, I’m using several Raspberry Pi 3 Model B+ devices. Some have the standard Raspberry Pi camera, and some have SainSmart Wide Angle Fish-Eye cameras. They’re all connected to my home LAN via wireless. There’s nothing special about the RPi setups, so I won’t repeat what is so easily findable elsewhere. Note that in placing your cameras, you need to account for the fact that they need to be plugged into an outlet.
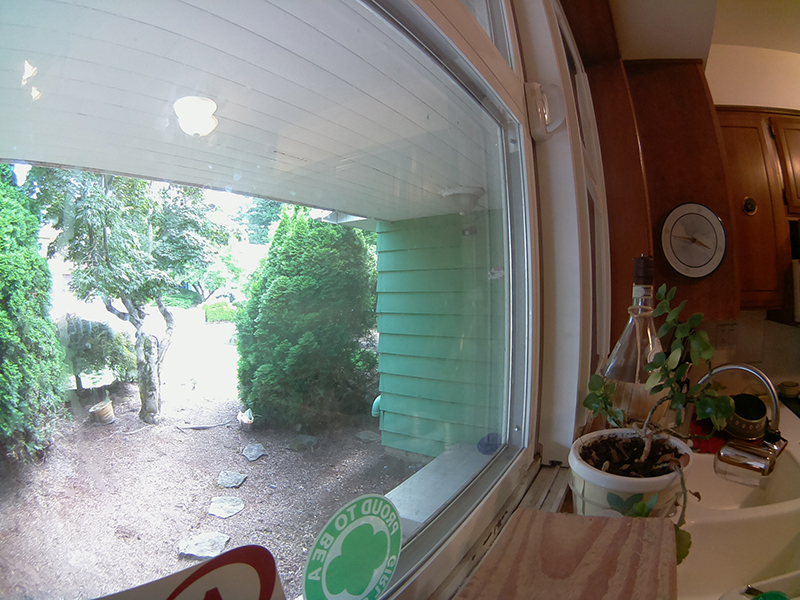
I call my system ‘cerebro’ after Professor Xavier’s device for scanning mutant brains, so the Pis are named cerebro1, cerebro2, etc. Mine doesn’t scan brains, just takes pictures, like this one:

Everything is done via pretty simple commands and some homemade daemons.
On the Raspberry Pis
Images are stored in /cerebro. Scripts are in /app/cerebro.
There are three scripts that run:
- cerebrod: This is the daemon that takes a picture every 5 seconds
- cerebro_uploaderd: This uploads the picture to the cloud
- a housekeeping cron job that cleans up old images
I take a pic once every 5 seconds. I run the capture script as a systemd daemon because cron only has a resolution of 1 minute.
Here is cerebrod_captured:
#!/bin/bash

# -v verbose
# -o output with pattern
# -ts make that pattern the unix epoch
# --exposure to auto
# --awb to auto
# -q 20 - did not see a huge dropoff vs. 50 but saved 2MB on size
# -t 86400000 number of ms in a day
# -tl 5000 take a pic every 5 seconds

HOSTNAME=$(/bin/hostname -s)
/usr/bin/raspistill -v -o /cerebro/${HOSTNAME}_%d.jpg -ts --exposure auto --awb auto -q 20 -t 86400000 -tl 5000
So you get names like cerebro2_1594507631.jpg, where ‘cerebro2’ is the name of the Raspberry Pi that took the picture and 1594507631 is the Unix epoch. Pics are 1.3MB, so over the course of an hour, this writes about 936MB per hour.
Here is the systemd unit file:
[Unit]
Description=cerebrod

[Service]
ExecStart=/app/cerebro/cerebrod
Restart=always
StartIntervalLimit=5
TimeoutStartSec=30
StandardOutput=/app/cerebro/cerebrod.log
StandardError=/app/cerebro/cerebrod.log
User=cerebro
Group=cerebro

[Install]
WantedBy=multi-user.target
To prevent the card from filling up, I have a simple cron job to clean up all images older than 1 hour:
find /cerebro -mmin +60 -exec rm -f {} \; > /dev/null 2>&1Finally, there is a daemon to upload files to my web site. Here is cerebro_uploaderd:
#!/bin/bash

HOSTNAME=$(/bin/hostname -s)
while [ 1 ] ; do
  time /usr/bin/rsync -avz -e "ssh -l ${HOSTNAME} -i /home/cerebro/.ssh/${HOSTNAME}" --exclude "*.jpg~" /cerebro cerebro@cerebro.lowend.party:/cerebro
  sleep 3
done
Note there is no –delete flag in that rsync. The –exclude covers cases where the jpeg is in the process of being written when this runs. What happens in that case is the rsync sees it but by the time it sends it, it’s gone, and there’s an error generated. Instead, I just let the next invocation (a few seconds later) catch the completed file.
Here is cerebro_uploaderd’s systemd unit file:
[Unit]
Description=cerebro security camera uploader

[Service]
ExecStart=/app/cerebro/cerebro_uploaderd
Restart=always
StartIntervalLimit=5
TimeoutStartSec=30
StandardOutput=/app/cerebro/cerebro_uploaderd.log
StandardError=/app/cerebro/cerebrod_uploaderd.log
User=cerebro
Group=cerebro

[Install]
WantedBy=multi-user.target
I restart both daemons once every 12 hours. I find they occasionally die for no reason – probably due to the limitations of the Raspberry Pi. Unlike normaly systems, I don’t restart cerebrod in the middle of the night – I want it taking pictures then. Instead, I restart it at 7am and 5pm, when someone is always home and awake. Regardless, it restarts so fast I don’t miss a picture. cerebro_uploaderd can restart any time.
00 17,7 * * * /bin/systemctl restart cerebrod
05 17,7 * * * /bin/systemctl restart cerebro_uploaderd
On the VPS
/cerebro is the directory where the Pis upload their pictures.
I have a simple archive program that moves older pictures into /cerebro_archive:
#!/bin/bash
find /cerebro -mday +1 -exec mv {} /cerebro_archive \; > /dev/null 2>&1
This is done just so that the viewing script runs faster.
And then a one-liner to clean out files older than 30 days:
find /cerebro -mday +30 -exec rm -f {} \; > /dev/null 2>&1I have nginx+php running, and the site is password-protected with basic authentication (using the auth_basic and auth_basic_user_file directives, over https). The app to view pictures is a very simple index.php:
<html>
<head>
<title>cerebro</title>
</head>
<body>
<h1>Cerebro</h1>
<?php
$fileList = glob('/cerebro/*.jpg');
$last_pics = array();
foreach ($fileList as $filename) {
  $chopped = str_replace("/cerebro/","",trim($filename, '.jpg'));
  list ($camera,$timestamp) = explode("_",$chopped);
  if ( $last_pics[$camera] < $timestamp ) {
    $last_pics[$camera] = $timestamp;
  }
}

foreach ( $last_pics as $camera => $timestamp ) {
  $filename = '/cerebro/' . $camera . '_' . $timestamp . '.jpg';
  echo "<div class=\"cam-pic-block\">\n";
  echo "<a href=\"" . $filename . "\" />\n";
  echo "<img class=\"cam-block\" src=\"" . $filename . "\" />\n";
  echo "</a>\n";
  echo "<p><i>" . $camera . " at " . date('r',$timestamp) . "</i></p>\n";
  echo "</div>\n";
  echo "<br />\n";
}
?>
</body>
</html>
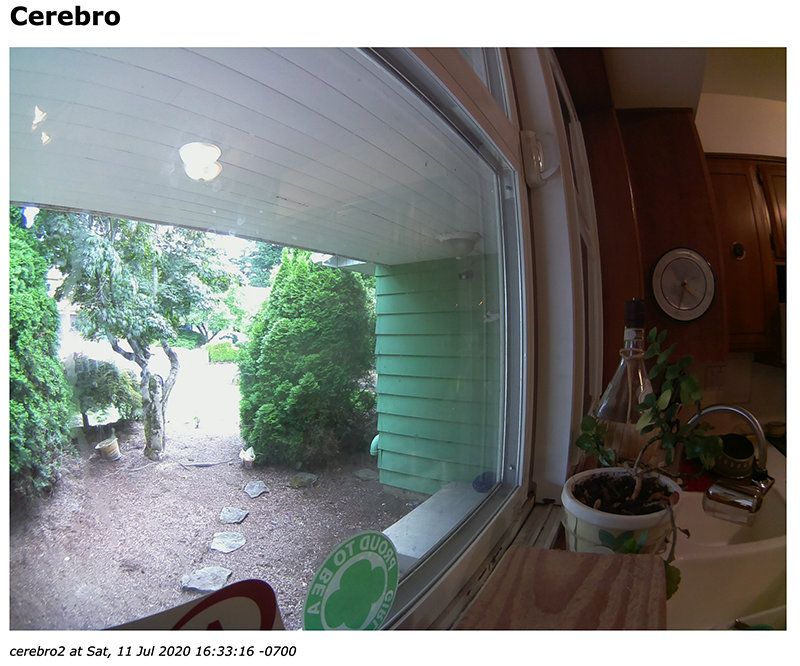
Here’s a screenshot of the viewing page:

Some Design Notes
Note that the on-line viewer only shows the most recent picture. My assumption is that if I needed to go and look back in time, I’d download a range of files and look through them.
Also note that you need to be mindful of your upload bandwidth. Each pic is 1.3MB, so if you have 5 cameras, that’s uploading 6.5MB every 5 seconds. Many residential broadband plans have much more download bandwidth than upload, so be sure your upload bandwidth can support this traffic.


Nice tutorial raindog! Another option is motionpi which is a full OS image for the pi which has recording, motion detection etc. You can also set up a VPS to pull from your cameras with something like zone alarm.
+1 for motionpi ! much easier and full of good features for surveillance