
Traditionally, authentication in Unix-based systems is done with passwords. This tests “something you know”. SSH keys offer a higher level of security by adding “something you have”- in this case, an SSH private key file. Even if an attacker was to guess your SSH passphrase, without the SSH private key file, this knowledge is not sufficient to allow him to login.
This tutorial will walk you through creating an SSH key on Linux, macOS, or Windows. In following tutorials we’ll show you how to use it to login, and optionally disable password-only logins.
Public/Private Key Basics
SSH keys use public key cryptography. When you generate a new SSH key, you will have two files: a private key and a public key. The private key you should keep on a trusted system at home, such as your PC, and it should never be shared with anyone. The public key will be placed on every server you wish to log into. The public key is truly public – you could post it on reddit and your security would in no way be compromised.
Virtually all Unix-based systems use OpenSSH from the OpenBSD project. OpenSSH supports several different encryption algorithms and you will need to choose which algorithm your key will use. Which algorithm you choose to use will be based on what kind of server you are connecting to. Note that this is server-dependent, not client-dependent:
- If your server has OpenSSH 6.5 or later, such as Debian 8+ or CentOS 7+, you should use ed25519.
- If your server is older, you should use RSA. Specifically, RSA with a 3072-bit key (which is the default).
- If you will be connecting to many servers and some are old, then RSA is the logical choice so you can use the same key across all servers.
Your SSH key will be passphrase-protected, which means that if someone were to somehow obtain your private key file, they cannot use it without knowing your passphrase (remember it’s both “something you have” and “something you know”). Make sure you follow the normal rules for strong passwords:
- long (16-32 characters or more)
- mix of uppercase/lowercase letters, numbers, and symbols
- no dictionary words
- don’t reuse passwords
Note that you can setup an ssh key without a passphrase. There are very valid reasons for doing so, such as using this key in batch scripts and other automation scenarios. However, unless you are specifically creating a key for this kind of unattended purpose, you should use a passphrase.
Generating a New SSH Key
Linux/macOS
OpenSSH includes a utility called ssh-keygen that we’ll use to generate a new key.
First, make sure you have an .ssh directory in your home directory. You can actually keep your ssh keys anywhere, but this is the traditional location. This directory should be mode 700 (drwx——). To ensure your directory is setup properly, open a terminal copy/paste the following:
[ ! -d ~/.ssh ] && mkdir ~/.ssh ; chmod 700 ~/.sshNow type the following to generate a key:
ssh-keygen -f ~/.ssh/my-ssh-key -t ed25519 -C 'ssh key for your@email.com'Let’s break that down:
-f: This is the file in which your key will be stored. After generation, two files will be created: my-ssh-key (the private key) and my-ssh-key.pub (the public key). Of course, you can name this file anything you wish.
-t: In this case, we’re using ed25519. You can also enter ‘rsa’ here to create a RSA key.
-C: This is a comment that will be included in your SSH key. This makes it easier to keep track of multiple keys.
There are other ssh-keygen parameters – see the man page if you’re curious.
Once you give the ssh-keygen command, you’ll be asked to enter a passphrase.
Here is an example of generating a key:
    $ ssh-keygen -f ~/.ssh/my-ssh-key -t ed25519 -C 'ssh key for your@email.com'
    Generating public/private ed25519 key pair.
    Enter passphrase (empty for no passphrase):
    Enter same passphrase again:
    Your identification has been saved in /home/example/.ssh/my-ssh-key.
    Your public key has been saved in /home/example/.ssh/my-ssh-key.pub.
    The key fingerprint is:
    SHA256:gIY5DGVDwq2ncvsz6KN1xthvO9LrPdySEl++87ZxRK8 ssh key for your@email.com
    The key's randomart image is:
    +--[ED25519 256]--+
    |+o*              |
    | * = .           |
    |  * o .       .  |
    | . +   .     . . |
    |  o     S     . .|
    |...+  .   .  . . |
    |..oo=. + =  . E  |
    | .+o+.=.* + .o   |
    |.o.o.*==.o.=o.   |
    +----[SHA256]-----+
If we look in our home directory’s .ssh directory, we see:
    $ ls -l ~/.ssh
    total 16
    -rw-------  1 example  staff  2655 Apr  2 15:35 my-ssh-key
    -rw-r--r--  1 example  staff   580 Apr  2 15:35 my-ssh-key.pub
    $ cat ~/.ssh/my-ssh-key.pub
    ssh-ed25519 AAAAC3NzaC1lZDI1NTE5AAAAIGPw+oAB0cfuJAaHWaEmXsgJzVm1B4+OP8Qr3ZL9nJf0 ssh key for your@email.com
The “ssh-ed25519” at the beginning of the line indicates the key type, and you can see the comment we entered at the end.
Windows
On Windows, we will use the venerable PuTTY package. It’s available for free download as either a .msi (Windows installer) or as a set of binaries. To generate the key, we will use puttygen.exe.
Once you’ve either installed via the installer or downloaded puttygen.exe, fire up that application:
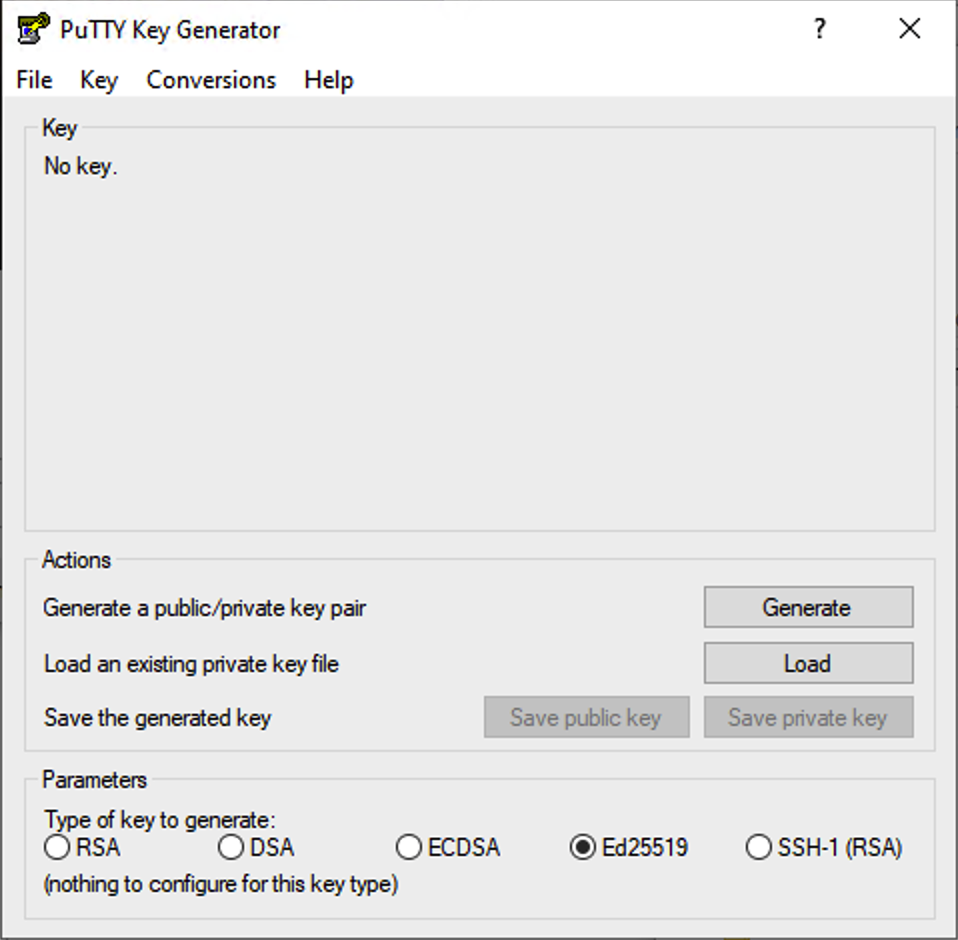
If you are generating an RSA key, make sure to change the “Number of bits in a generated key” to 3072. If you are generating an ed25519 key, then there is nothing to change.
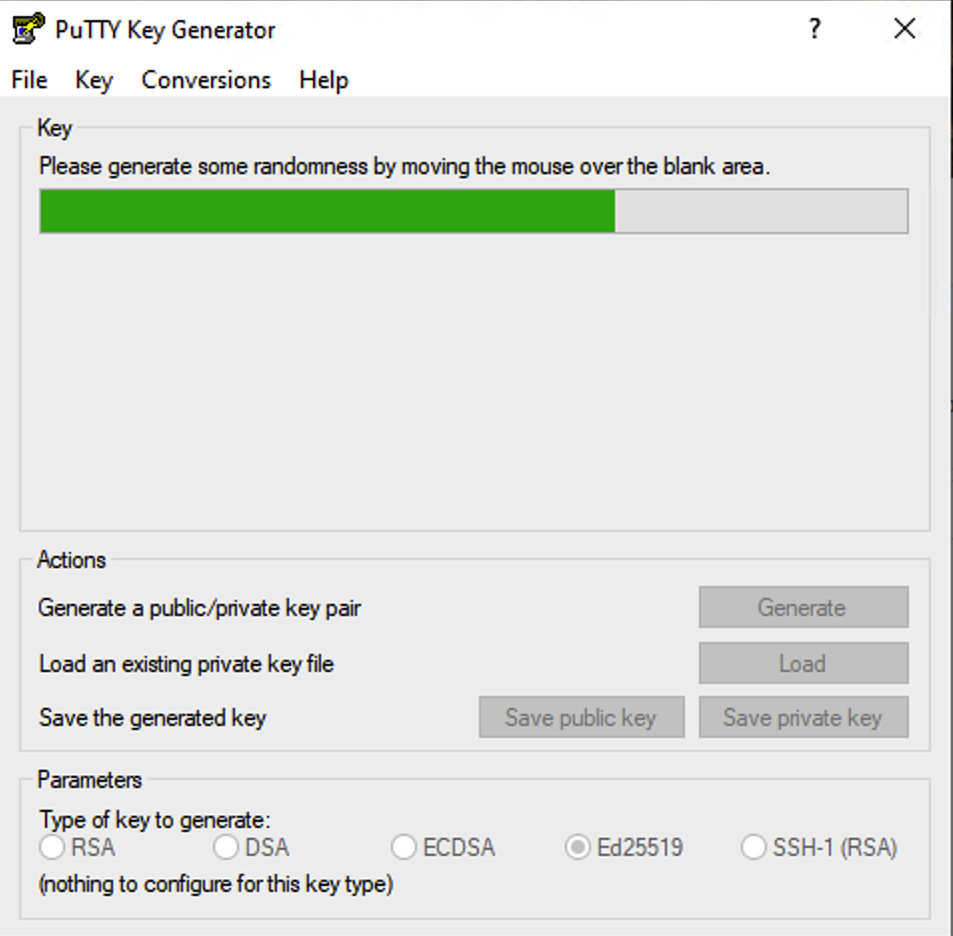
Click “Generate”. You’ll be prompted to move your mouse over the app’s window in order to generate entropy.
Next, modify the key’s comment if you wish and enter your passphrase.
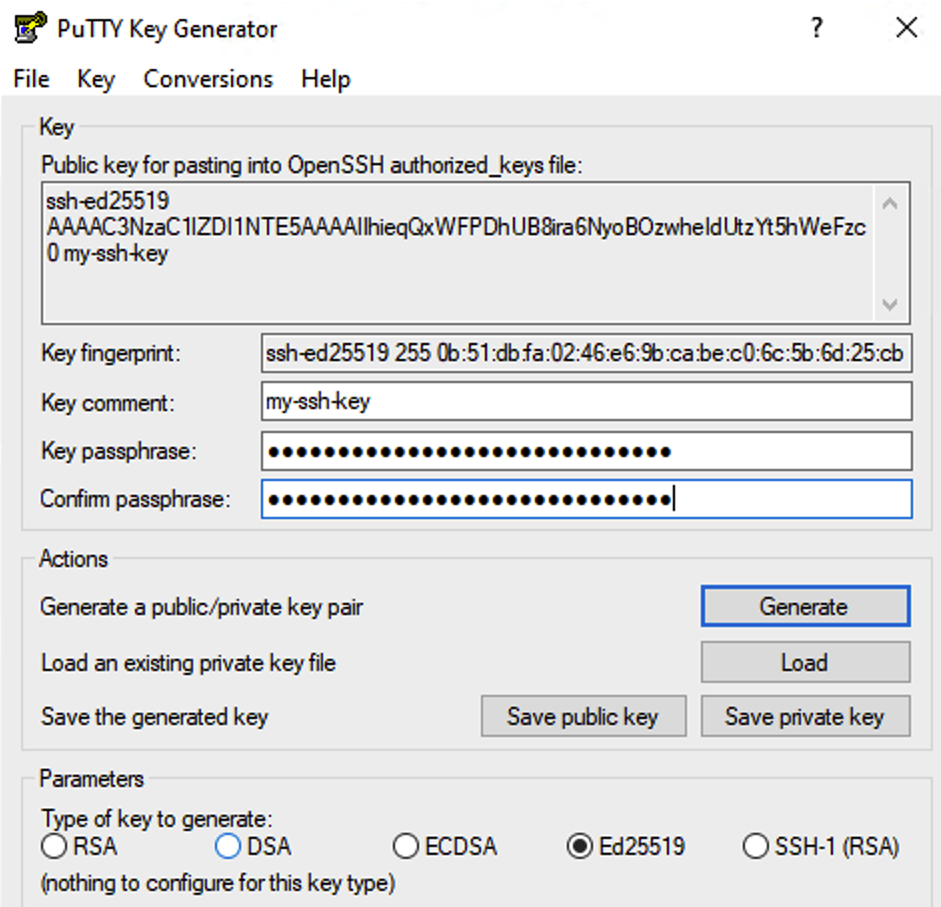
Then click “Save public key” and “Save private key”. You can save these wherever you wish but be sure the folder is kept safe. PuTTY will save your private key with a .ppk (PuTTY Private Key) extension, and your public key without an extension. In this case, they’ve saved them as “my-ssh-key”:

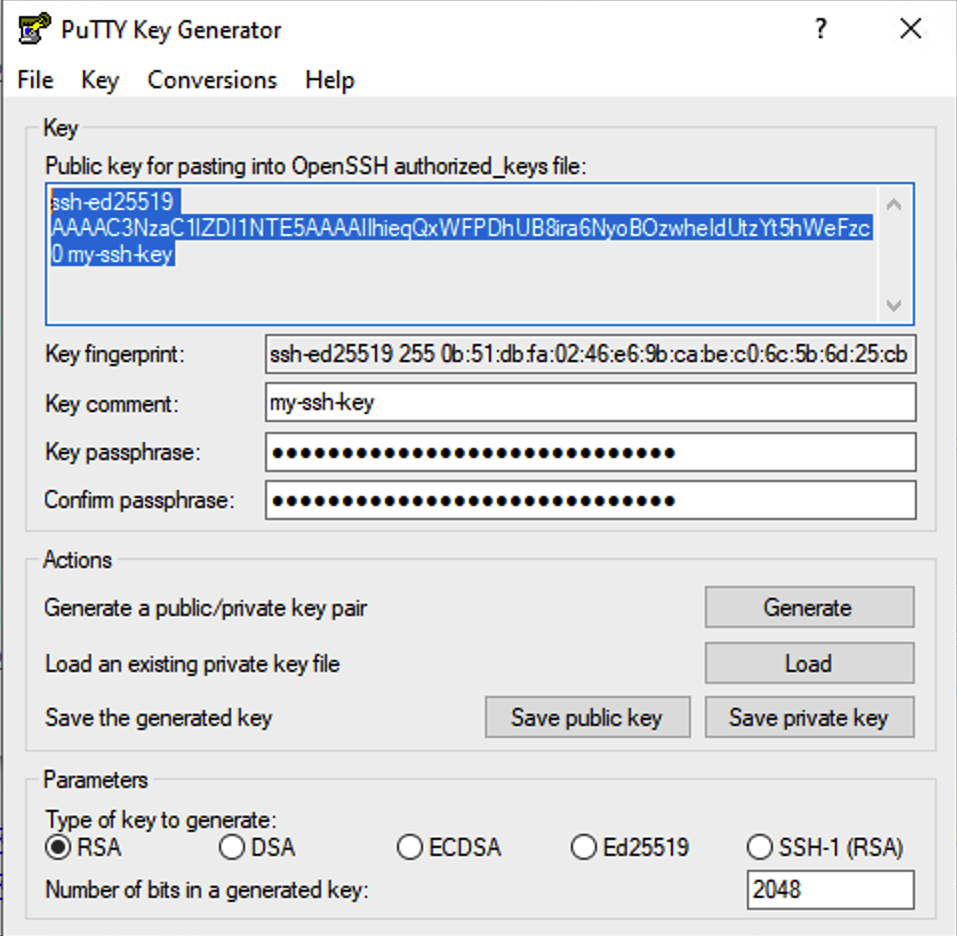
Before you close puttygen.exe, you’ll also need to save the public key in a format you can install on the server. At the top under “Key” you will see a section marked “Public key for pasting into OpenSSH authorized_keys file”. Highlight the text in this box with your mouse, hit Control-C, then open Notepad.exe and paste it into a file. Save it alongside your keys in a file called “my-ssh-key pastable.txt”:

That’s It!
You’ve successfully generated an SSH key. In the next tutorial, we’ll show you how to use them to login to your server.
Related Posts:
How to SSH in a Non-Permissive Environment (Behind an Unfriendly Firewall at Work or School)
Nyr's Legendary Road Warrior Script: Still the Rock Solid Go-To for Easy VPN!
Knock, Knock: How to Shield Your VPS From Port Scanning with Port Knocking
Roll Your Own: How to Setup and Maintain a Minecraft Server on Your VPS
Tighten Up Your VPS With an SSH Audit! Let's Look at the ssh-audit Package...Does OpenBSD Score Hig...
Dropbear in 2025: Still the LowEnd SSH Server of Choice?
raindog308 is a longtime community LETizen, technical writer, and self-described techno polymath. With deep roots in the *nix world, he has a passion for systems both modern and vintage, ranging from Unix, Perl, Python, and Golang to shell scripting and mainframe-era operating systems like MVS. He’s equally comfortable with relational database systems, having spent years working with Oracle, PostgreSQL, and MySQL.
As an avid user of LowEndBox providers, raindog308 runs an empire of LEBs, from tiny boxes for VPNs, to mid-sized instances for application hosting, and heavyweight servers for data storage and complex databases. He brings both technical rigor and real-world experience to every piece he writes.
Beyond the command line, raindog308 has a life-long love of German Shepherd Dogs, high-quality knives, target shooting, theology, tabletop RPGs, playing guitar, and hiking in deep, quiet forests.
His goal with every article is to help users, from beginners to seasoned sysadmins, get more value, performance, and enjoyment out of their infrastructure.
You can find him daily in the forums at LowEndTalk under the handle @raindog308.


I have generated my keys using PuttyGen but need to be able to specify exactly the email address, as I get an ‘is not recognized as an internal or external command error’.
I don’t understand why in the world would you use Ed25519 being the most insecure. Use RSA with 4096 bits and it’s way more secure.
I hadn’t thought of using containers but that’s a great idea. Thanks so much for sharing!