
In the previous tutorial, we showed you how to generate an SSH key pair. In this tutorial, we’ll show you how to use it to login.
Assumptions
In this tutorial:
- Your ssh key file is called “my-ssh-key”.
- The server is “myserver.example.com” and your user account there is “example”.
- SSH is running on port 22, the default.
Setting up SSH
If you were to connect to the server without using a key, you’d be prompted for a password. We will now configure your account to use SSH key as its preferred authorization.
Note that you don’t need to be root to do this. Assuming your server is configured with reasonable defaults, this method will work on any Unix-based server (Linux, BSD, etc.).
We are not specifically setting up ssh keys for root, but these instructions will work for root as well. Normally you do not want to directly login as root but rather as an unprivileged user, and then either su to root or use sudo.
If Your Client is Linux or macOS
We can use the very handy OpenSSH utility ssh-copy-id to save a lot of time. Invoke it as follows.
    $ ssh-copy-id -i ~/.ssh/my-ssh-key example@myserver.example.com
    /usr/bin/ssh-copy-id: INFO: Source of key(s) to be installed: "/home/example/.ssh/my-ssh-key.pub"
    The authenticity of host 'myserver.example.com (x.x.x.x)' can't be established.
    ECDSA key fingerprint is SHA256:HIi6F+IIkSOLHWUNR8l70WgdNrFlTORdZoZcrD5s4p4.
    Are you sure you want to continue connecting (yes/no/[fingerprint])? yes
    /usr/bin/ssh-copy-id: INFO: attempting to log in with the new key(s), to filter out any that are already installed
    /usr/bin/ssh-copy-id: INFO: 1 key(s) remain to be installed -- if you are prompted now it is to install the new keys
    example@myserver.example.com's password: (enter your password here)
    Number of key(s) added:        1
    Now try logging into the machine, with:   "ssh 'example@myserver.example.com'"
    and check to make sure that only the key(s) you wanted were added.
Now let’s try to login:
    $ ssh -i ~/.ssh/my-ssh-key example@myserver.example.com
    Enter passphrase for key '/home/example/.ssh/my-ssh-key': (enter your SSH passphrase)
    [example@my-server~]$
And you’re good to go! If you want to see what ssh-copy-id did, take a look at ~/.ssh on your server:
    $ ls -ld ~/.ssh
    drwx------ 2 example example 4096 Apr  2 23:18 /home/example/.ssh
    $ ls -l ~/.ssh/
    total 4
    -rw------- 1 example example 580 Apr  2 23:18 authorized_keys
    $ cat ~/.ssh/authorized_keys
    ssh-ed25519 AAAAC3NzaC1lZDI1NTE5AAAAIGPw+oAB0cfuJAaHWaEmXsgJzVm1B4+OP8Qr3ZL9nJf0 ssh key for your@email.com
ssh-copy-id has done the following:
- Created a directory in your home directory called .ssh and set ownership to you
- Set permissions on ~/.ssh to mode 700 (drwx——)
- Copied your public key to a file called ~/.ssh/authorized_keys
- Set the authorized_keys file permissions to mode 600 (rwx——)
If Your Client is Windows
Unfortunately, PuTTY does not come with the handy ssh-copy-id utility, so we’ll need to do the server setup manually.
You’ll need your *pastable public* key file handy. You may recall in the last tutorial we copied the section of puttygen called “Public key for pasting into OpenSSH authorized_keys file” and saved it to a file called “my-ssh-key pastable.txt”. That is the file you need here. It’s small enough you can copy/paste the contents.
Login to your server and type the following commands to create the .ssh directory:
    [ ! -d ~/.ssh ] && mkdir ~/.ssh
    chmod 700 ~/.ssh
In that directory, either create or edit a file called authorized_keys (note there is no extension).If it already exists, then you can can edit it and paste the contents of your public key to the end of the file. If it doesn’t exist, just paste in your public key. Save the file and quit your editor.
When you’re done, set permissions:
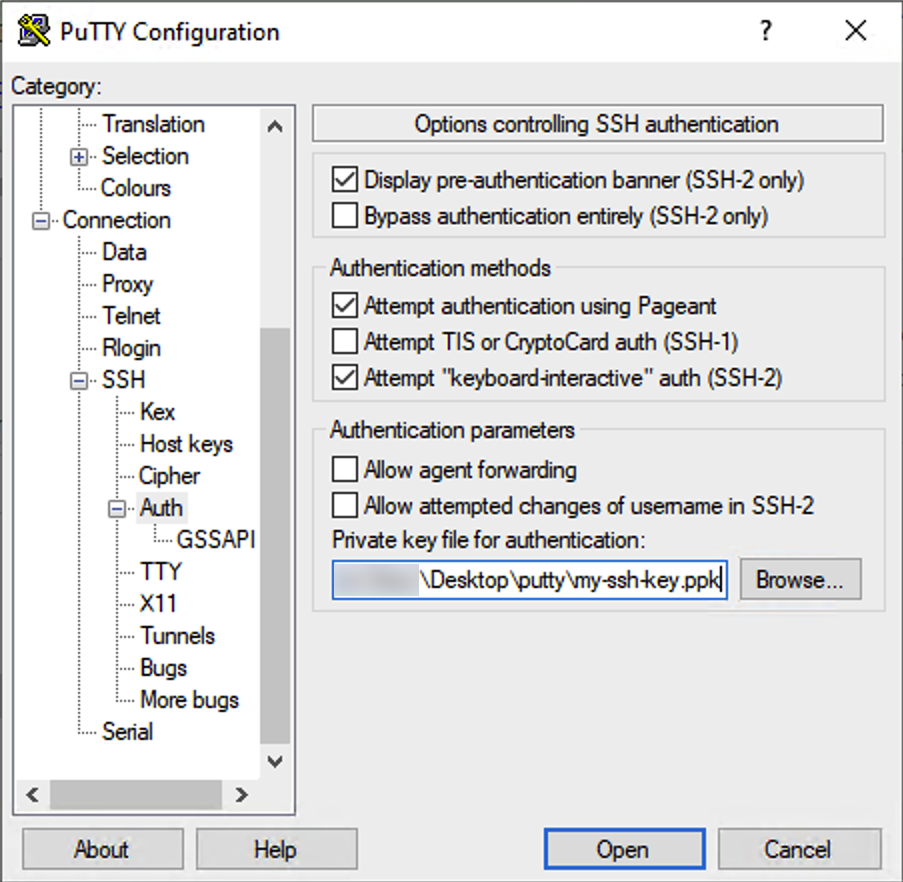
chmod 600 ~/.ssh/authorized_keysNow try to login using PuTTY. We’ll start by setting up an entry for this host. Scroll down to the SSH section on the left and click Auth. Then browse for your SSH *private* key:
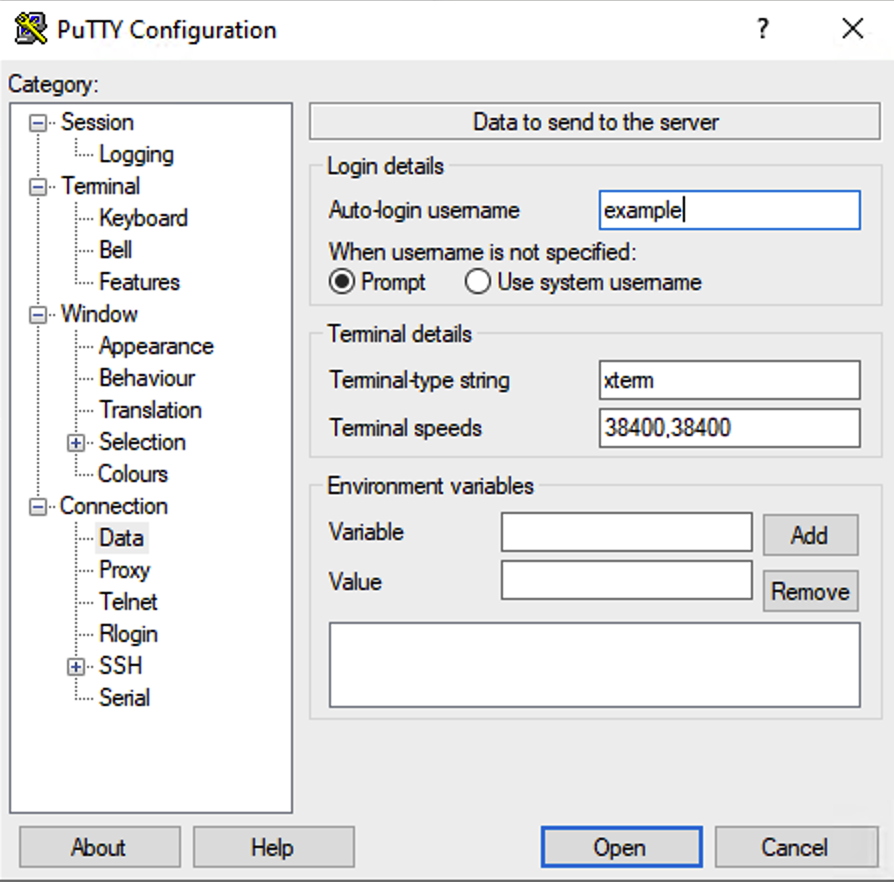
Next click on Connection->Data on the left and enter your username under “Auto-login Username”. This is so you don’t have to type the username every time.
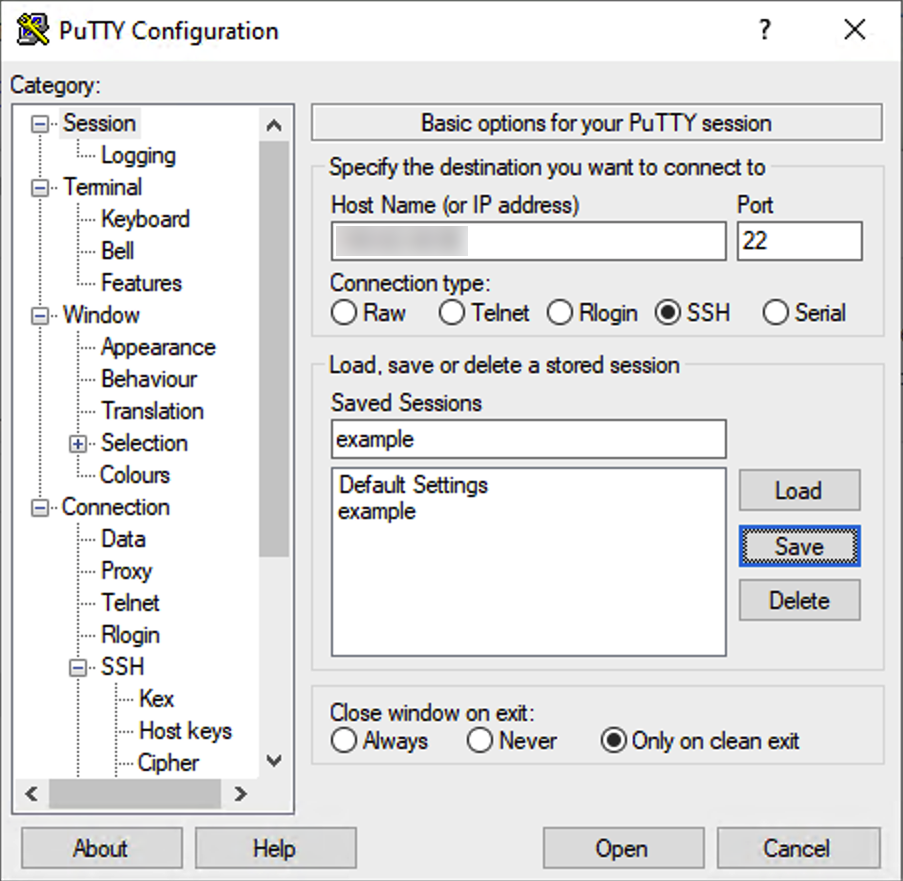
Now go back to Session on the left menu and enter the hostname (or IP) at the top. Enter a name for this session under “Saved Sessions” and click Save.
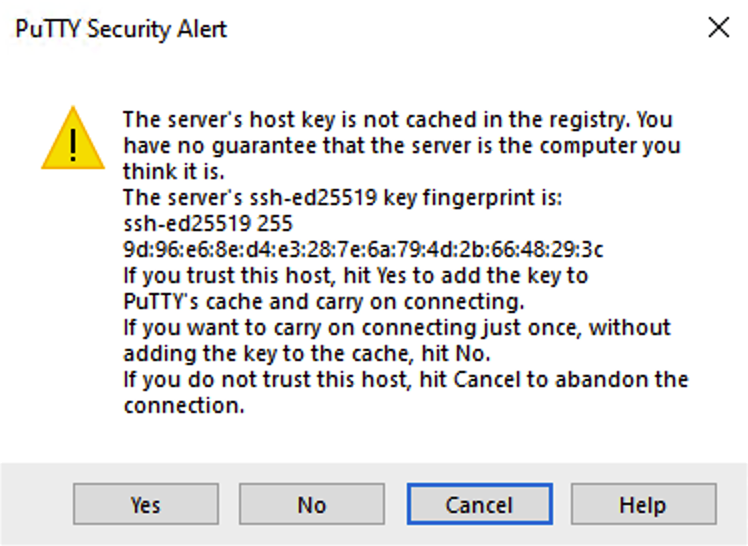
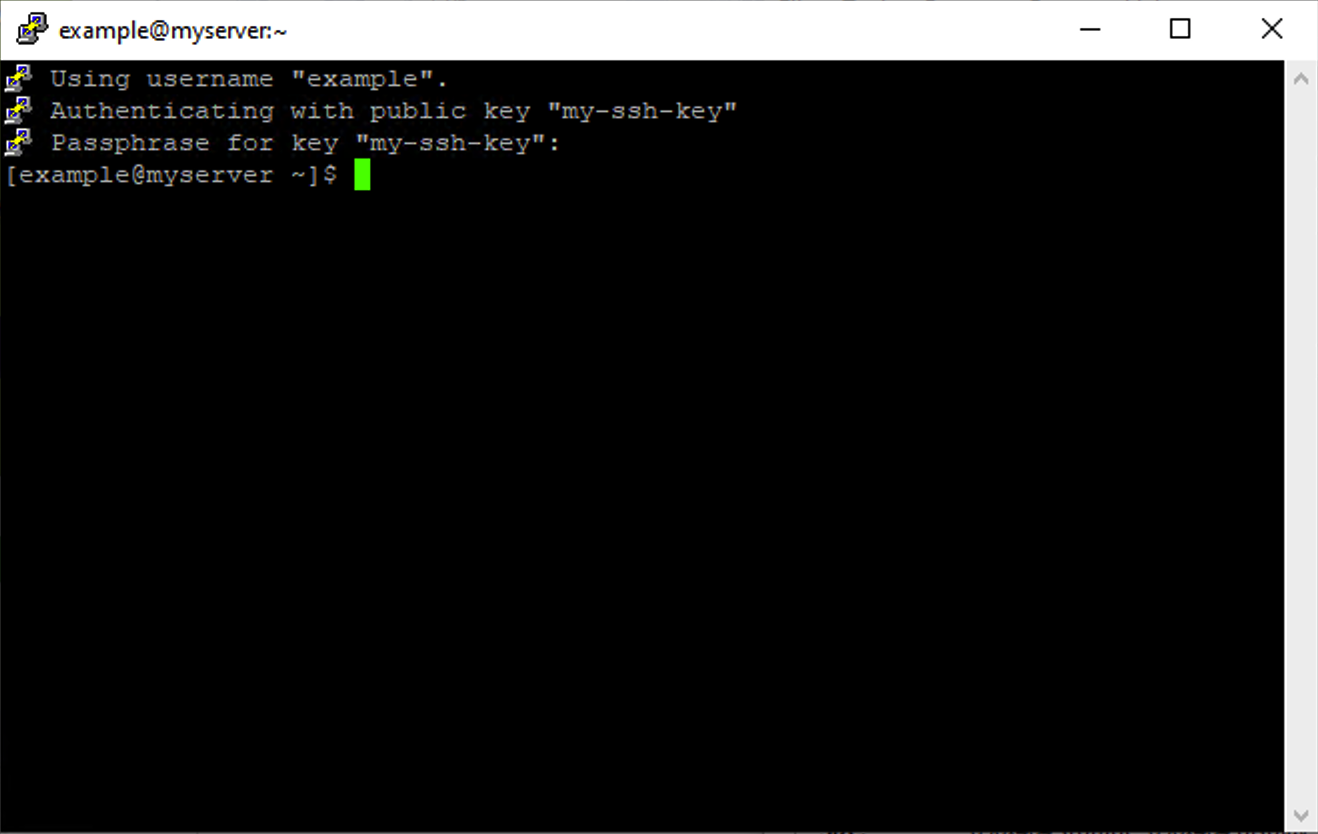
Now go ahead and try logging in. Answer Yes to the warning about the host key – this simply means it’s not cached in your local list of known hosts.
Troubleshooting
The vast majority of issues logging in with ssh keys are a misconfiguration on the server. All of the following must be true for SSH key authorization to work:
- You must have a directory called .ssh in your home directory (the name can be reconfigured by root but is very rare).
- This directory must be owned by you and set to mode 700 (drwx——) so only you can enter it.
- You must have a file in this directory called authorized_keys that contains the public key. Note that if you’re using puttygen.exe, it’s the *pastable* publickey.
- This authorized_keys file must be mode 600 (rw——-) so only you can read it.
If you get a Password: prompt instead of being prompted for your SSH keyphrase, check that all of these four conditions are true.
Next Up: Restricting Password Authentication
In the next Tutorial, we’ll show you how to significantly harden your server by disabling password authentication so that only SSH key authentication is accepted.
Related Posts:
How to SSH in a Non-Permissive Environment (Behind an Unfriendly Firewall at Work or School)
Whatever Happened About that Provider Who Claimed a Virtualizor Bug Caused a Breach?
Nyr's Legendary Road Warrior Script: Still the Rock Solid Go-To for Easy VPN!
Provider Claims Virtualizor WHMCS Plugin Vulnerability Caused Breach. Virtualizor Doesn't Agree.
If Your Biometric Data is Stolen, Should You Care? Probably Not.
Knock, Knock: How to Shield Your VPS From Port Scanning with Port Knocking
raindog308 is a longtime community LETizen, technical writer, and self-described techno polymath. With deep roots in the *nix world, he has a passion for systems both modern and vintage, ranging from Unix, Perl, Python, and Golang to shell scripting and mainframe-era operating systems like MVS. He’s equally comfortable with relational database systems, having spent years working with Oracle, PostgreSQL, and MySQL.
As an avid user of LowEndBox providers, raindog308 runs an empire of LEBs, from tiny boxes for VPNs, to mid-sized instances for application hosting, and heavyweight servers for data storage and complex databases. He brings both technical rigor and real-world experience to every piece he writes.
Beyond the command line, raindog308 has a life-long love of German Shepherd Dogs, high-quality knives, target shooting, theology, tabletop RPGs, playing guitar, and hiking in deep, quiet forests.
His goal with every article is to help users, from beginners to seasoned sysadmins, get more value, performance, and enjoyment out of their infrastructure.
You can find him daily in the forums at LowEndTalk under the handle @raindog308.


Thank you for the article. Very helpful.