 Setting up your own OpenVPN VPN on both server and client is very easy to do. In this tutorial, we’ll walk through setting up an OpenVPN server on a VPS you own, and then configuring Windows and macOS to connect to it.
I’ll be using a Debian 10 VPS on Linode (1GB Nanode to be precise) which is vpn.lowend.party. The VPS you choose does not need hardly any RAM, so a small VPS is perfect. You should be able to get a VPN VPS for $15-20 a year. There are plenty of great OpenVZ options available on LowEndBox, which should be your most affordable option.
Setting Up the OpenVPN Server
We’re going to use Nyr’s OpenVPN Road Warrior script. It makes setting up OpenVPN on the server side dead simple.
Get the script and execute it:
wget https://git.io/vpn -O openvpn-install.sh && bash openvpn-install.shNow run it. You can take the defaults for most things. I’ll use Google’s DNS and name my VPN connection “vpn.lowend.party”. My responses are bolded.
Welcome to this OpenVPN road warrior installer!
I need to ask you a few questions before starting setup.
You can use the default options and just press enter if you are ok with them.

Which protocol do you want for OpenVPN connections?
   1) UDP (recommended)
   2) TCP
Protocol [1]: 1

What port do you want OpenVPN listening to?
Port [1194]: <return>

Which DNS do you want to use with the VPN?
   1) Current system resolvers
   2) 1.1.1.1
   3) Google
   4) OpenDNS
   5) NTT
   6) AdGuard
DNS [1]: 3

Finally, tell me a name for the client certificate.
Client name [client]: vpn.lowend.party

We are ready to set up your OpenVPN server now.
Press any key to continue...

Get:1 http://mirrors.linode.com/debian buster InRelease [121 kB]
Get:2 http://mirrors.linode.com/debian-security buster/updates InRelease [65.4 kB]
Get:3 http://mirrors.linode.com/debian buster-updates InRelease [49.3 kB]
Get:4 http://mirrors.linode.com/debian buster/main Sources [7,831 kB]
Get:5 http://mirrors.linode.com/debian buster/main amd64 Packages [7,905 kB]
Get:6 http://mirrors.linode.com/debian buster/main Translation-en [5,969 kB]
Get:7 http://mirrors.linode.com/debian-security buster/updates/main Sources [119 kB]
Get:8 http://mirrors.linode.com/debian-security buster/updates/main amd64 Packages [197 kB]
Get:9 http://mirrors.linode.com/debian-security buster/updates/main Translation-en [106 kB]
Get:10 http://mirrors.linode.com/debian buster-updates/main Sources.diff/Index [2,212 B]
Get:11 http://mirrors.linode.com/debian buster-updates/main amd64 Packages.diff/Index [2,212 B]
Get:12 http://mirrors.linode.com/debian buster-updates/main Translation-en.diff/Index [2,212 B]
Get:13 http://mirrors.linode.com/debian buster-updates/main Sources 2020-02-23-2017.41.pdiff [924 B]
Get:14 http://mirrors.linode.com/debian buster-updates/main amd64 Packages 2020-02-23-2017.41.pdiff [2,162 B]
Get:13 http://mirrors.linode.com/debian buster-updates/main Sources 2020-02-23-2017.41.pdiff [924 B]
Get:15 http://mirrors.linode.com/debian buster-updates/main Translation-en 2020-02-23-2017.41.pdiff [1,700 B]
Get:15 http://mirrors.linode.com/debian buster-updates/main Translation-en 2020-02-23-2017.41.pdiff [1,700 B]
Get:14 http://mirrors.linode.com/debian buster-updates/main amd64 Packages 2020-02-23-2017.41.pdiff [2,162 B]
Fetched 22.4 MB in 6s (4,067 kB/s)
Reading package lists... Done
N: Repository 'http://mirrors.linode.com/debian buster InRelease' changed its 'Version' value from '10.3' to '10.4'
Reading package lists... Done
Building dependency tree
Reading state information... Done
ca-certificates is already the newest version (20190110).
ca-certificates set to manually installed.
The following additional packages will be installed:
  easy-rsa libccid libglib2.0-0 libglib2.0-data liblzo2-2 libpcsclite1
  libpkcs11-helper1 libusb-1.0-0 opensc opensc-pkcs11 pcscd shared-mime-info
  xdg-user-dirs
Suggested packages:
  pcmciautils resolvconf openvpn-systemd-resolved
The following NEW packages will be installed:
  easy-rsa libccid libglib2.0-0 libglib2.0-data liblzo2-2 libpcsclite1
  libpkcs11-helper1 libusb-1.0-0 opensc opensc-pkcs11 openvpn pcscd
  shared-mime-info xdg-user-dirs
The following packages will be upgraded:
  openssl
1 upgraded, 14 newly installed, 0 to remove and 22 not upgraded.

Need to get 6,337 kB of archives.
After this operation, 24.3 MB of additional disk space will be used.
Get:1 http://mirrors.linode.com/debian buster/main amd64 openssl amd64 1.1.1d-0+deb10u3 [844 kB]
Get:2 http://mirrors.linode.com/debian buster/main amd64 easy-rsa all 3.0.6-1 [37.9 kB]
Get:3 http://mirrors.linode.com/debian buster/main amd64 libusb-1.0-0 amd64 2:1.0.22-2 [55.3 kB]
Get:4 http://mirrors.linode.com/debian buster/main amd64 libccid amd64 1.4.30-1 [334 kB]
Get:5 http://mirrors.linode.com/debian buster/main amd64 libglib2.0-0 amd64 2.58.3-2+deb10u2 [1,258 kB]
Get:6 http://mirrors.linode.com/debian buster/main amd64 libglib2.0-data all 2.58.3-2+deb10u2 [1,110 kB]
Get:7 http://mirrors.linode.com/debian buster/main amd64 liblzo2-2 amd64 2.10-0.1 [56.1 kB]
Get:8 http://mirrors.linode.com/debian buster/main amd64 libpcsclite1 amd64 1.8.24-1 [58.5 kB]
Get:9 http://mirrors.linode.com/debian buster/main amd64 libpkcs11-helper1 amd64 1.25.1-1 [47.6 kB]
Get:10 http://mirrors.linode.com/debian buster/main amd64 opensc-pkcs11 amd64 0.19.0-1 [826 kB]
Get:11 http://mirrors.linode.com/debian buster/main amd64 opensc amd64 0.19.0-1 [305 kB]
Get:12 http://mirrors.linode.com/debian buster/main amd64 openvpn amd64 2.4.7-1 [490 kB]
Get:13 http://mirrors.linode.com/debian buster/main amd64 pcscd amd64 1.8.24-1 [95.3 kB]
Get:14 http://mirrors.linode.com/debian buster/main amd64 shared-mime-info amd64 1.10-1 [766 kB]
Get:15 http://mirrors.linode.com/debian buster/main amd64 xdg-user-dirs amd64 0.17-2 [53.8 kB]
Fetched 6,337 kB in 0s (78.0 MB/s)
apt-listchanges: Reading changelogs...
Preconfiguring packages ...
(Reading database ... 29490 files and directories currently installed.)
Preparing to unpack .../00-openssl_1.1.1d-0+deb10u3_amd64.deb ...
Unpacking openssl (1.1.1d-0+deb10u3) over (1.1.1d-0+deb10u2) ...
Selecting previously unselected package easy-rsa.
Preparing to unpack .../01-easy-rsa_3.0.6-1_all.deb ...
Unpacking easy-rsa (3.0.6-1) ...
Selecting previously unselected package libusb-1.0-0:amd64.
Preparing to unpack .../02-libusb-1.0-0_2%3a1.0.22-2_amd64.deb ...
Unpacking libusb-1.0-0:amd64 (2:1.0.22-2) ...
Selecting previously unselected package libccid.
Preparing to unpack .../03-libccid_1.4.30-1_amd64.deb ...
Unpacking libccid (1.4.30-1) ...
Selecting previously unselected package libglib2.0-0:amd64.
Preparing to unpack .../04-libglib2.0-0_2.58.3-2+deb10u2_amd64.deb ...
Unpacking libglib2.0-0:amd64 (2.58.3-2+deb10u2) ...
Selecting previously unselected package libglib2.0-data.
Preparing to unpack .../05-libglib2.0-data_2.58.3-2+deb10u2_all.deb ...
Unpacking libglib2.0-data (2.58.3-2+deb10u2) ...
Selecting previously unselected package liblzo2-2:amd64.
Preparing to unpack .../06-liblzo2-2_2.10-0.1_amd64.deb ...
Unpacking liblzo2-2:amd64 (2.10-0.1) ...
Selecting previously unselected package libpcsclite1:amd64.
Preparing to unpack .../07-libpcsclite1_1.8.24-1_amd64.deb ...
Unpacking libpcsclite1:amd64 (1.8.24-1) ...
Selecting previously unselected package libpkcs11-helper1:amd64.
Preparing to unpack .../08-libpkcs11-helper1_1.25.1-1_amd64.deb ...
Unpacking libpkcs11-helper1:amd64 (1.25.1-1) ...
Selecting previously unselected package opensc-pkcs11:amd64.
Preparing to unpack .../09-opensc-pkcs11_0.19.0-1_amd64.deb ...
Unpacking opensc-pkcs11:amd64 (0.19.0-1) ...
Selecting previously unselected package opensc.
Preparing to unpack .../10-opensc_0.19.0-1_amd64.deb ...
Unpacking opensc (0.19.0-1) ...
Selecting previously unselected package openvpn.
Preparing to unpack .../11-openvpn_2.4.7-1_amd64.deb ...
Unpacking openvpn (2.4.7-1) ...
Selecting previously unselected package pcscd.
Preparing to unpack .../12-pcscd_1.8.24-1_amd64.deb ...
Unpacking pcscd (1.8.24-1) ...
Selecting previously unselected package shared-mime-info.
Preparing to unpack .../13-shared-mime-info_1.10-1_amd64.deb ...
Unpacking shared-mime-info (1.10-1) ...
Selecting previously unselected package xdg-user-dirs.
Preparing to unpack .../14-xdg-user-dirs_0.17-2_amd64.deb ...
Unpacking xdg-user-dirs (0.17-2) ...
Setting up xdg-user-dirs (0.17-2) ...
Setting up libglib2.0-0:amd64 (2.58.3-2+deb10u2) ...
No schema files found: doing nothing.
Setting up liblzo2-2:amd64 (2.10-0.1) ...
Setting up libpkcs11-helper1:amd64 (1.25.1-1) ...
Setting up opensc-pkcs11:amd64 (0.19.0-1) ...
Setting up libglib2.0-data (2.58.3-2+deb10u2) ...
Setting up shared-mime-info (1.10-1) ...
Setting up libpcsclite1:amd64 (1.8.24-1) ...
Setting up libusb-1.0-0:amd64 (2:1.0.22-2) ...
Setting up openssl (1.1.1d-0+deb10u3) ...
Setting up easy-rsa (3.0.6-1) ...
Setting up openvpn (2.4.7-1) ...
[....] Restarting virtual private network daemon.:.
Created symlink /etc/systemd/system/multi-user.target.wants/openvpn.service → /lib/systemd/system/openvpn.service.
Setting up libccid (1.4.30-1) ...
Setting up opensc (0.19.0-1) ...
Setting up pcscd (1.8.24-1) ...
Created symlink /etc/systemd/system/sockets.target.wants/pcscd.socket → /lib/systemd/system/pcscd.socket.
Processing triggers for man-db (2.8.5-2) ...
Processing triggers for mime-support (3.62) ...
Processing triggers for libc-bin (2.28-10) ...
Processing triggers for systemd (241-7~deb10u3) ...
init-pki complete; you may now create a CA or requests.
Your newly created PKI dir is: /etc/openvpn/server/easy-rsa/pki
Using SSL: openssl OpenSSL 1.1.1d  10 Sep 2019
Generating RSA private key, 2048 bit long modulus (2 primes)
.............+++++
........................+++++
e is 65537 (0x010001)
Using SSL: openssl OpenSSL 1.1.1d  10 Sep 2019
Generating a RSA private key
.......................+++++
.........+++++
writing new private key to '/etc/openvpn/server/easy-rsa/pki/easy-rsa-1668.z4zqJY/tmp.3jy9Ii'
-----
Using configuration from /etc/openvpn/server/easy-rsa/pki/easy-rsa-1668.z4zqJY/tmp.cHab1S
Check that the request matches the signature
Signature ok
The Subject's Distinguished Name is as follows
commonName            :ASN.1 12:'server'
Certificate is to be certified until May  9 23:29:57 2030 GMT (3650 days)
Write out database with 1 new entries
Data Base Updated
Using SSL: openssl OpenSSL 1.1.1d  10 Sep 2019
Generating a RSA private key
.............+++++
.................................................................................................+++++
writing new private key to '/etc/openvpn/server/easy-rsa/pki/easy-rsa-1743.QRDcVj/tmp.siHTEx'
-----
Using configuration from /etc/openvpn/server/easy-rsa/pki/easy-rsa-1743.QRDcVj/tmp.87s9ot
Check that the request matches the signature
Signature ok
The Subject's Distinguished Name is as follows
commonName            :ASN.1 12:'vpn_lowend_party'
Certificate is to be certified until May  9 23:29:57 2030 GMT (3650 days)
Write out database with 1 new entries
Data Base Updated
Using SSL: openssl OpenSSL 1.1.1d  10 Sep 2019
Using configuration from /etc/openvpn/server/easy-rsa/pki/easy-rsa-1799.N6ujtN/tmp.PLjftX
An updated CRL has been created.
CRL file: /etc/openvpn/server/easy-rsa/pki/crl.pem
Created symlink /etc/systemd/system/multi-user.target.wants/openvpn-iptables.service → /etc/systemd/system/openvpn-iptables.service.
Created symlink /etc/systemd/system/multi-user.target.wants/openvpn-server@server.service → /lib/systemd/system/openvpn-server@.service.
Finished!
Your client configuration is available at: /root/vpn_lowend_party.ovpn
If you want to add more clients, just run this script again!
Wow, that was a lot. The system has been completely configured for OpenVPN.
Now look in your root directory:
root@vpn:~# ls -l /root
total 32
-rw-r--r-- 1 root root 23043 May 11 23:27 openvpn-install.sh
-rw-r--r-- 1 root root  5007 May 11 23:29 vpn_lowend_party.ovpn
That .ovpn file is what we need to configure on the client side. It is a text file. You can either scp it from your server, or just cat it (cat *.ovpn), copy the text, and paste it in a file on your client side. But make sure the file you save it as ends in .ovpn (not .txt).
Configuring Your Windows PC
To configure for Windows, we’ll use the official OpenVPN client. Go to OpenVPN.net and select the appropriate installer. We’re using Windows 10 in this example. Downloading the .exe and installing it is the usual next, next, next Windows process.
Once installed, either double-click the OpenVPN icon on your desktop or select it from the start menu.
![]()

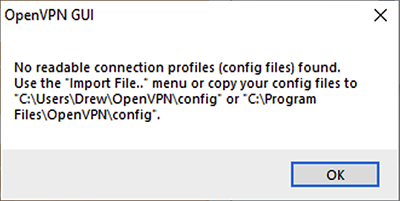
You’ll get an error that there are no config files. Click OK.
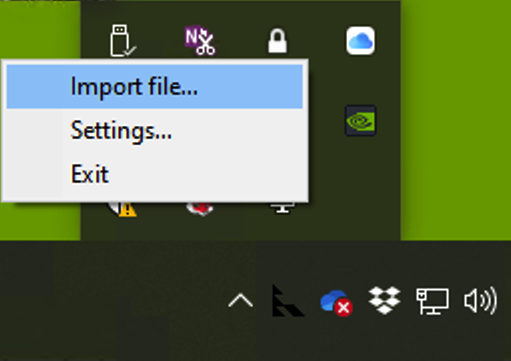
Now find the OpenVPN GUI icon in your tray (lower right hand corner).
![]()
Right click and select “Import file…”
In the file selector, browse to the .ovpn file you copied from your VPN server:

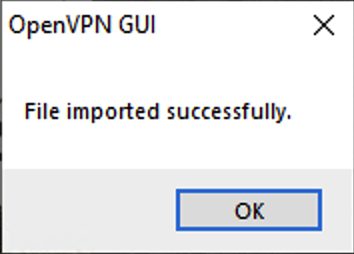
Once you’ve clicked OK, you’ll get a message that it has been successfully imported:
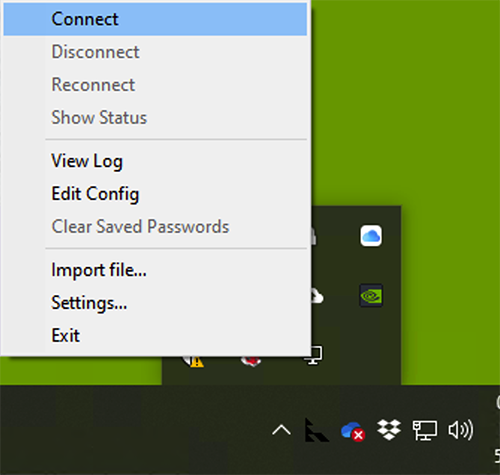
Now right-click on the OpenVPN GUI icon in your tray again and select Connect:
OpenVPN will dazzle you with some fast-scrolling log info to show you how hard it’s working.
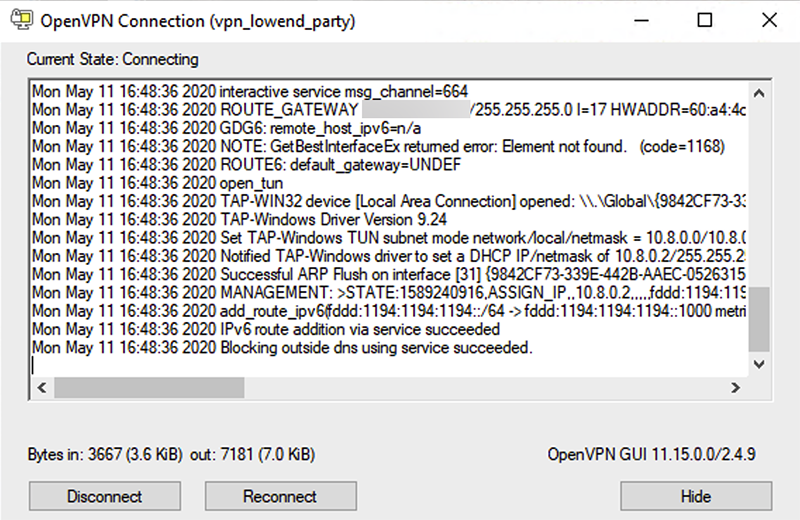
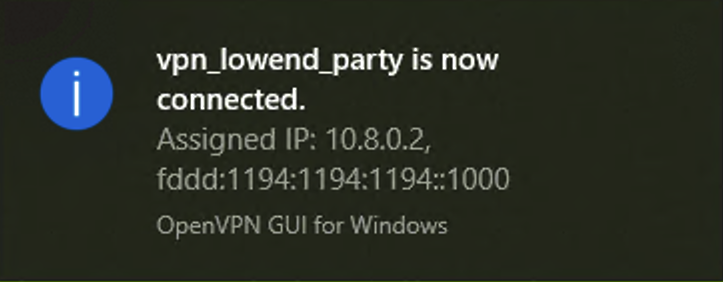
You’ll get a notification that you’re connected:
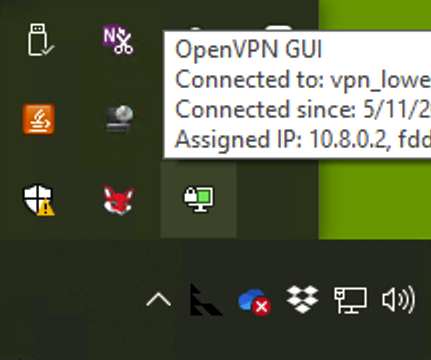
And if you look in your tray, you’ll see the OpenVPN icon has now turned green:
At this point, if you go to something like What’s My IP, your browser will display the IP of your VPN server, not your home Internet, verifying that you’re VPN’d to your server.
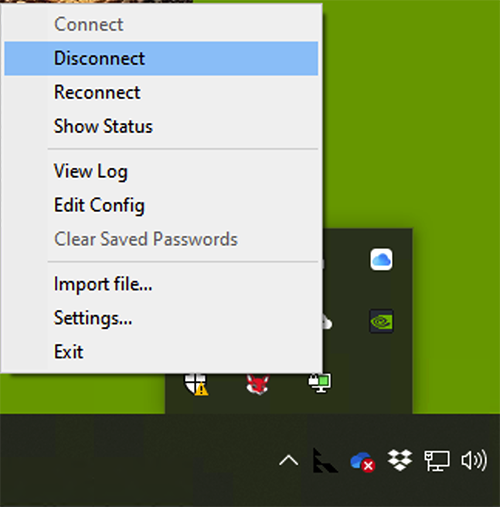
To disconnect, right-click on the OpenVPN GUI and select Disconnect.
Configuring Your Mac (with Viscosity)
For Mac, I’m going to show you how to use SparkLab’s Viscosity, which is my favorite VPN client. It’s not free, so if you are looking for a free client, skip forward to the next section which uses an alternate client, Tunnelblick.
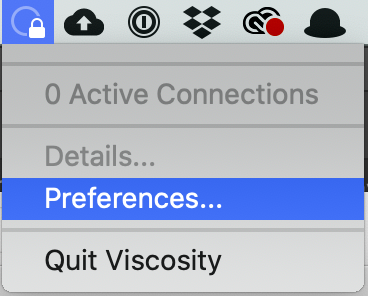
Installing Viscosity is the usual .dmg mount and click. Once it’s installed, run it from Applications. You’ll find a new icon (circle and padlock) on your menu bar:
![]()
Click it and select Preferences to setup your connection:
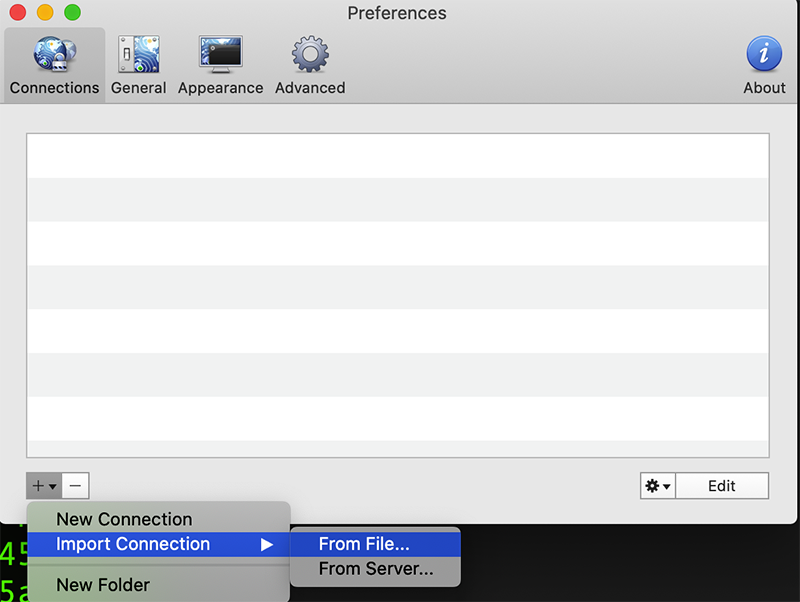
In the Preferences pane, hit the plus button in the lower left corner, and select Import Connection and then From File.
Browse to the .ovpn file you copied from your server earlier:

Once you’ve selected it and clicked OK, you’ll get a successful import message from Viscosity:
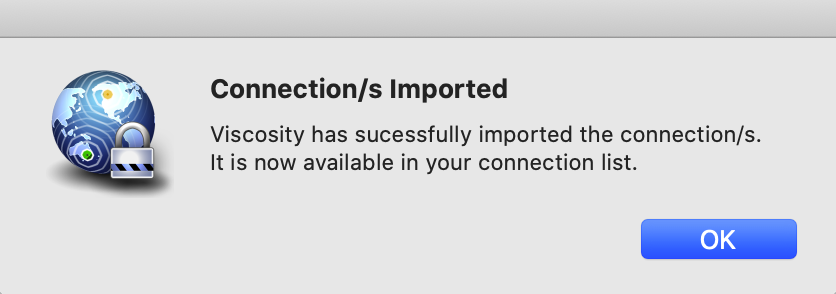
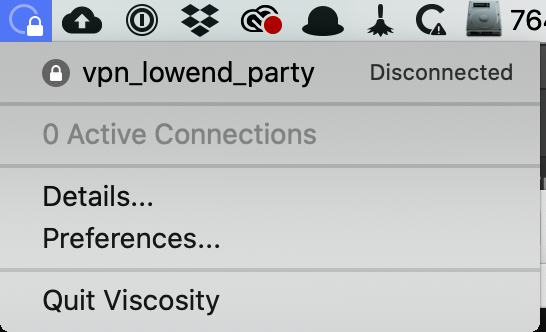
Click OK, then go back to your menu bar. Click the circle-and-padlock Viscosity icon again. your connection will show as “Disconnected”. Click it to connect.
After a moment, you’ll get a macOS notification that you’ve been connected:

At this point, if you go to something like What’s My IP, your browser will display the IP of your VPN server, not your home Internet, verifying that you’re VPN’d to your server.
To disconnect, click the Viscosity menu bar icon again and click on your connection name:
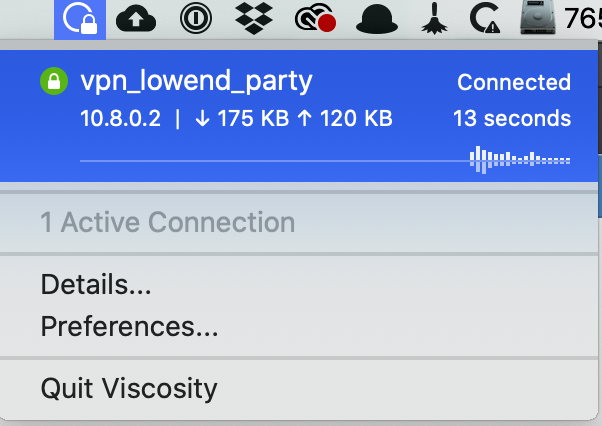
You’ll get a macOS notification that you’ve bene disconnected:

Configuring Your Mac (with Tunnelblick)
Tunnelblick is a free OpenVPN-compatible client for macOS. To obtain a copy, head over to tunnelblick.net. Installing it is the usual .dmg mount & click.
Once run, Tunnelblick will display its opening welcome:
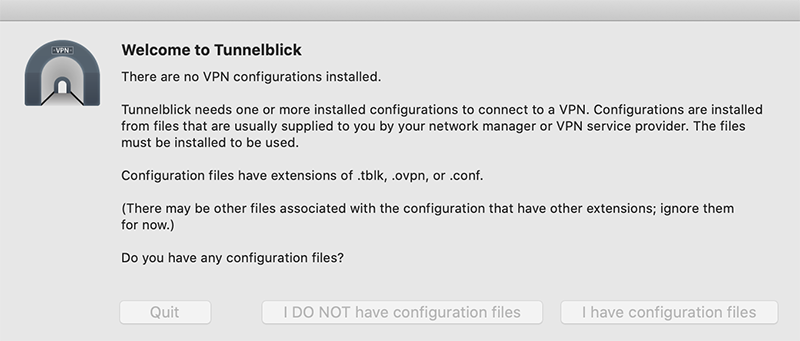
Click “I have configuration files”. Tunnelblick will then tell you it doesn’t care. OK, not exactly, but it’ll tell you this isn’t the place to enter configuration files. Close the window.
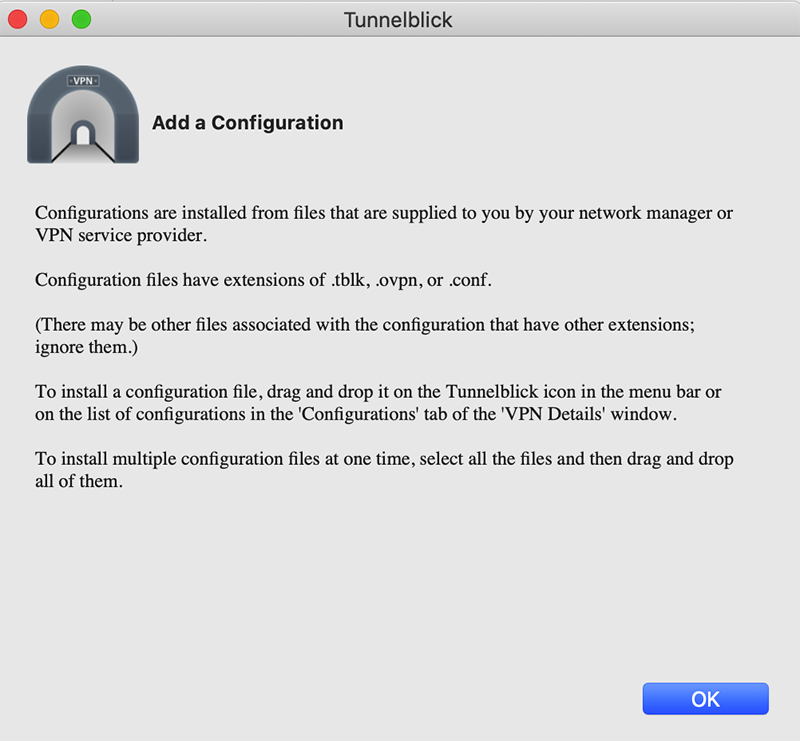
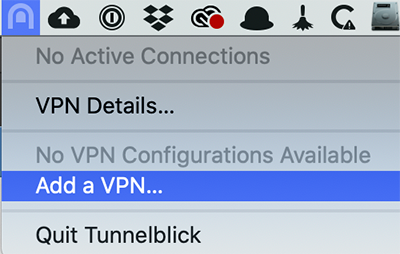
In the menu bar, click the new Tunnelblick icon and select Add a VPN…
The Configurations pane that comes up. In Finder, browse to where you saved the .ovpn file, click it, and drag it to Configurations.
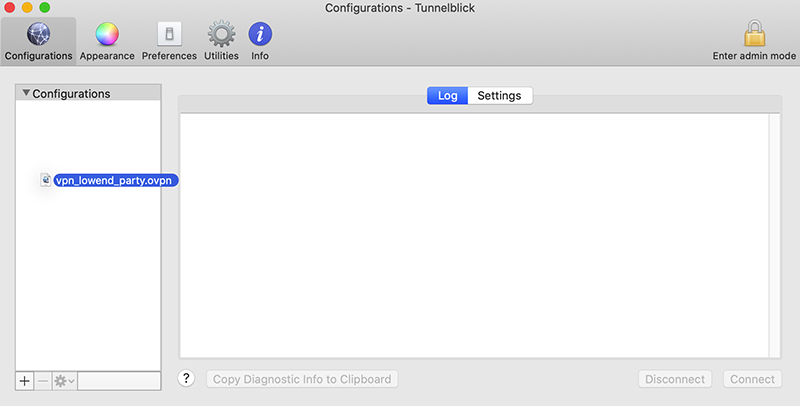
You’ll be asked if you want to install it for all users or just you. Make your choice:
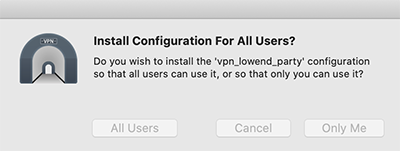
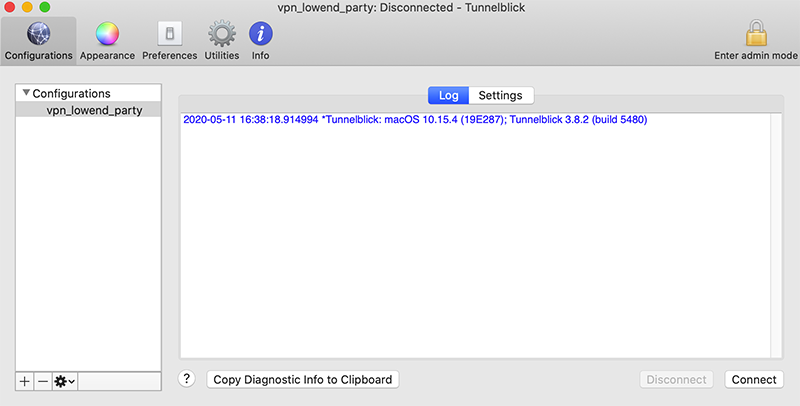
Tunnelblick will then show it under Configurations. Close this window.
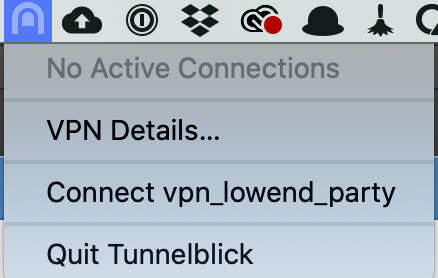
Back in your menu bar, click the Tunnelblick icon and select the Connect entry for your VPN:
After working for a bit, Tunnelblick will give you a nice bright green acknowledgement that you’re connected:
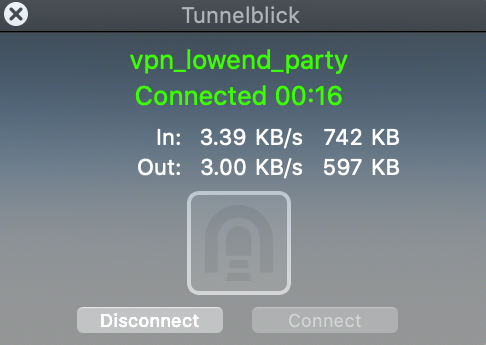
At this point, if you go to something like What’s My IP, your browser will display the IP of your VPN server, not your home Internet, verifying that you’re VPN’d to your server.
To disconnect, simply click the TunnelBlick menu bar icon again and click Disconnect:


Thanks for this. Done!