![]()
In this tutorial, we’ll show you how to setup and get started with Rundeck, a free (as in beer) job control solution.
Why Rundeck?
For some simple needs, crontab suffices. If you have a job you want to run at 1am, you stick it in crontab (or use atd), it runs, and you’re happy.
But what if you have more complex needs? For example, “backup these databases, and if that succeeds, tarball this source code, then git pull, then restart these systems, then run these maintenance jobs…” You could do that all as different cron jobs, but you lose the ability to set dependencies. You could write a mother script to call many scripts, but then you lose modularity and create a brittle sprawl. And what if you want to manage jobs across many servers? What if the results of jobs on some drive what happens on others? And what if you want to make jobs easy to run one-off – perhaps even allowing end-users to do so without needing to give them all the keys to the kingdom?
This type of complex job management was for years the domain of stratospherically expensive job enterprise control solutions. Rundeck is a free product that gives you tremendous power in managing systems.
Personally, I have a home Rundeck server that controls backups on all my home systems and VPSes, housekeeping jobs, seedbox maintenance and conversion jobs, rotating pictures on our digital photo frame, etc.
Setting Up Rundeck
In this tutorial, I’ll create a Rundeck server (master.lowend.party) and a single node (slave.lowend.party). Rundeck can scale to control hundreds (perhaps thousands) of nodes, but the principles are the same.
In this case, I’m using a Debian 9 VPS with 4GB of RAM for my master, and a Debian 10 VPS with 1GB of RAM for the salve. The reason for Debian 9 on the master is that Rundeck requires OpenJDK 8, which is easily installable on Debian 9. Support for OpenJDK 11 is coming but at the moment, JDK 8 is required.
After imaging the master, I installed some required packages:
apt-get install openjdk-8-jre-headless mariadb-server gnupg2 apt-transport-https
After installing MariaDB, I secured it.
root@master:~# mysql_secure_installation

NOTE: RUNNING ALL PARTS OF THIS SCRIPT IS RECOMMENDED FOR ALL MariaDB
SERVERS IN PRODUCTION USE! PLEASE READ EACH STEP CAREFULLY!

In order to log into MariaDB to secure it, we'll need the current
password for the root user. If you've just installed MariaDB, and
you haven't set the root password yet, the password will be blank,
so you should just press enter here.

Enter current password for root (enter for none):
OK, successfully used password, moving on...

Setting the root password ensures that nobody can log into the MariaDB
root user without the proper authorisation.

Set root password? [Y/n] y
New password:
Re-enter new password:
Password updated successfully!
Reloading privilege tables..
... Success!

By default, a MariaDB installation has an anonymous user, allowing anyone
to log into MariaDB without having to have a user account created for
them. This is intended only for testing, and to make the installation
go a bit smoother. You should remove them before moving into a
production environment.

Remove anonymous users? [Y/n] y
... Success!

Normally, root should only be allowed to connect from 'localhost'. This
ensures that someone cannot guess at the root password from the network.

Disallow root login remotely? [Y/n] y
... Success!

By default, MariaDB comes with a database named 'test' that anyone can
access. This is also intended only for testing, and should be removed
before moving into a production environment.

Remove test database and access to it? [Y/n] y
- Dropping test database...
... Success!
- Removing privileges on test database...
... Success!

Reloading the privilege tables will ensure that all changes made so far
will take effect immediately.

Reload privilege tables now? [Y/n] y
... Success!

Cleaning up...

All done! If you've completed all of the above steps, your MariaDB
installation should now be secure.

Thanks for using MariaDB!
Now we’ll create a database for Rundeck.
root@master:/etc/rundeck# mysql
Welcome to the MariaDB monitor. Commands end with ; or \g.
Your MariaDB connection id is 55
Server version: 10.3.22-MariaDB-0+deb10u1 Debian 10

Copyright (c) 2000, 2018, Oracle, MariaDB Corporation Ab and others.

Type 'help;' or '\h' for help. Type '\c' to clear the current input statement.

MariaDB [(none)]> create database rundeck;
Query OK, 1 row affected (0.000 sec)

MariaDB [(none)]> grant ALL on rundeck.* to 'rundeckuser'@'localhost' identified by 'rundeckpassword';
Query OK, 0 rows affected (0.000 sec)

MariaDB [(none)]> flush privileges;
Query OK, 0 rows affected (0.000 sec)

MariaDB [(none)]> Bye
Now let’s install Rundeck itself.
echo "deb https://rundeck.bintray.com/rundeck-deb /" > /etc/apt/sources.list.d/rundeck.list
curl 'https://bintray.com/user/downloadSubjectPublicKey?username=bintray' | apt-key add -
apt-get update
apt-get install rundeck
Before we startup Rundeck, we want to make some configuration changes. All of Rundeck’s configuration is in /etc/rundeck.
Modify framework.properties:
framework.server.name = master.lowend.party
framework.server.hostname = master.lowend.party
framework.server.port = 4440
framework.server.url = http://master.lowend.party:4440
Modify rundeck-config.properties to change from using h2 (a slow internal database only suitable for testing) to the MariaDB database we set up:
grails.serverURL=http://master.lowend.party:4440
#dataSource.url = jdbc:h2:file:/var/lib/rundeck/data/rundeckdb;MVCC=true
dataSource.url = jdbc:mysql://localhost/rundeck?autoReconnect=true&useSSL=false
dataSource.username=rundeckuser
dataSource.password=rundeckpassword
dataSource.driverClassName=com.mysql.jdbc.Driver
Modify realm.properties to set a password fo the ‘admin’ account. The default password is ‘admin’. Change it to something better:
admin:complex-password,user,admin,architect,deploy,build
Now start Rundeck:
systemctl start rundeckd
Now you can see Rundeck running (via ps -ef):
rundeck 6810 1 99 12:44 ? 00:00:21 java -Drundeck.jaaslogin=true -Djava.security.auth.login.config
It may take Rundeck a few moments to startup. If you look at /var/log/rundeck/service.log you’ll see this message towards the end that Rundeck is ready:
[2020-05-19 12:47:46.891] INFO BootStrap --- [ main] Rundeck startup finished in 2202ms
Rundeck runs on port 4440, so I surfed to master.lowend.party:4440.
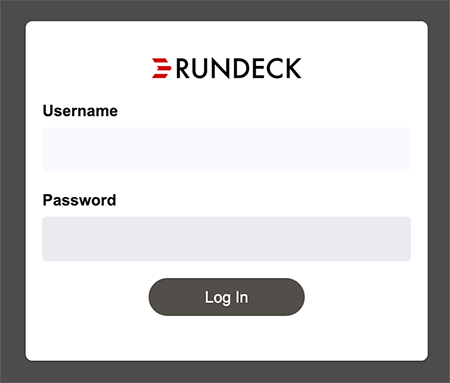
Login as admin with the password you set in realm.properties above.
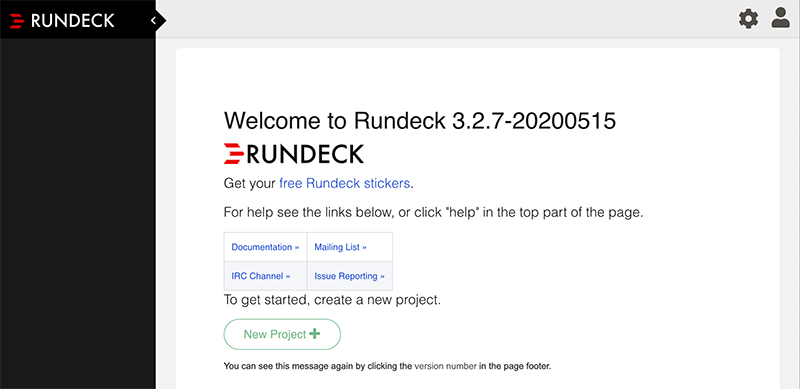
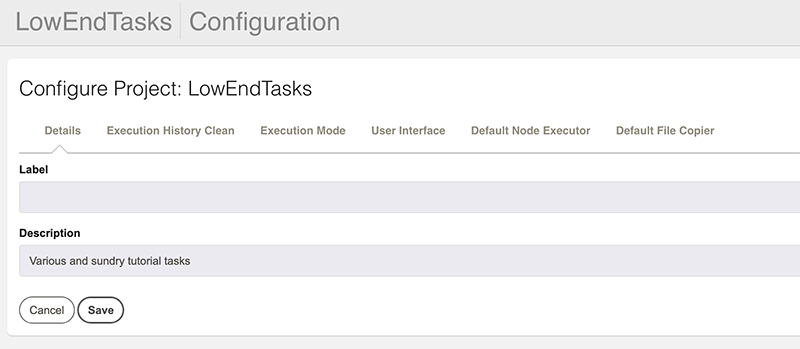
Now click New Project.
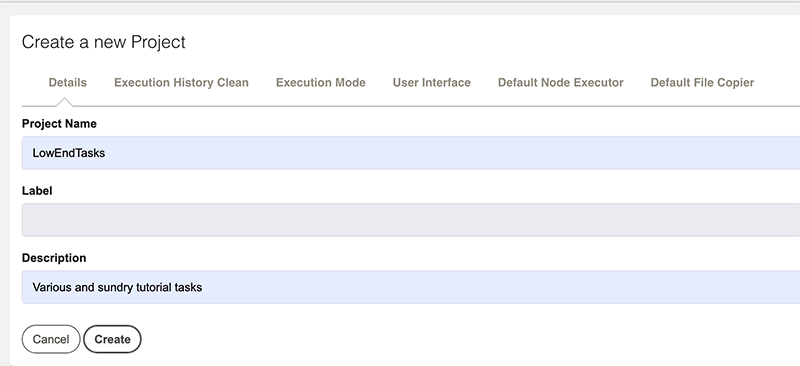
Click Create. Now in the left menu bar, expand Project Settings and click Edit Nodes.
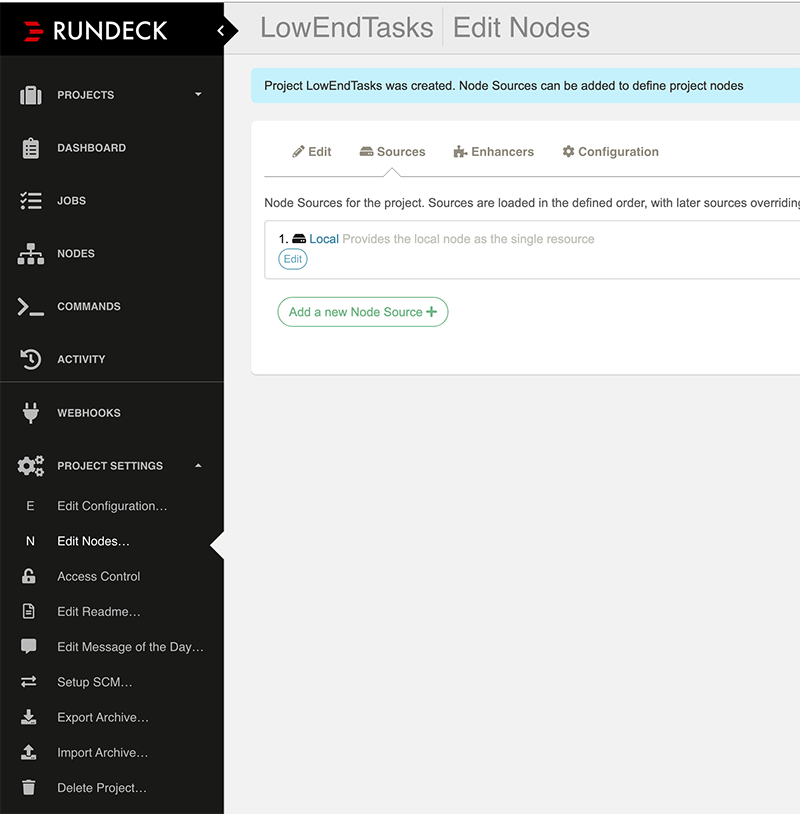
We now need to setup our list of nodes. We need a read from a “source”. This could be something exotic like the output from a giant enterprise database system, Ansible, a URL, etc. But for this tutorial, we’ll read from a file.
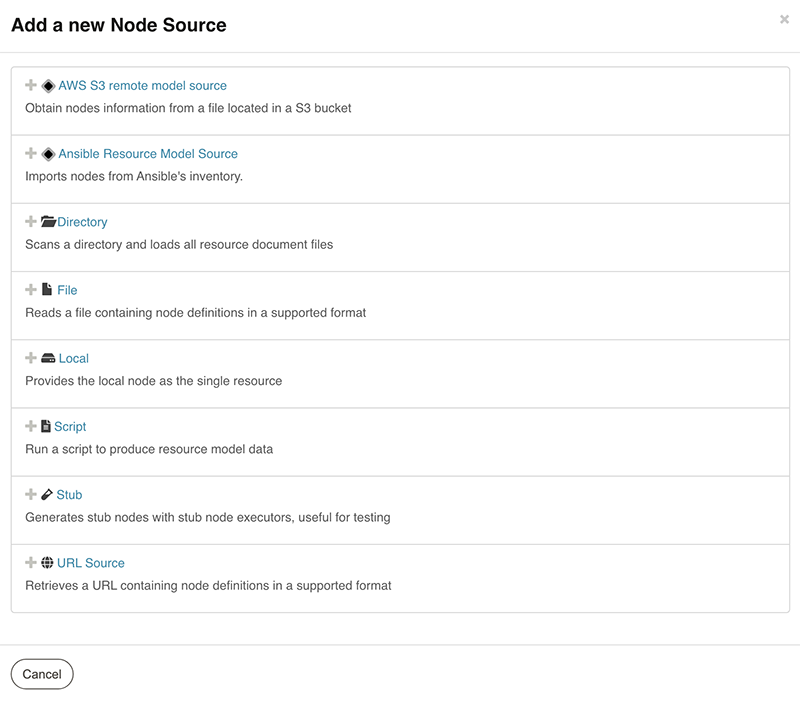
Click File.
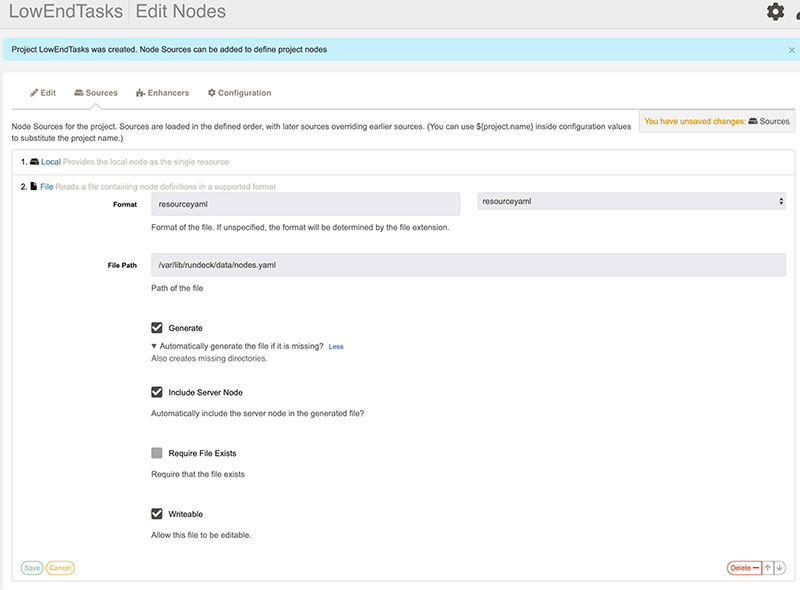
We’ll use YAML. We’re going to let Rundeck generate a new file for us. Fill out the boxes as shown.
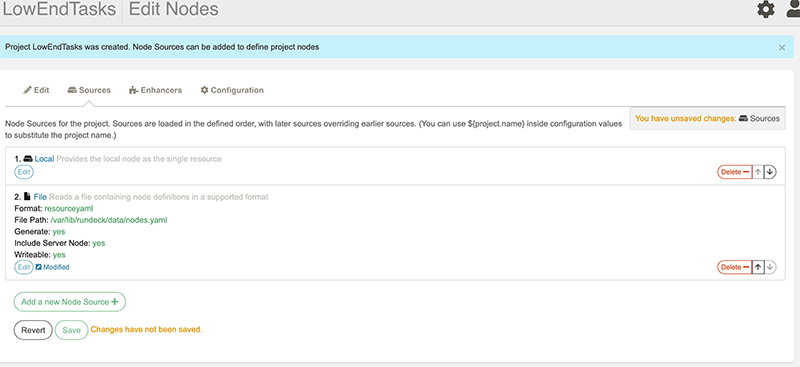
Now click save. On master, in /var/lib/rundeck/data, this file now exists:
root@master:/var/lib/rundeck/data# cat nodes.yaml
master.lowend.party:
  nodename: master.lowend.party
  hostname: master.lowend.party
  osVersion: 4.9.0-12-amd64
  osFamily: unix
  osArch: amd64
  description: Rundeck server node
  osName: Linux
  username: rundeck
  tags: ''
I added a new entry for slave:
master.lowend.party:
  nodename: master.lowend.party
  hostname: master.lowend.party
  osVersion: 4.9.0-12-amd64
  osFamily: unix
  osArch: amd64
  description: Rundeck server node
  osName: Linux
  username: rundeck
  tags: ''
slave.lowend.party:
  nodename: slave.lowend.party
  hostname: slave.lowend.party
  osVersion: 4.9.0-12-amd64
  osFamily: unix
  osArch: amd64
  description: Rundeck slave node
  osName: Linux
  username: rundeck
  tags: ''
Now let’s setup SSH keys. Once again select Edit Configuration on Project Settings.
Click Default Node Executor.

You’ll see that SSH is the default way that Rundeck will connect to systems and run jobs. Let’s use the name already in use and create a passwordless SSH key:
root@master:/var/lib/rundeck# ssh-keygen -f /var/lib/rundeck/.ssh/id_rsa
Generating public/private rsa key pair.
Enter passphrase (empty for no passphrase):
Enter same passphrase again:
Your identification has been saved in /var/lib/rundeck/.ssh/id_rsa.
Your public key has been saved in /var/lib/rundeck/.ssh/id_rsa.pub.
The key fingerprint is:
SHA256:jKEPwDsvSDZ7WB1Sc9tRiBFgC+JI3c6IO1xhriTL1NE root@master.lowend.party
The key's randomart image is:
+---[RSA 2048]----+
| o..o=.++.o. |
|+..=+E+.o.. |
|..B.*o.. . |
|.+ Bo+.+ |
|*=*.o.. S |
|+B=o o |
|.oo.. . |
| .. |
| |
+----[SHA256]-----+
root@master:/var/lib/rundeck# chown rundeck:rundeck /var/lib/rundeck/.ssh/id*
Setting Up Slave
On the slave server, I created rundeck account and placed the id_rsa.pub ssh key in rundeck’s authorized_keys. I also allowed the rundeck user to execute jobs as root by placing a file in /etc/sudoers.d/rundeck with these contents:
rundeck ALL=(ALL:ALL) NOPASSWD: ALLNow I’ve created a job to run:
root@slave:/etc/sudoers.d# cat /usr/local/bin/maintenance.sh
#!/bin/bash

apt-get update
apt-get -y upgrade
Creating a Job
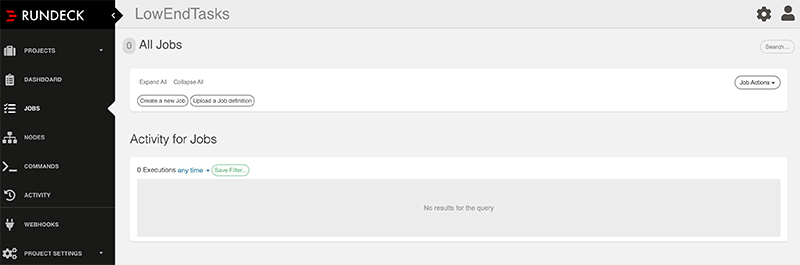
Back in the Rundeck interface, click Jobs.
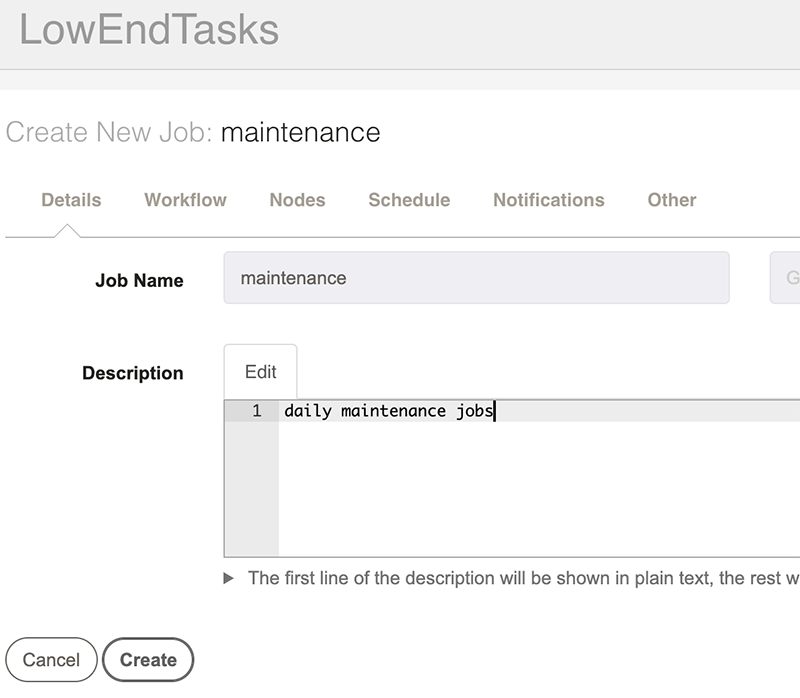
Click “Job Actions”, and then click “New Job”. Fill out the form with a suitable name and description.
Now click Workflow.
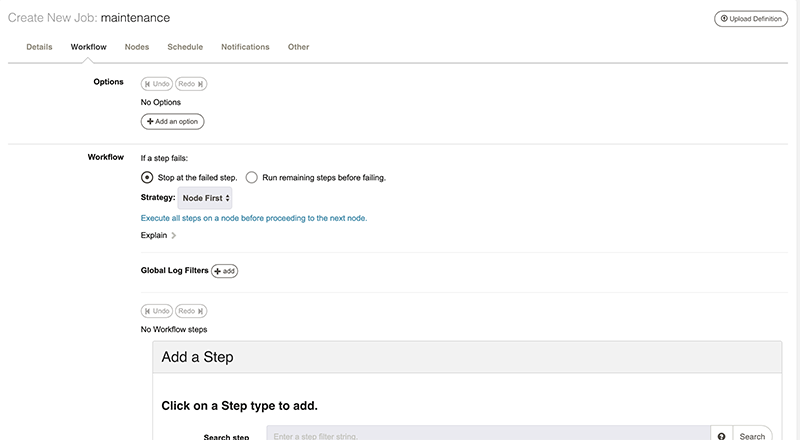
Click Add Step.
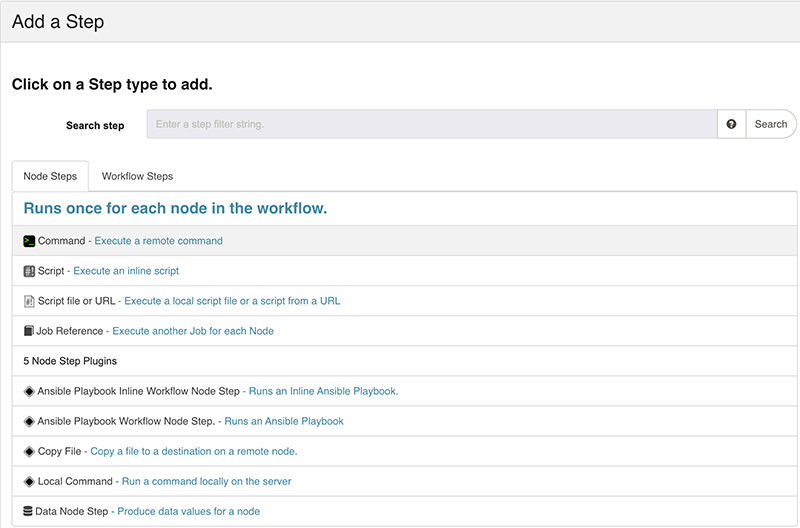
Select Command.
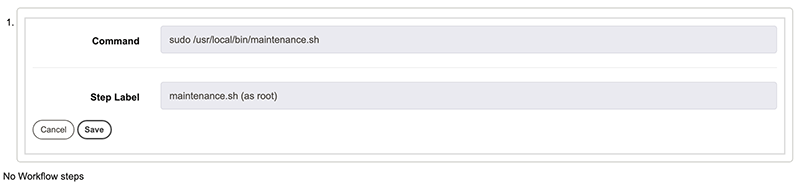
Now click Save, then click Nodes.
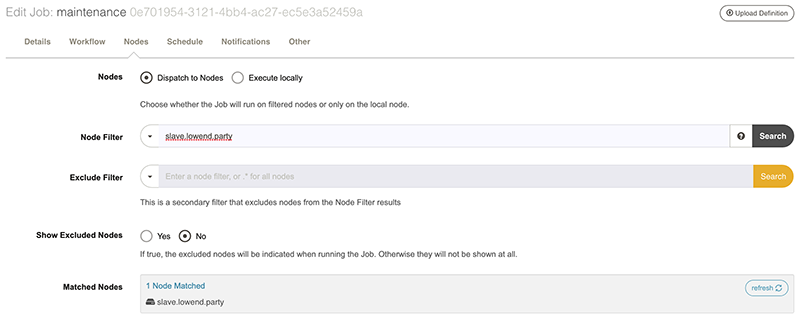
Select Dispatch to Nodes. Under Node Filter, I’ve entered the node name. If you had nodes in a specific format, you could use wildcards (e.g., prod*, etc.), list nodes, or use * for all nodes.
You can also configure instructions on how to handle failed nodes:

Now save the job definition. On the main job page, select the job.

And then Run Job Now:
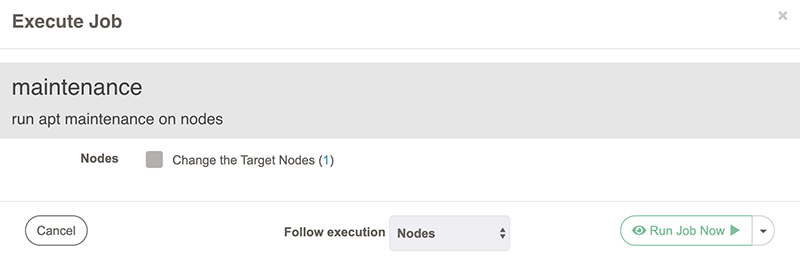
In the subsequent window, you’ll see the job’s result:

Automating Job Execution
Let’s set the job to run without need for manual execution.
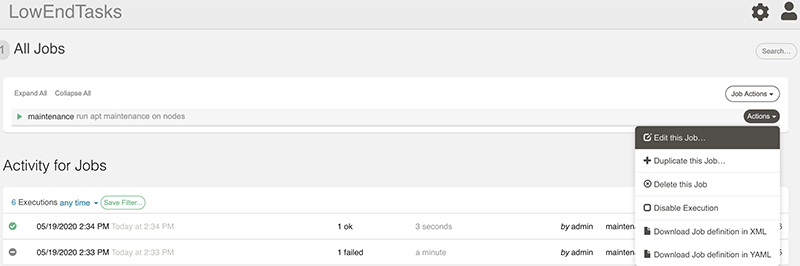
On the project’s jobs page, select Actions and then Edit This Job.
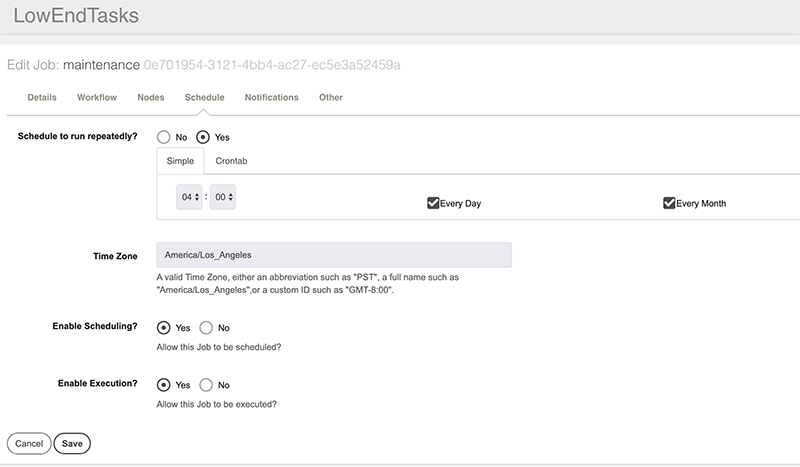
Click Schedule. The default “simple scheduler” will appear:
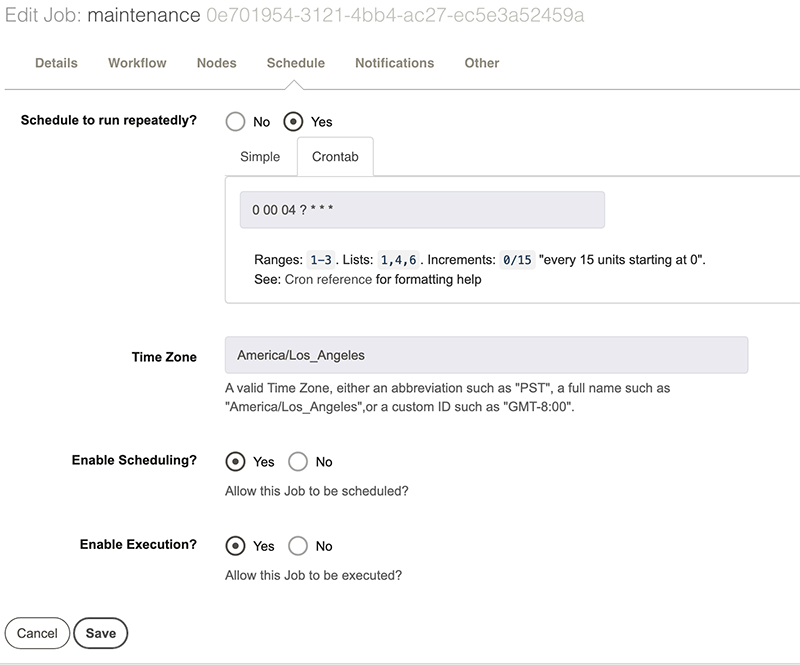
This is sufficient for most scheduling, but if you need more advanced options, you can switch to Crontab scheduling by clicking “Crontab”:
We can also setup notifications. For various states, such as job success or job failure, Rundeck can send an email or POST to a web hook (see the documentation for details). Here I will configure the job to email me if it fails. Note that I’m using one of the available Rundeck variables (${job_name}) so I don’t have to type the job name. These variables are covered in the documentation.

Multi-Step Jobs
Let’s make our job a bit more complicated by linking several steps together.
On the slave, I’ve created a script to do MariaDB backups. I also want to clean out old backups as well. For that, I will use an Inline Script as opposed to a Command. Here’s how my workflow looks now:
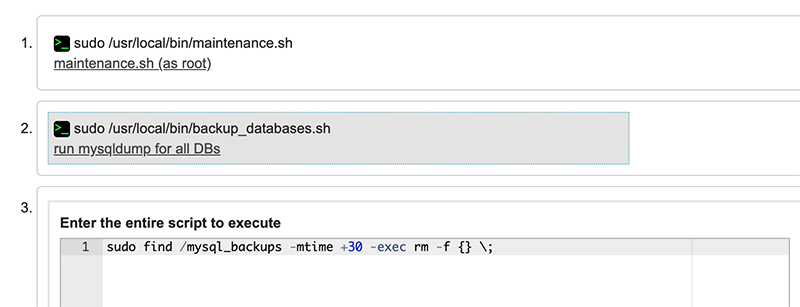
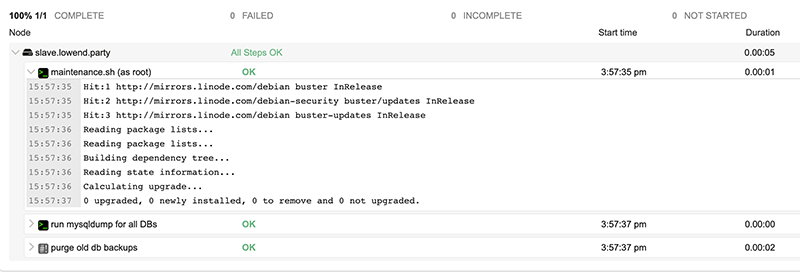
Now when I execute the job, I see all steps firing sequentially:

Learning More
We’ve barely scratched the surface of Rundeck’s capabilities. To learn more, visit Rundeck.com and peruse the documentation.
Related Posts:
Nyr's Legendary Road Warrior Script: Still the Rock Solid Go-To for Easy VPN!
Roll Your Own: How to Setup and Maintain a Minecraft Server on Your VPS
From Oracle Cloud to TOR to Telegram: Check Out LowEndTalk Tutorials!
LowEndBox BUSTED for Dealing in Mind Expanding Substances
Ramdisks: Why You Might Enjoy One, Plus a Performance Puzzler
Have You Checked Out Our Tutorials?
raindog308 is a longtime community LETizen, technical writer, and self-described techno polymath. With deep roots in the *nix world, he has a passion for systems both modern and vintage, ranging from Unix, Perl, Python, and Golang to shell scripting and mainframe-era operating systems like MVS. He’s equally comfortable with relational database systems, having spent years working with Oracle, PostgreSQL, and MySQL.
As an avid user of LowEndBox providers, raindog308 runs an empire of LEBs, from tiny boxes for VPNs, to mid-sized instances for application hosting, and heavyweight servers for data storage and complex databases. He brings both technical rigor and real-world experience to every piece he writes.
Beyond the command line, raindog308 has a life-long love of German Shepherd Dogs, high-quality knives, target shooting, theology, tabletop RPGs, playing guitar, and hiking in deep, quiet forests.
His goal with every article is to help users, from beginners to seasoned sysadmins, get more value, performance, and enjoyment out of their infrastructure.
You can find him daily in the forums at LowEndTalk under the handle @raindog308.


hey good one