There are many password managers on the market today. Most are vendor-hosted, such as LastPass, which puts you in the position of trusting the vendor’s security (on both the client and storage side). Some offer self-hosted options, but generally require Dropbox or other cloud storage. There are also standalone apps where you engineer any synchronization yourself, but not all provide the creature comforts of cross-device synchronization and browser fillers.
In this tutorial, we’ll look at Bitwarden, a password manager that offer self-hosted options, and walk through setting it up.
Before You Start
First, take note of the somewhat steep hosting requirements: 4G of RAM. You may be able to cheat a little if you’re the only user, but you’re not going to host this on a 128MB system.
Also, note that Bitwarden is docker-based, which has implications for those wanting to host on OpenVZ. But really, it’s 2020, folks.
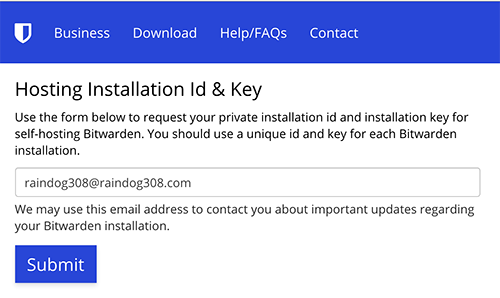
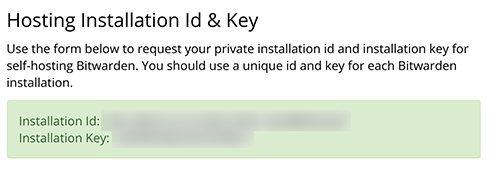
Before you begin, head over to https://bitwarden.com/host/ and enter your email address. This will provision you an installation ID and installation key, which you’ll need to install BitWarden
Bitwarden Prerequisites
With those out of the way, let’s get down to typing commands. Install some prereqs:
apt install -y apt-transport-https ca-certificates wget gnupg2 software-properties-common curl
Now we’ll add the docker repo:
wget -O - https://download.docker.com/linux/debian/gpg | apt-key add
echo "deb [arch=amd64] https://download.docker.com/linux/debian buster stable" > /etc/apt/sources.list.d/docker.list
apt update
apt install -y docker-ce docker-ce-cli containerd.io
Bitwarden wants a later/greater docker-compose than is in the repo as of this time of writing, so I’ll manually download it:
curl -L "https://github.com/docker/compose/releases/download/1.26.0/docker-compose-$(uname -s)-$(uname -m)" -o /usr/local/bin/docker-compose
chmod 755 /usr/local/bin/docker-compose
Now you can start and enable docker:
cd systemctl start docker
systemctl enable docker
Let’s make sure docker works:
root@bitwarden:~# docker run hello-world
Unable to find image 'hello-world:latest' locally
latest: Pulling from library/hello-world
0e03bdcc26d7: Pull complete
Digest: sha256:d58e752213a51785838f9eed2b7a498ffa1cb3aa7f946dda11af39286c3db9a9
Status: Downloaded newer image for hello-world:latest

Hello from Docker!
This message shows that your installation appears to be working correctly.

To generate this message, Docker took the following steps:
1. The Docker client contacted the Docker daemon.
2. The Docker daemon pulled the "hello-world" image from the Docker Hub.
(amd64)
3. The Docker daemon created a new container from that image which runs the
executable that produces the output you are currently reading.
4. The Docker daemon streamed that output to the Docker client, which sent it
to your terminal.

To try something more ambitious, you can run an Ubuntu container with:
$ docker run -it ubuntu bash

Share images, automate workflows, and more with a free Docker ID:
https://hub.docker.com/

For more examples and ideas, visit:
https://docs.docker.com/get-started/
One final step is to install the mail system of your choice. If you don’t have a choice, postfix is easy to use.
apt install postfix
Select “Internet Site” and enter the FQDN of your server (in this case, bitwarden.lowend.party).
Installing Bitwarden
I host in /bitwarden, but you can put your install anywhere you like.
mkdir /bitwarden
cd /bitwarden
curl -Lso bitwarden.sh https://go.btwrdn.co/bw-sh && chmod +x bitwarden.sh
./bitwarden.sh install
There’s a lot out output and status messages. You will need to answer some questions:
(!) Enter the domain name for your Bitwarden instance (ex. bitwarden.example.com): bitwarden.lowend.party
(!) Do you want to use Let's Encrypt to generate a free SSL certificate? (y/n): y
(!) Enter your email address (Let's Encrypt will send you certificate expiration reminders): raindog308@raindog308.com
(!) Enter your installation id (get at https://bitwarden.com/host): (you got this above)
(!) Enter your installation key: (you got this above)
We need to configure mail parameters before we start Bitwarden. To do this, edit /bitwarden/bwdata/env/global.override.env and change as follows:
globalSettings__mail__replyToEmail=no-reply@bitwarden.lowend.party
globalSettings__mail__smtp__host=bitwarden.lowend.party
globalSettings__mail__smtp__port=25
globalSettings__mail__smtp__ssl=false
globalSettings__mail__smtp__username=
globalSettings__mail__smtp__password=
This assumes you’re running a stock postfix configuration. You can also configure to use a different mail host, use SSL, login with a username/password, etc.
Once this step is complete, you’re ready to run Bitwarden. Let’s do it through systemd, so that if our VM restarts for any way, Bitwarden will start on boot.
Place the following in /etc/systemd/system/bitwarden.service:
[Unit]
Description=Bitwarden
Requires=docker.service
After=docker.service

[Service]
ExecStart=/bitwarden/bitwarden.sh start
ExecStop=/bitwarden/bitwarden.sh stop

[Install]
WantedBy=default.target
Now enable and start Bitwarden:
systemctl daemon-reload
systemctl enable bitwarden
systemctl start bitwarden
Bitwarden can take a minute or two to startup because it has to pull docker images, etc. BTW, yes, that’s Microsoft SQL Server (Express Edition) running under the covers.
Before we login, we want to configure postfix to accept mail from Bitwarden. Because Bitwarden is running via docker, when we tell it to send email to localhost, it’s not the same localhost Postfix is thinking of. Let’s see where it’s running.
# docker network ls
NETWORK ID          NAME                DRIVER              SCOPE
d9cc1f3a6b10        bridge              bridge              local
f98a474288df        docker_default      bridge              local
87cb796a4769        docker_public       bridge              local
13f31967b4d1        host                host                local
c15a9550aee7        none                null                local
If you were to look in /bitwarden/bwdata/docker/docker-compose.yml, you’d see that the ‘api’ container uses the ‘default’ and ‘public’ networks. After issuing
docker network inspect 87cb796a4769I see that the docker API container is running on 172.19.0.3.
Edit /etc/postfix/main.cf to add the part in bold:
mynetworks = 127.0.0.0/8 [::ffff:127.0.0.0]/104 [::1]/128 172.19.0.0/16
Then type
postfix reload
Logging Into Bitwarden
Once Bitwarden is up and running, browse to your hostname. In this case, https://bitwarden.lowend.party.
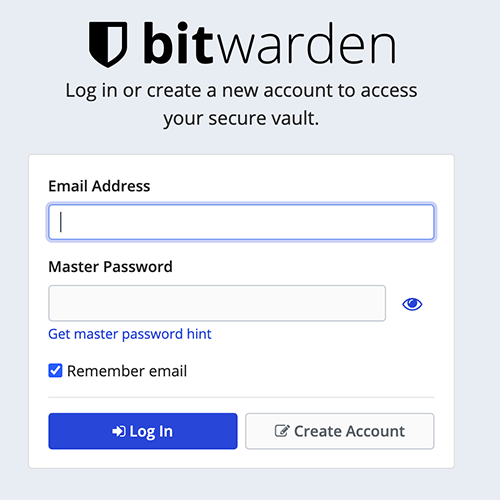
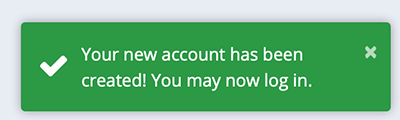
Click Create Account.
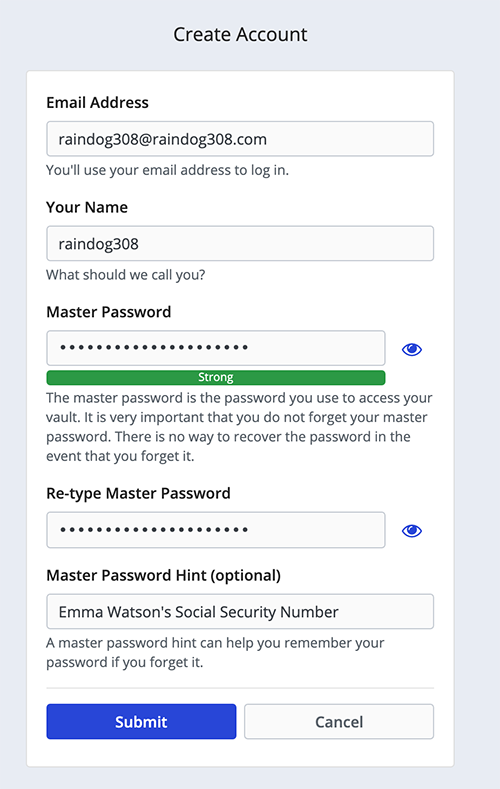
Fill out the form. Note that you’re not creating an account on bitwarden.com but rather on your server.
Now login to your account.
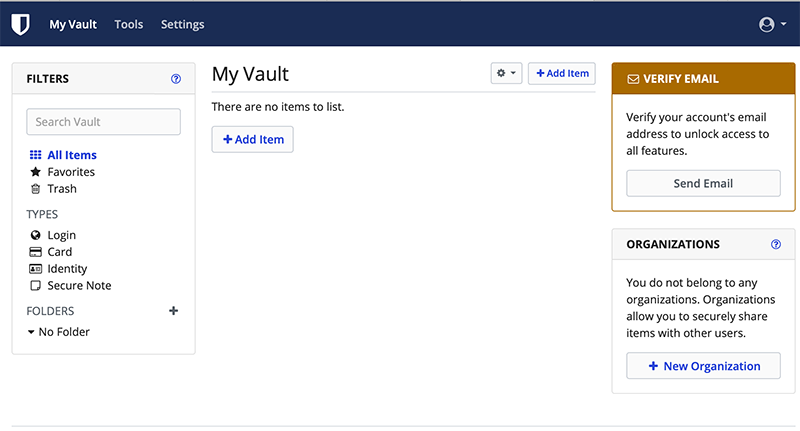
You can click Verify Email and an email verification will be sent to you.
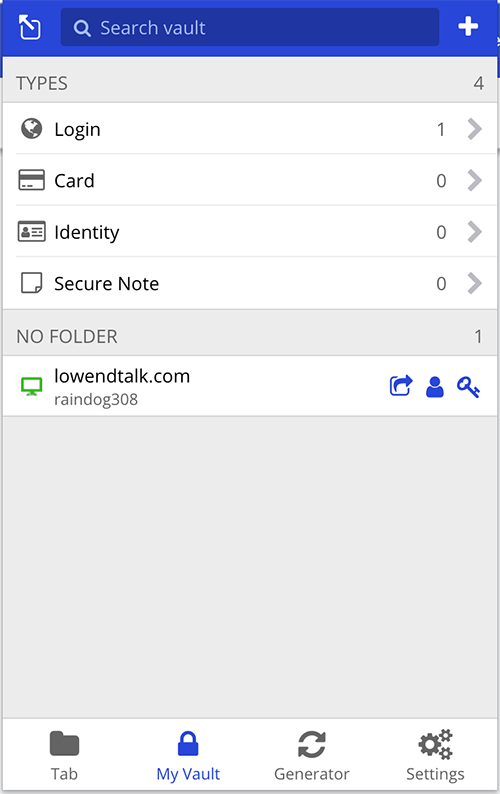
Let’s add an item. Click Add Item.

Click Save and it’s now ready for synchronization everywhere.
Configuring Your Client Devices
I’m going to walk through setting up the Chrome extension.
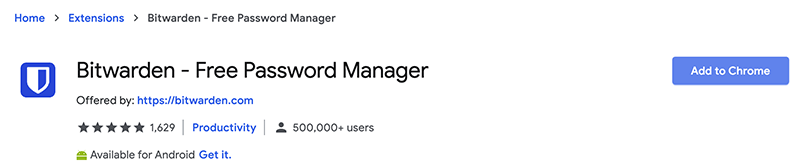
Once setup, click on the Bitwarden icon and the setup screen will drop down.

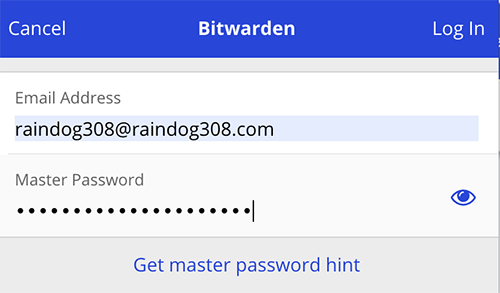
If you attempt to login there, you’ll be logging into Bitwarden.com. Instead, click the gears icon.

Enter your server URL. Then save and login with your credentials.
Your synchronized vault will appear.
The setup on phones, etc. is virtually identical as it’s the same panels and forms. Remember click the gear icon to enter your custom server URL.
Using Bitwarden
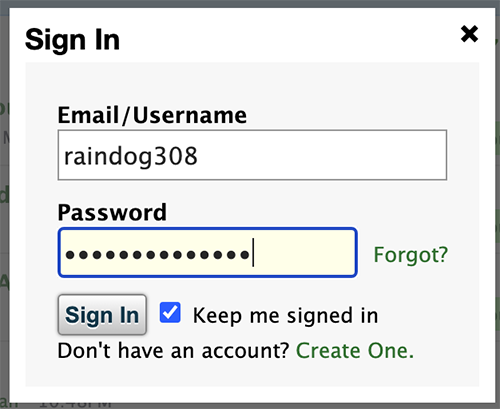
Let’s use this login. I browse to the world’s greatest web site and click Sign In. When the Sign In box pops up, I hit control-shift-L (command-shift-L on Mac) and my credentials are autofilled.
Securing Bitwarden
Right now, anyone who comes across your Bitwarden install can click Create Account and set themselves up. They won’t have access to your logins (unless they know your login and master password) but you don’t want people setting up accounts.
To prevent this, edit /bitwarden/bwdata/env/global.override.env and set disableUserRegistration to true:
globalSettings__disableUserRegistration=true
This toggles account to creation to false. Note that the button will still appear in the GUI but people won’t be able to create accounts.
Backing Up Bitwarden
To backup Bitwarden, you should
- Shutdown Bitwarden to ensure the database is consistent
- Backup /bitwarden/bwdata
- Restart Bitwarden
Should you need to restore a backup, follow this Bitwarden doc.
Related Posts:
Ten Cool Linux Command Line Tricks for the Journeyman Practitioner
How to Stretch a 10GB VPS Disk: Compressed Folders, tmpfs, and Space-Saving Magic
What Happens When You Run a VPS with Zero Swap?
Before You Format: ext4, XFS, and btrfs Differences Explained (And Which One You Should Pick)
The End of Uniprocessor Configs on Linux - It's a Multicore-Only Kernel Now
Five Times When Updating Your OS Would Have Saved You From Being Hacked
Raindog308 is a longtime LowEndTalk community administrator, technical writer, and self-described techno polymath. With deep roots in the *nix world, he has a passion for systems both modern and vintage, ranging from Unix, Perl, Python, and Golang to shell scripting and mainframe-era operating systems like MVS. He’s equally comfortable with relational database systems, having spent years working with Oracle, PostgreSQL, and MySQL.
As an avid user of LowEndBox providers, Raindog runs an empire of LEBs, from tiny boxes for VPNs, to mid-sized instances for application hosting, and heavyweight servers for data storage and complex databases. He brings both technical rigor and real-world experience to every piece he writes.
Beyond the command line, Raindog is a lover of German Shepherds, high-quality knives, target shooting, theology, tabletop RPGs, and hiking in deep, quiet forests.
His goal with every article is to help users, from beginners to seasoned sysadmins, get more value, performance, and enjoyment out of their infrastructure.
You can find him daily in the forums at LowEndTalk under the handle @raindog308.


Wow so many useful articles lately, thank you Andrew!
Also, would love to read on how to set up Bitwarden_rs the less hungry alternative.
very nice detailed article!
Had no idea Bitwarden has a self-hosted option now. Thanks.
I’m guessing the advantage of self-hosted Bitwarden is that passwords are stored on someone’s own server so access can be more tightly controlled like using a VPN, client SSL certificates, or private LAN. Otherwise, Bitwarden has free secure cloud storage of passwords through their mobile apps, desktop apps, and Chrome extension.
Use bitwarden_rs instead. Install via docker and docker-compose for super easy setup. Uses *FAR* fewer resources. I have it plus a bunch of other stuff running on a 1GB VPS and I’m at 50% ram. Bitwarden_rs uses about 100MB according to htop.
Install the chrome extension and life is easy. Also the iOS and Android apps are nice and allowing the keyboard means it’ll autotype.