What is Apache Virtual Host
Apache virtual host helps to run multiple websites on the same server. There are two types of virtual host configuration that apache supports
- IP-based virtual hosts
- Name-based virtual hosts
IP based virtual host configuration is used to host multiple websites on different IP addresses on the same physical server. This is not commonly used while comparing with the name based virtual host.
The name based virtual host configuration is the commonly used configuration for serving multiple websites from the same physical server. In this configuration, when apache web server receives a request, it will look for the virtual host file configuration and deliver the content from the configured directory.
This process will not show the end user that the same server is responsible for serving of other websites. There is no limit on the number of websites you can host on your server using the virtual host configuration as far as your server can bear the load.
In this article, we will be guiding through how to configure apache virtual hosts on Ubuntu 16.04.
Prerequisites
Get the following things ready with you before we start configuring the virtual host file on Ubuntu 16.04
– A machine with Ubuntu 16.04 installed
– A user account with sudo privileges
– Putty to connect to server
Note:
Throughout this article, we will be referring domain names as “example1.com” and “example2.com”. Replace these example domain names with your actual domain name wherever required.
Did you get a chance to read our previous article How to Install Apache, MySQL, PHP (LAMP) Stack on Ubuntu 16.04? This article explains the installation procedure of Apache, MySQL, PHP on Ubuntu. It is the common configuration required to run most of the web applications.
Setup Apache Virtual Hosts on Ubuntu 16.04
This tutorial explains all the steps of virtual host configuration and testing of it for successful configuration. The steps covered in this article are listed below.
- Update system repositories
- Installing Apache on ubuntu
- Creating directory for websites
- Create test pages for each website
- Create Virtual hosts file
- Enable the newly virtual host files
- Testing of the virtual host files
1. Update System Repositories
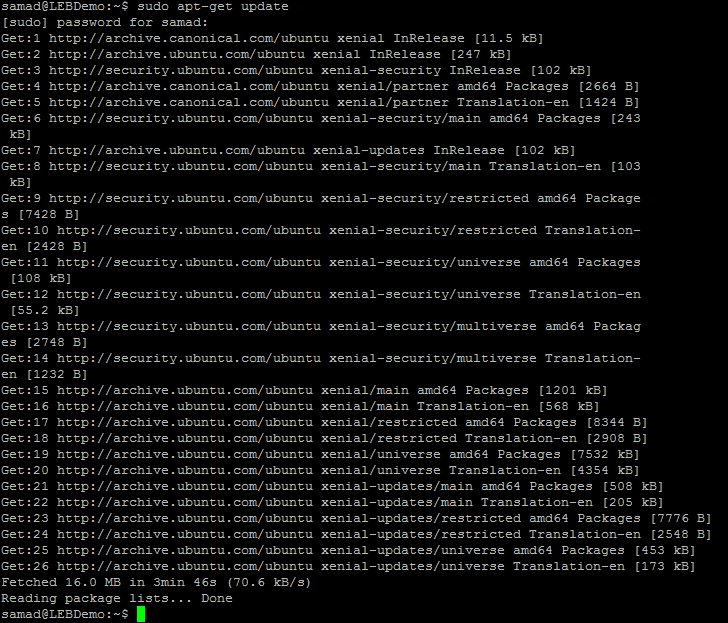
Before we start with any installation or configuration, make sure that the system repositories are updated. Please run the following command on the Putty box to make the system up to date
sudo apt-get update
2. Installing Apache on Ubuntu
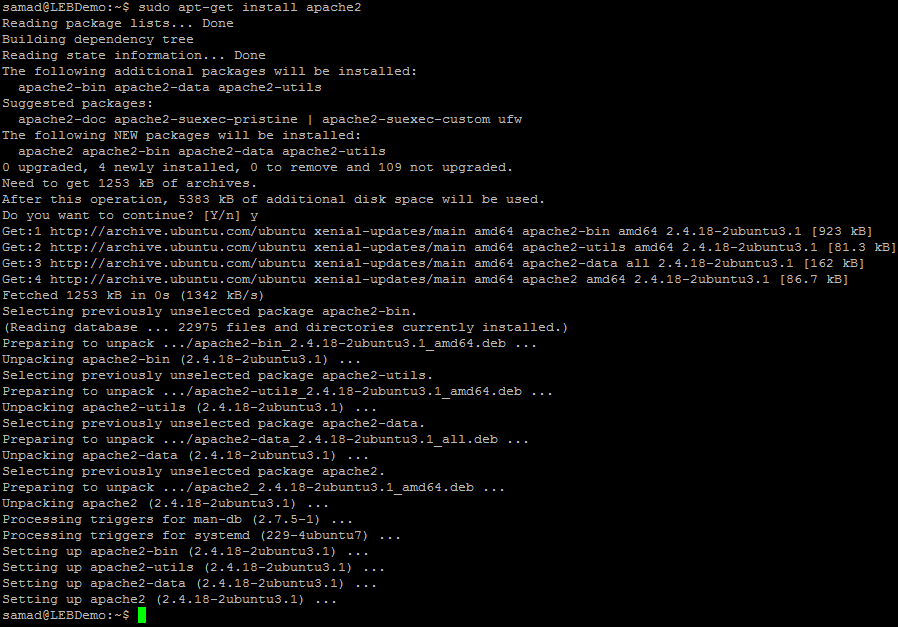
If you have already installed apache on the server, please move on to the next step. If not, go ahead with the following command to install apache on the server.
sudo apt-get install apache2
The apache status can be checked by running either of the following commands
sudo service apache2 status
or
sudo systemctl status apache2
If the apache is running on your server, you can move ahead with the further steps listed below
3. Create directory for websites
We need to create a separate directory for each domain name to store the website files. By default, the document root will be /var/www/html. We are going to create separate directories for the domain names example1.com and example2.com in the www directory.
that is, the directory structure will look like as below.
/var/www/example1.com and /var/www/example2.com
For a better directory structure and convenience, we will host our website files in the public_html folder which is created inside each domain directory.
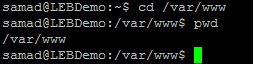
Just use the following command to change your current directory to /var/www/
cd /var/www
Confirm the present directory by issuing the following command
pwd
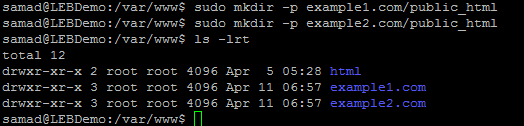
Just release the following commands in the putty box to create directories for example1.com and example2.com websites
sudo mkdir -p example1.com/public_html
sudo mkdir -p example2.com/public_html
Use the following command to list the contents of current directory
ls -lrt
4. Create test pages for website
We will create test pages for both of these example URLs in the directory. This will be used to test our virtual host file after configuration.
We will place index pages on both of the domain’s public_html folders. This is a test file for our demo, if you need to use your website files, you can upload it now or later by removing this index file.
cd /var/www/example1.com/public_html
sudo vi index.html
Paste the following HTML code into the file and press Esc:wq and hit enter to save and return to the command window
<html>
<body>
<h1>Howdy! The example1.com virtual host is working Fine!</h1>
</body>
</html>
Now, we will create a similar index for example2.com, If you need only one virtual host to be created for testing, just skip this step
cd /var/www/example2.com/public_html
sudo vi index.html
Copy paste the following code into the text editor and exit by pressing the keys Esc:wq and Enter
<html>
<body>
<h1>Howdy! The example2.com virtual host is working Fine!</h1>
</body>
</html>
Now you have successfully created the index files for both the domain names. We will move on to the next step for creating virtual hosts files for both these websites.
![]()
5. Creating virtual host files
In this step, we are going to create virtual host files for each of our domain names. This virtual host files will tell the web server to process the correct files for each website request.
By default, there will be a virtual hosts file named “000-default.conf” which helps to load the default Apache web server page on request.
We will copy this default configuration for our website and will make some changes to work with our domain example1.com
cd /etc/apache2/sites-available/
sudo cp 000-default.conf example1.com.conf
The above command will copy the contents of 000-default.conf to example1.com.conf. Now we will modify example1.com.conf to accept the request for the domain name example1.com
sudo vi example1.com.conf
The example file will look like as below
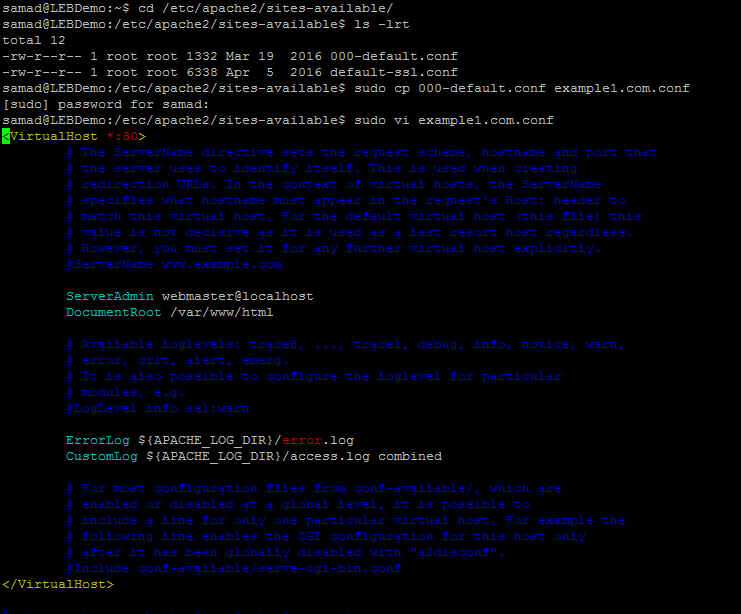
We have only a few lines to customise in it.All the lines starting with # is a comment.
The following line of the virtual host file will match the request that comes on the port 80
<VirtualHost *:80>
We need to modify the server admin email in the next line
ServerAdmin webmaster@example1.com
We need to add two more directives after this line to process the domain request. The ServerName and ServerAlias which will match the domain name to process the request.
ServerName is the domain name. ie, example1.com
ServerAlias is the additional matching conditions that need to be processed. ie, www.example1.com
Add these lines to the virtual host file
ServerName example1.com
ServerAlias www.example1.com
The most important and final thing we need to change in the default virtual host file is the document root. As mentioned, the default document root will be /var/www/html. However, we have created different directory for our websites which needs to be mentioned here
DocumentRoot /var/www/example1.com/public_html
You can save and close the opened virtual host file after making these changes.
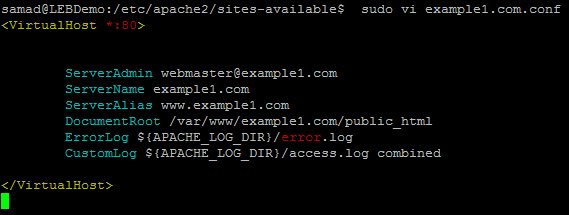
In short, the virtual host file will have the following contents after removing the comments from it
<VirtualHost *:80>
ServerAdmin webmaster@example1.com
ServerName example1.com
ServerAlias www.example1.com
DocumentRoot /var/www/example1.com/public_html
ErrorLog ${APACHE_LOG_DIR}/error.log
CustomLog ${APACHE_LOG_DIR}/access.log combined</VirtualHost>
You have successfully created virtual hosts file for example1.com. Create the virtual host file for example2.com by just repeating the steps by changing example1.com to example2.com
6. Enable new virtual host files and disable the default
In this step, we will enable the newly created virtual host files and disable the default file created by apache.
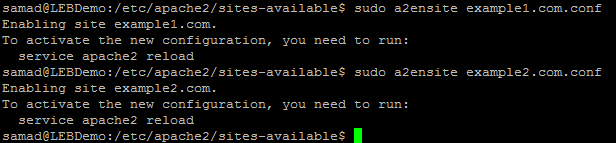
Just run the following command in the putty box to enable example1.com.conf and example2.com.conf using a2ensite tool
sudo a2ensite example1.com.conf
sudo a2ensite example2.com.conf
Now disable the default virtual host file
sudo a2dissite 000-default.conf
You need to restart apache to take these changes effect. Supply any of the following commands to restart apache
sudo systemctl restart apache2
or
sudo service apache2 restart
Set up Apache virtual hosts file on Ubuntu has been completed. Now we can go ahead with testing of the virtual host file.
7. Testing virtual hosts file configuration
If you have used a real domain name that is pointed to your VPS, you can just load that domain from the web browser. Otherwise, you need to edit the local host file to redirect the dummy domain name to your web server’s IP address
For Mac and Linux computer, edit the following file
/etc/hosts
For Windows, edit the below hosts file to redirect the domain request to your server IP
C:\Windows\System32\drivers\etc\hosts
Add the server IP address and the dummy domain name in the following format

Save the hosts file on your local machine and try to access the example domain name from any web browser. If you are receiving the following result, you have successfully configured virtual hosts on Ubuntu.

Wrapping up…
If you have correctly followed our tutorial, you might have ended up configuring two virtual hosts file on ubuntu for running two websites on a single server.
You can run multiple websites on the same server by adding more virtual host files to the configuration by repeating the steps mentioned in this article.
Related Posts:
Nyr's Legendary Road Warrior Script: Still the Rock Solid Go-To for Easy VPN!
Roll Your Own: How to Setup and Maintain a Minecraft Server on Your VPS
From Oracle Cloud to TOR to Telegram: Check Out LowEndTalk Tutorials!
LowEndBox BUSTED for Dealing in Mind Expanding Substances
More On Installing And Configuring Certbun For Use With Apache
Updating A Free Udemy Bootstrap Course On Oracle Cloud Free Tier
At LowEndBox, our News and Editorial Team is dedicated to delivering timely, accurate, and actionable content tailored to the needs of developers, hosting enthusiasts, and infrastructure professionals. We curate, report, and analyze the latest developments in the world of hosting, cloud infrastructure, data centers, open-source platforms, and internet services, always with a focus on value, performance, and accessibility.
Our team monitors the global hosting landscape to bring you breaking news, vendor updates, platform changes, market trends, and expert insights. Whether it’s a price hike from a major control panel, a breakthrough in virtualization technology, or a new indie provider shaking up the market, we strive to deliver content that empowers the LowEnd community to stay informed and ahead of the curve.
We also collaborate closely with the vibrant LowEndTalk community to surface meaningful discussions, highlight real-world deployments, and share voices from within the ecosystem.
Our mission is simple: to help you make smarter infrastructure decisions by delivering the stories that matter, clearly, consistently, and without hype.
Stay tuned for fresh editorial content, in-depth analyses, and community-powered features from the team that keeps LowEndBox running.


What about for CENTOS???
gg
Thank you very much
Thank you very much, excellent 🙂
It worked! Thank you
Thanks for this, some other notes, add this inside the tag if you are using something like Laravel that uses a .htaccess file
Require all granted
AllowOverride All
“Require all granted” means all IP Addresses can access the site (I assume you can also block IP’s here?)
“AllowOverride All” means use the .htaccess file located in the Directory.
I just had to add this to get Laravel 5.4 working with Apache 2.4 because routes were not working after deployment to production. Happy I found your site as it helped set everything else up 🙂
Please, this is running if you load the browse of the same local machine where the virtual hosts is, but do not for the others addresses in the same local network. How do it for the others machine in the local network (the mask is the same)?
Abdu, thank you very much for this tutorial. It has helped me a lot.
Greetings from Mexico!
Thank you very much it was very helpful.
Every thing is fine but at the final step when I type deneme01.com I get this error msg and my site does not show:
Your connection is not private
Attackers might be trying to steal your information from deneme01.com (for example, passwords, messages, or credit cards). Learn more
NET::ERR_CERT_COMMON_NAME_INVALID
Thank you for the help everything is working fine we need more people like you on the web to help other people ho want to learn more about Linux
*****
not working for me ,,,,
Hello, tks all works
But how can I run Let’s encrypted https for all virtual host.
perfect
Simple but super duper tutorial, thanks buddy.