 In this tutorial, we’ll show you how to setup your own private, encrypted, self-hosted video conferencing solution. You’ll be able to hand out a URL (and optionally a password) to people and have them join you for a live video group chat, the same was you would using Zoom, GotoMeeting, Google Hangouts, etc. The product we’re going to use is Jitsi.
Setting Up the Server
I’m using a Debian 10 server with 4GB of RAM named “videochat.lowend.party”. This may be overkill. Depending on the number of concurrent connections, you may be able to get away with as little as 1GB of RAM. As you know, there are plenty of cheap VPS options available on LowEndBox.com and both OpenVZ and KVM based systems will work well.
You must have a valid DNS entry setup and working for your server.
After imaging, I installed some prerequisites.
apt-get update
apt-get -y install openjdk-11-jre-headless nginx gnupg2 wget
Let’s enable and start nginx:
systemctl enable nginx
systemctl start nginx
Now we need to add the Jitsi repository. First, grab and add the key:
# wget -qO - https://download.jitsi.org/jitsi-key.gpg.key | apt-key add -
OK
Next, add the Jitsi repository and update apt:
echo 'deb https://download.jitsi.org stable/' > /etc/apt/sources.list.d/jitsi-stable.list
apt-get update
And now we’re ready to install Jitsi:
apt-get -y install jitsi-meet
You’ll be asked two questions during setup:
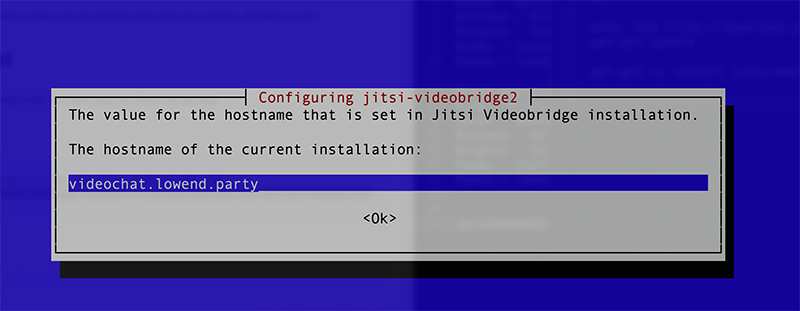
Enter your hostname.
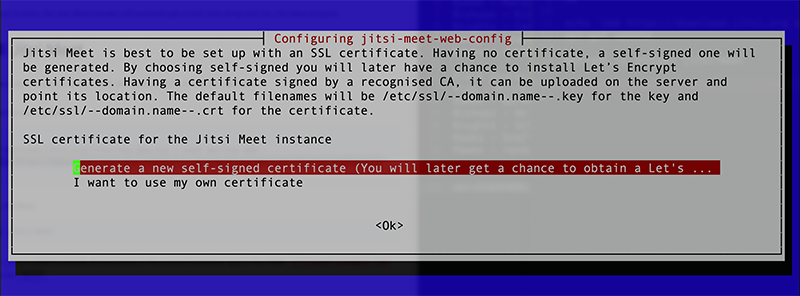
Select “Generate a new self-signed ceritificate”.
Jitsi will then finish installation. When it’s done, we want to setup Let’s Encrypt so that our video chats are encrypted. Use the Jitsi-provided script for this purpose:
/usr/share/jitsi-meet/scripts/install-letsencrypt-cert.sh
The only question you’ll be asked is your email address. Jitsi will take care of everything else.
Once it’s done, you’re ready to go!
We’re Live
I pointed my browser at https://videochat.lowend.party:
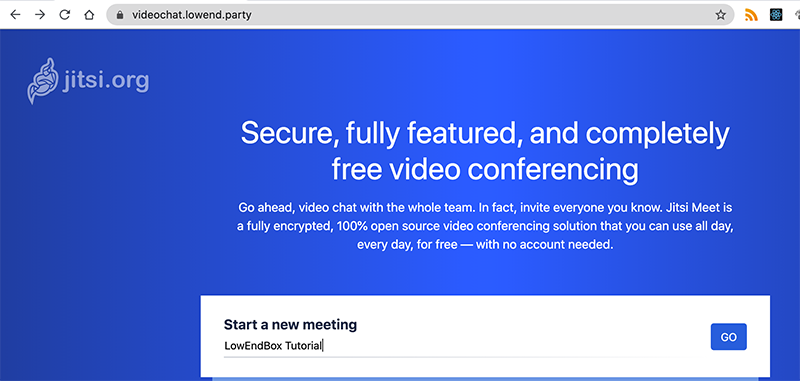
You can type a name for your meeting in the center box and then press Go, and your conference will be live.
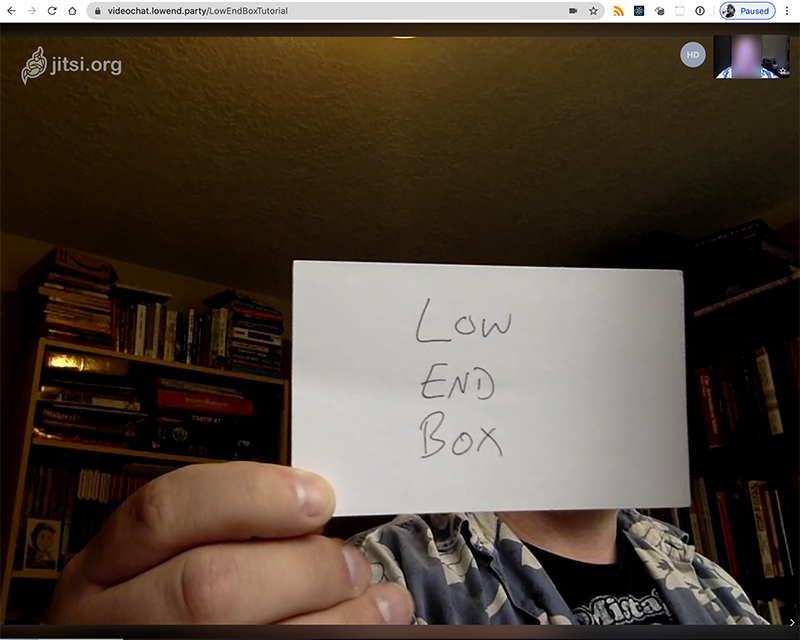
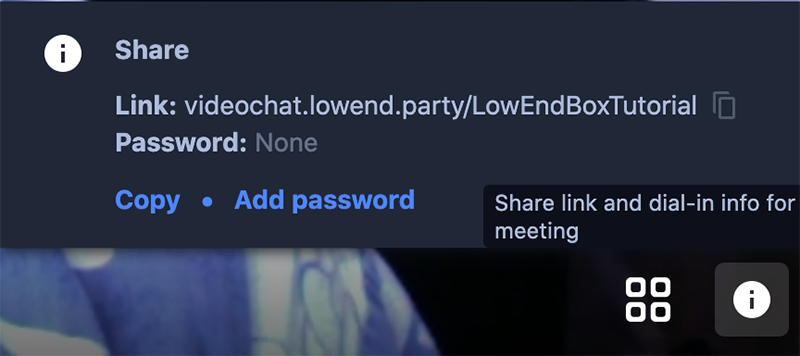
Click the information (“i” in a circle) button in the lower right to copy the URL to your video chat, and optionally set a password.
Securing Jitsi Meet
If you add a password to a conference, that means that no one else can join that conference. But you’re not protected against some random Internet user discovering your Jitsi Meet installation and using it to start a conference of your own, draining your server resources and bandwidth. Let’s fix that.
First, edit /etc/prosody/conf.avail/(your hostname).cfg.lua. Edit the “VirtualHost” section for your server and change the authentication parameter from “anonymous” to “internal_plain”:
VirtualHost "videochat.lowend.party"
        authentication = "internal_plain"
        ssl = {
                key = "/etc/prosody/certs/videochat.lowend.party.key";
                certificate = "/etc/prosody/certs/videochat.lowend.party.crt";
        }
        speakerstats_component = "speakerstats.videochat.lowend.party"
        conference_duration_component = "conferenceduration.videochat.lowend.party"
        modules_enabled = {
            "bosh";
            "pubsub";
            "ping"; -- Enable mod_ping
            "speakerstats";
            "turncredentials";
            "conference_duration";
        }
        c2s_require_encryption = false
Copy these lines and except for the ssl sction and paste them directly below, changing as follows (bolded):
VirtualHost "guest.videochat.lowend.party"
       authentication = "anonymous"
       -- do not copy the ssl section
       speakerstats_component = "speakerstats.videochat.lowend.party"
       conference_duration_component = "conferenceduration.videochat.lowend.party"
       modules_enabled = {
           "bosh";
           "pubsub";
           "ping"; -- Enable mod_ping
           "speakerstats";
           "turncredentials";
           "conference_duration";
       }
       c2s_require_encryption = false
guest.videochat.lowend.party is an internal entry, not something we need to create an external DNS entry for. However, you should create an entry in /etc/hosts:
127.0.0.1 localhost videochat.lowend.party guest.videochat.lowend.party
Now edit /etc/jitsi/meet/(your hostname)-config.js and add the following entry (bolded):
var config = {
    hosts: {
        domain: 'videochat.lowend.party',
        anonymousdomain: 'guest.videochat.lowend.party',
Edit /etc/jitsi/jicofo/sip-communicator.properties and add this line:
org.jitsi.jicofo.auth.URL=XMPP:videochat.lowend.partyNow create users that will authenticate via the prosodyctl command. For example:
prosodyctl register raindog308 videochat.lowend.party complex-password
Then reboot your server (fastest way to restart all the services).
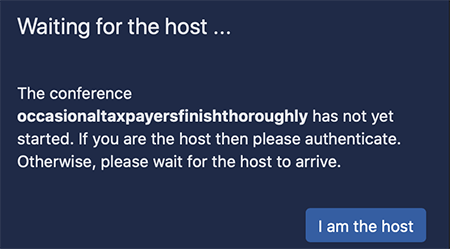
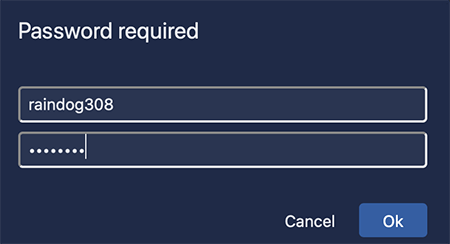
Now when you go to your Jitsi Meet and try to start a meeting, you will see a prompt to authenticate before you can start a conference:
Related Posts:
Nyr's Legendary Road Warrior Script: Still the Rock Solid Go-To for Easy VPN!
Roll Your Own: How to Setup and Maintain a Minecraft Server on Your VPS
From Oracle Cloud to TOR to Telegram: Check Out LowEndTalk Tutorials!
LowEndBox BUSTED for Dealing in Mind Expanding Substances
Ramdisks: Why You Might Enjoy One, Plus a Performance Puzzler
Have You Checked Out Our Tutorials?
raindog308 is a longtime community LETizen, technical writer, and self-described techno polymath. With deep roots in the *nix world, he has a passion for systems both modern and vintage, ranging from Unix, Perl, Python, and Golang to shell scripting and mainframe-era operating systems like MVS. He’s equally comfortable with relational database systems, having spent years working with Oracle, PostgreSQL, and MySQL.
As an avid user of LowEndBox providers, raindog308 runs an empire of LEBs, from tiny boxes for VPNs, to mid-sized instances for application hosting, and heavyweight servers for data storage and complex databases. He brings both technical rigor and real-world experience to every piece he writes.
Beyond the command line, raindog308 has a life-long love of German Shepherd Dogs, high-quality knives, target shooting, theology, tabletop RPGs, playing guitar, and hiking in deep, quiet forests.
His goal with every article is to help users, from beginners to seasoned sysadmins, get more value, performance, and enjoyment out of their infrastructure.
You can find him daily in the forums at LowEndTalk under the handle @raindog308.


visiting: http://videochat.lowend.party
results in –
File not found
The web address you entered could not be found. This could be because the site is temporarily offline or because the file you requested no longer exists on the web site. Please verify that you have correctly entered the web site address and try again. If this problem persists, try browsing to the web site’s home page and navigating to the file from there.
I got Error: Account creation/modification not supported.