 When Gmail got going, they allowed people to setup email with custom domains, so naturally all of you did.
Then they took that feature away and said if you want that, you have to pay, but legacy accounts were grandfathered. For a while, there was a lively market of people selling Gmail domains that were “legacy-enabled”. Because Gmail legacy came in different sizes, some allowed 25 accounts, some 100, and some really valuable ones 1,000. Of course, once you got the domain, you probably didn’t want to use joe@healingsoups.info or whatever goofy domain, but for a while there were a seemingly endless number of tricks that could be used to add domain, alias a domain, or otherwise manipulate a complex series of APIs, web pages, and forms to either add or switch the domain so you could once again be joe@sadisticdeathmissile.com or whatever you prefer. According to one study I just made up, had all of this brainpower been harnessed for the greater good, both cancer and tooth decay would have been cured by now.
One by one, Google closed these holes.
And then finally the big bomb was dropped: Google announced they were cancelling legacy accounts. There were pumped fists and even lawsuits discussed. This was all rather silly and a bit of spoiled brat/foot stomping because Google never promised you a free rose garden and it was actually pretty nice of them to provide free service for 14-odd years (admittedly, they’re making money on ad revenue).
But then Google relented! Sort of. If your account is purely for personal use, you’re golden. If you’re using it for business, you need to pay. My private theory is that Google’s own employees had flocked to Gmail and had put all their family on it and were now grousing about having to hand over $5/head.
So now it’s time to actually make the move! And it’s ridiculously easy. I expected forms and dire oaths and probably a credit card number and maybe a DNA swab, but it’s four clicks. Let’s walk through it. Estimate time: 30 seconds, if you’re slow.
Step 1: Login to your Gmail. You’ll see this banner, which you’ve probably been visually ignoring for months:

Click Choose now. You’ll then be presented with two options.
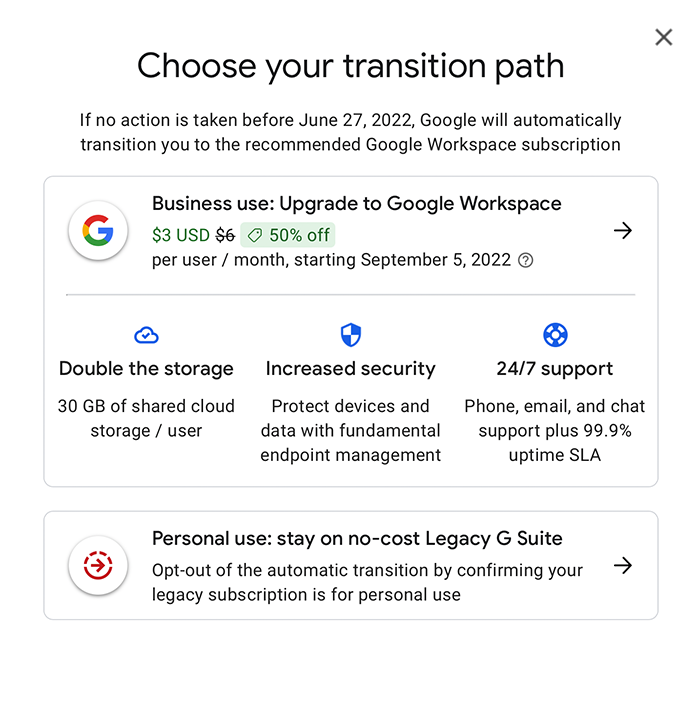
Step Two: You want the bottom option. Click “Personal use”.
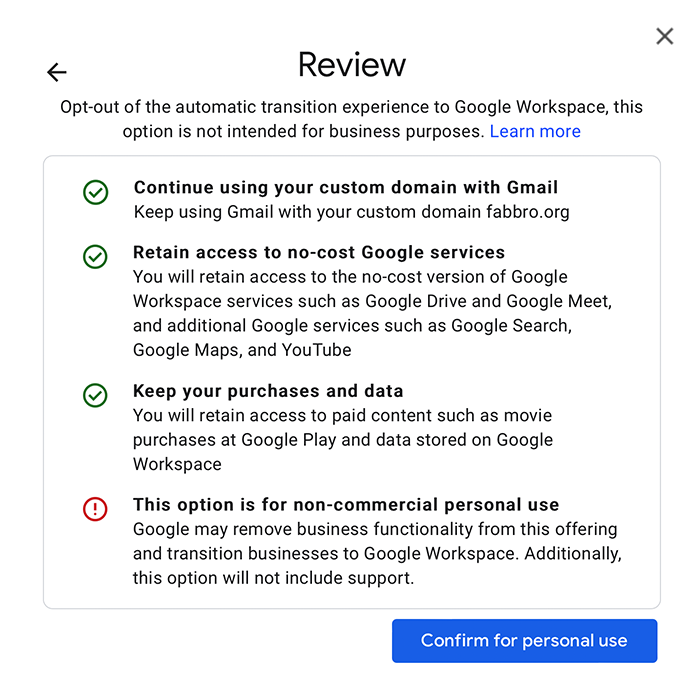
Step Three: That first check box is the one we want to see. Click “Confirm for personal use”.
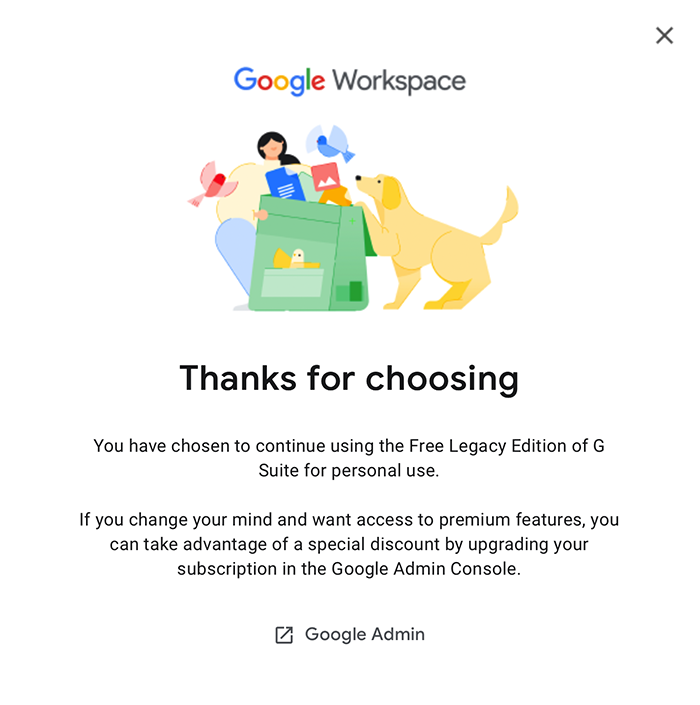
Step Four: There is no step four. You’re done!











> it was actually pretty nice of them to provide free service for 14-odd years (admittedly, they’re making money on ad revenue).
I will point out that GA/GW never did the ad scanning or whatever on free accounts either, as long as they were Apps/Workspace and not @gmail.com.