![]() It should first be noted this tutorial is designed to be used along with a server that has Proxmox Virtual Environment installed.
It should first be noted this tutorial is designed to be used along with a server that has Proxmox Virtual Environment installed.
Proxmox is probably the easiest-to-use virtual machine manager, and the best part is it’s entirely free (without enterprise repositories). I love it.
I consolidated the majority of my servers onto one main Proxmox server, but I realized if my drive went bad I was pretty much out of luck (no raid #yolo).
So, I did some research and came upon a nifty little tool named Proxmox Backup Server. It didn’t take long before I realized PBS was the real deal.
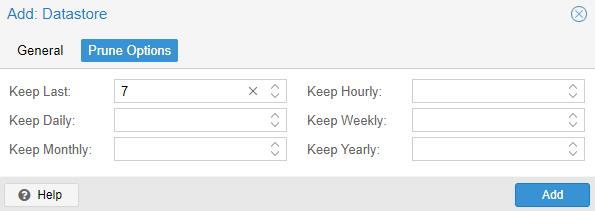
Anyway, in pursuit of a safety net, I set up a Proxmox Backup Server to take incremental backups every day, storing the backups for the last 7 backups and then deleting the backups.
I figure if something gets absolutely borked, I’ll figure it out within a week. I also pull backups of the VMs off of Proxmox VE once a week that’s stored on an external hard drive at home.
The way Proxmox PBS works makes it hard to back up the VMs directly without first installing Proxmox VE because VMs are intended to be restored directly from PBS after you add it as a storage source to the new Proxmox VE server.
You could set up more than one PBS server for redundancy, but I simply choose to export the VM snapshots directly from Proxmox VE and download them on an external hard drive I keep at home.
That way, I have two sources of failure. My house would have to catch on fire or flood at the same time FiberState and Alwyzon did.
There are a couple of geographical differences there that make that unlikely, unless… it’s doomsday, of course.
You don’t have to pull the data weekly like I do, but it’s recommended (or at least set up some form of redundancy outside of one Proxmox Backup Server).
This tutorial, however, will be about showing you how to set up a Proxmox Backup Server and automatically take self-pruning incremental backups. Let’s dive in.
Step 1: Install Debian 12 on a Storage Server
The first thing you’ll need to do is install Debian 12 on a high-storage server. I use Alwyzon:
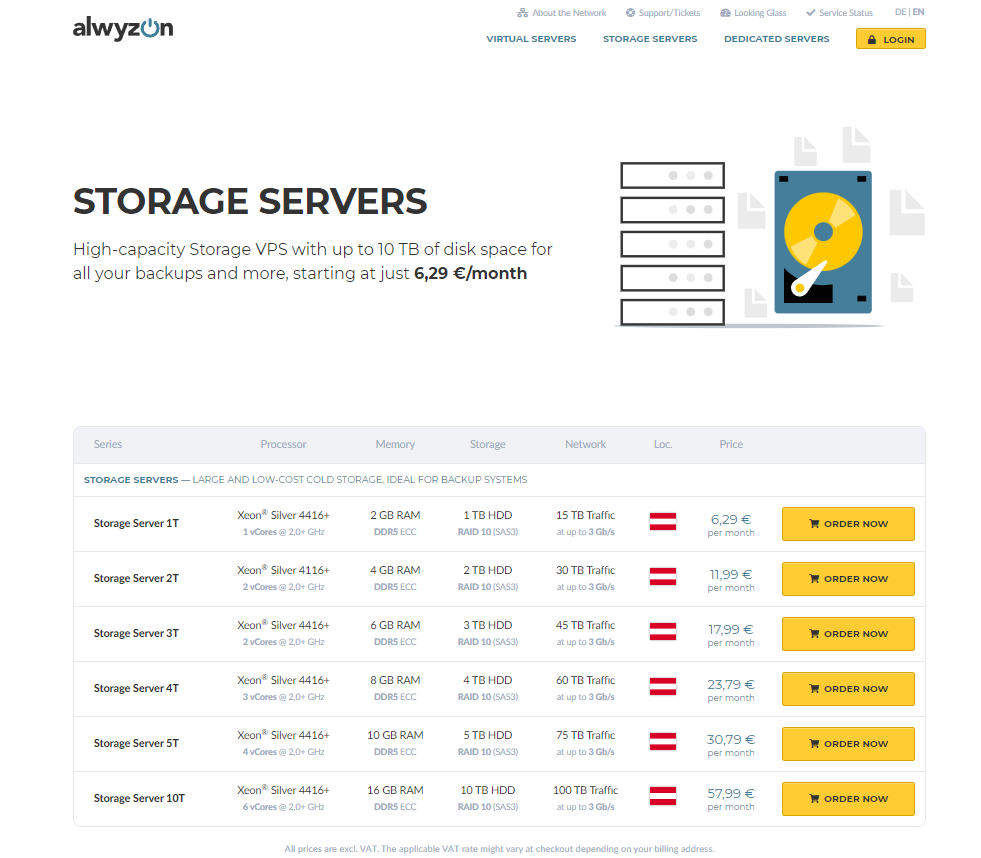
They’re located out of Vienna, Austria (I’ve heard it’s beautiful there and I need to visit) — and it doesn’t really make sense why I picked them, considering I’m way over in the States.
But I did, and I don’t regret it. It’s served its purpose fine for me, and it’s been reliable.
So, I will apply the ancient Midwestern proverb: “If it ain’t broke, don’t fix it.”
Once you’ve obtained a Debian 12 server, I would suggest configuring an SSH key as the only source of authentication; rather than text-based authentication.
It’s also suggested to setup an actual hostname such as pbs.yourdomain.com for your server and point it towards your PBS server IP.
Step 2: Installing Proxmox Backup Server
After Debian 12 is set up, we’ll need to modify our repositories.
Use the following command with root privileges:
nano /etc/apt/sources.list
You’ll see something like the following:
deb http://deb.debian.org/debian bookworm main non-free-firmware
deb-src http://deb.debian.org/debian bookworm main non-free-firmware

deb http://deb.debian.org/debian-security/ bookworm-security main non-free-firm>
deb-src http://deb.debian.org/debian-security/ bookworm-security main non-free->

deb http://deb.debian.org/debian bookworm-updates main non-free-firmware
deb-src http://deb.debian.org/debian bookworm-updates main non-free-firmware
Add this additional repository to the file:
# Proxmox Backup Server pbs-no-subscription repository provided by proxmox.com,
# NOT recommended for production use
deb http://download.proxmox.com/debian/pbs bookworm pbs-no-subscription
Now before we can run apt update, we need to get the Proxmox Backup Server’s GnuPG Key with the following command:
wget https://enterprise.proxmox.com/debian/proxmox-release-bookworm.gpg -O /etc/apt/trusted.gpg.d/proxmox-release-bookworm.gpg
Then finally, run:
apt update
apt-get install proxmox-backup
At the end, you’ll see:
Setting up proxmox-backup-server (3.0.2-1) ...
Setting up proxmox-backup-client (3.0.2-1) ...
Setting up proxmox-backup (3.0.1) ...
Then navigate to https://yourhostnameorIP:8007 to confirm Proxmox Backup Server was successfully installed.
Step 3: Set Up Incremental Backups
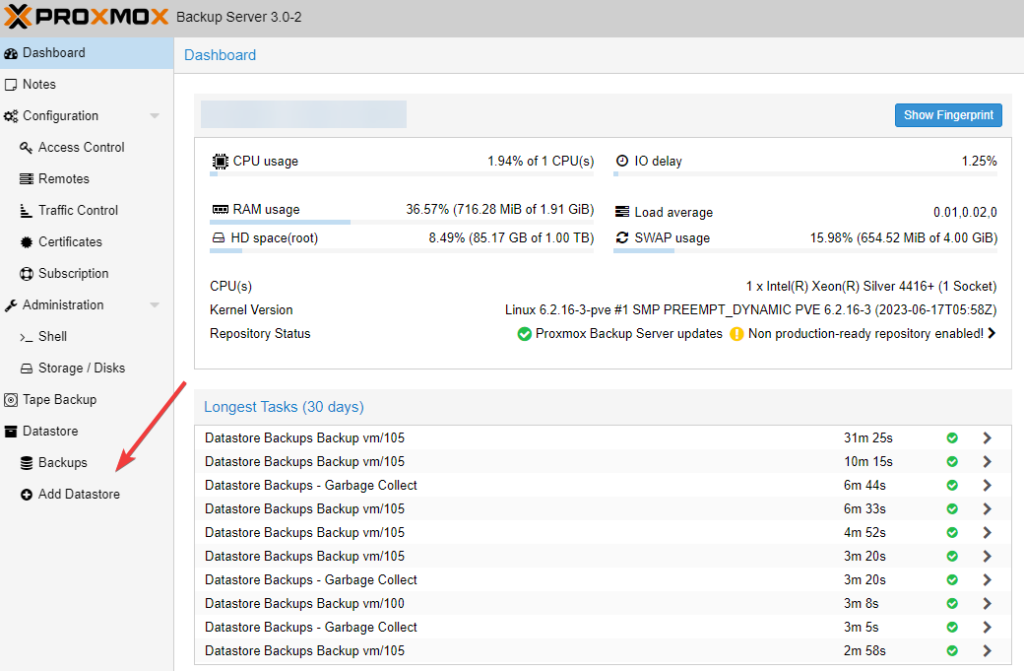
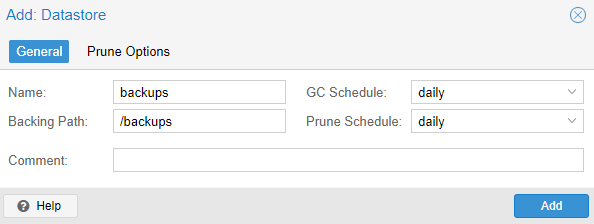
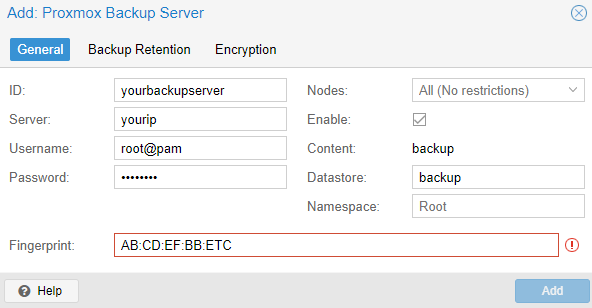
First, log in to Proxmox Backup Server and add a new datastore. It’s very simple:
Next, we’ll need to get your fingerprint.
You can do this by clicking “Show Fingerprint” on PBS’s dashboard, or via SSH by running the following command:
proxmox-backup-manager cert infoAfter obtaining your fingerprint, log into Proxmox VE, then you’ll click “Datacenter” and finally “Storage”:
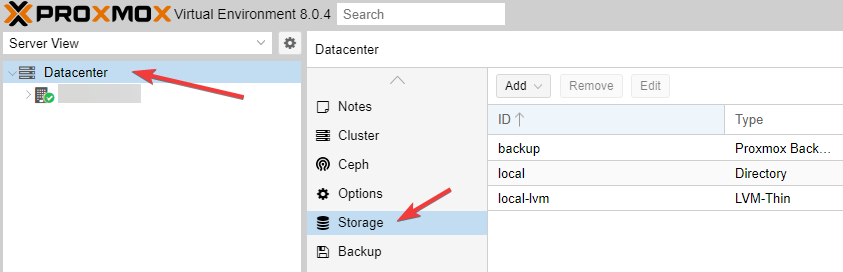
Click “Add”, and proceed to add your Proxmox Backup Server as a storage device:
Next, click “Backup”:
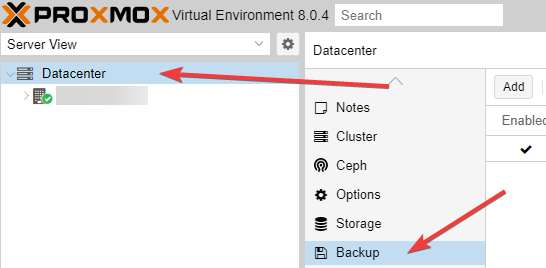
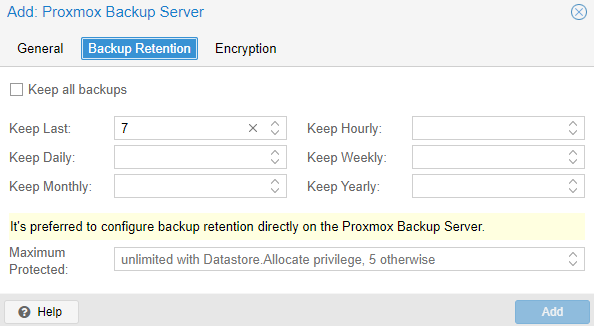
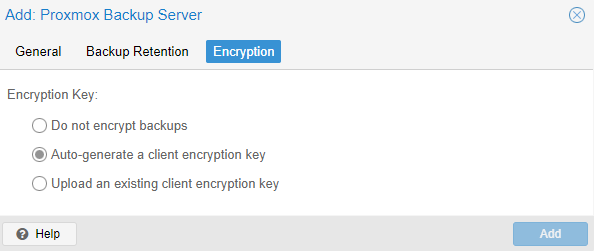
The last step is to click the “Add” button again, and then configure your desired backup settings:
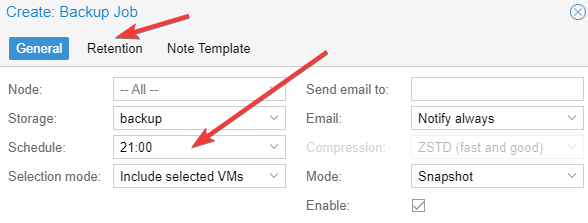
From that point forward, Bob’s your uncle, and the world is your oyster. You just need to select your desired schedule and retention duration.
Now You Have a Disaster Recovery Plan
It doesn’t matter if your server catches on fire. You have a backup.
Nor does it matter if your host disappears overnight.
Regardless of what happens, you can rest safely at night knowing your backup won’t disappear (at the same time as your main server, anyway), and you can quickly move Proxmox and spin up new virtual machines — you just have to configure the new networking settings.
Not bad.
Related Posts:
Are You Running Automated Updates? Fail Back Easily With Proxmox Snapshots! But There's a Catch...
PSA: Your Data is Not Safe on Just One Cloud (AWS Nuked a 10-Year Account and All Data Without Warni...
Snapshots vs Backups Explained, And Why You Need Both in Your Life
Four Customers Who Found Out the Hard Way You Need To Backup Your Cloud Data
How I Upgraded Proxmox 7 to 8 Without a Hitch: Part 2, the Upgrade
How I Upgraded Proxmox 7 to 8 Without a Hitch: Part 1, the Backing Up
I write things sometimes. Contact: hey@sirfoxy.com


Leave a Reply